Happy July! Wow, the year is half over. My list of things to get accomplished in my home isn’t moving quite as quickly as Father Time. Do you feel the same way?
After a week-long trip for work and play – and then another week to recover from that – I’m finally ready to work on projects again. I’d love to be able to say that I will finish my kids’ bathroom this month, but lets not kid ourselves. I did finish a project over the weekend, though – framing the boring, builder’s bathroom mirror.
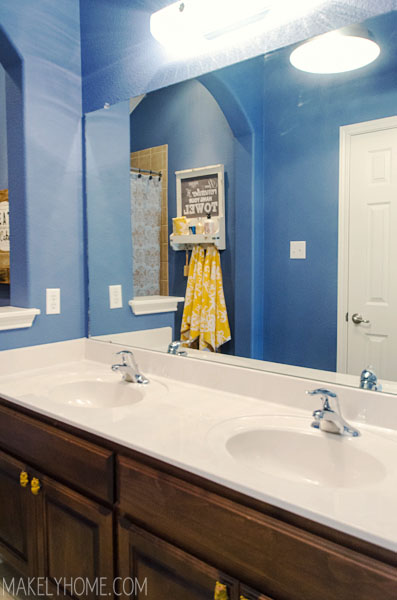
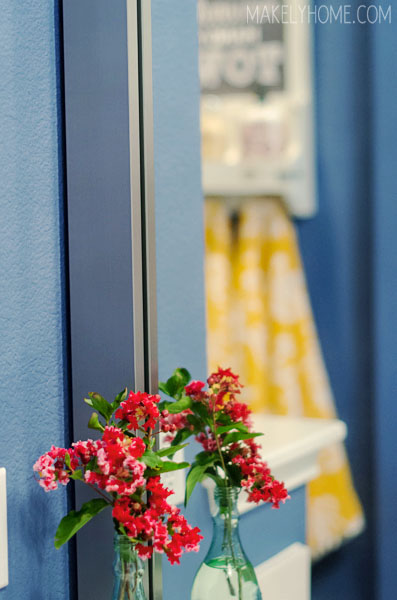
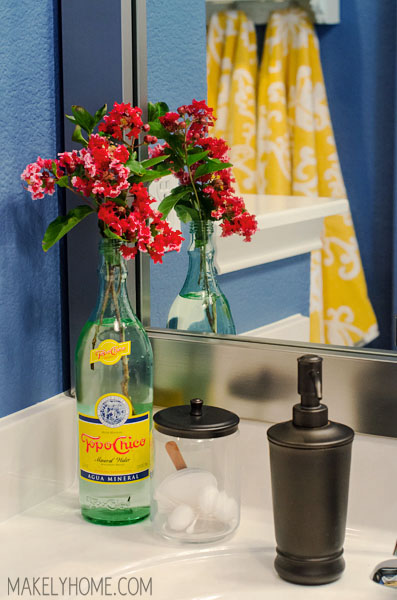
This poor mirror has seen better days. I didn’t do a great job taping it off when I painted the room because I knew that I wanted to frame it out. The backing is also starting to disintegrate; I can only guess that because the builder didn’t attach it to the wall by anything other than mirror clips (i.e. no adhesive on the back), the heat/humidity/moisture from the bathroom is wreaking havoc on the cheap mirrored backing. It looks a little cloudy, which I think is just the mirror’s way of trying to vintage-ify itself quickly.
Years from now, we’ll replace that mirror. We don’t want the slight blotchiness of it to be the reason why a teenage Emma will say she puts her makeup on too heavy. 🙂 But, until then, we’re going to put lipstick on this pig of a mirror.
I’ve seen lots of DIY tutorials on framing your own mirrors with molding from the hardware store. They look great. Some people even use corner blocks so you don’t have to mitre any corners. But for this bathroom, I wanted something that had a more contemporary feel.
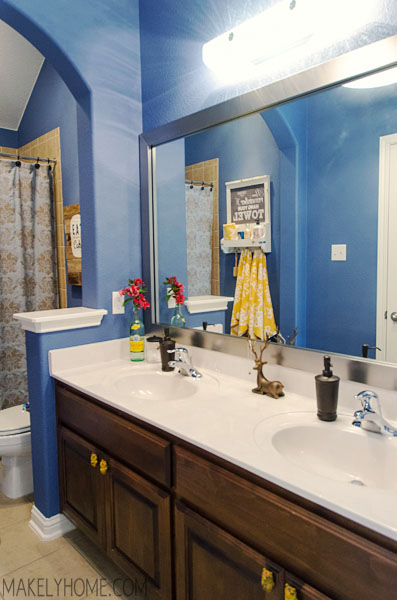
I have used an easy mirror framing product from a company called Mirror Mate in the past, and I was excited when they agreed to help me with my kids bathroom. We hung their custom sized, peel and stick frames in our master bath over 3 years ago, and they still look just as good as they did on the day we installed them.
Mirror Mate let me select the style I wanted to use, and I picked out the Broadway Brushed Chrome. I measured my mirror per the instructions on the website and a few days later (literally), a long box containing the frame pieces and installation tools appeared at my doorstep.
It honestly couldn’t have been easier to assemble the frame. The included instructions where simple but detailed, so I was never left wondering if I was messing up an important step.
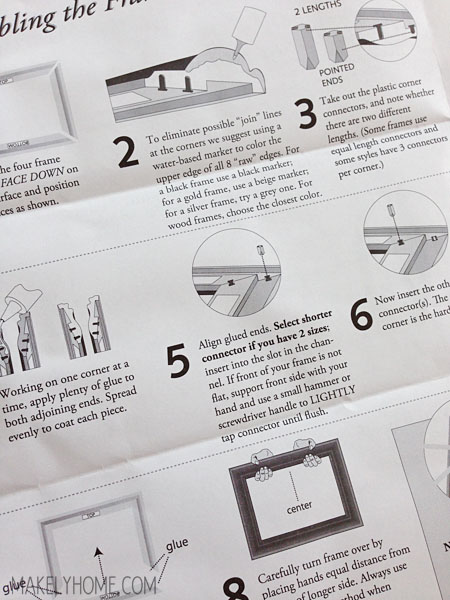
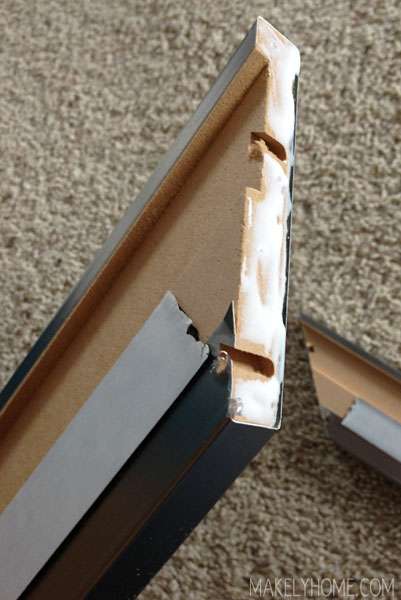
All you have to do is lay the frame out on your floor and assemble the corners. You use the included glue to coat both pieces of a corner and then push/hammer some little doodads into pre-cut holes to secure the joint.
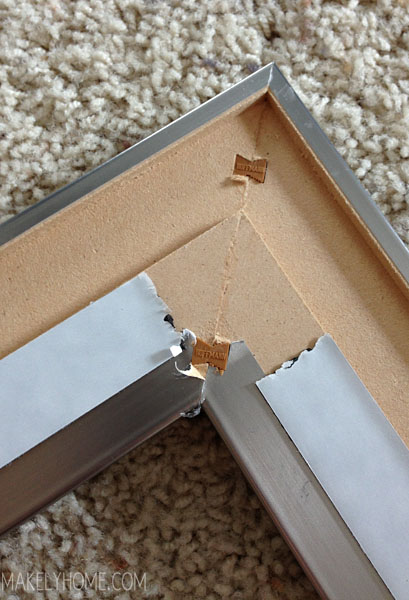
After you let the glue dry for about an hour, you get a buddy (or a willing husband) to help you install the frame – by peeling off the backing from the frame’s adhesive strips and pressing it onto your mirror. Seriously! It’s that easy.
As I walked in and out of that bathroom this weekend, I was always delighted at how nice the frame makes the bathroom look. I still have some work to do in there, but this chrome frame pulled the bathroom together nicely. I love how it lends itself to the as-of-now-unnammed style I’m going for in the room, but it doesn’t distract from the other elements.
MirrorMate has generously offered to give one of their frames away to a reader, too! The winner will get to select the frame of their choice in a custom size, up to a $150 value. To enter, fill out the Rafflecopter form below by telling me which frame you’d select (a comment at the bottom of this post won’t count as an entry). You can earn additional entries by liking MirrorMate on Facebook and Pinterest. The giveaway will be open through Sunday, July 7th and is open to residents 18 years of age and older in the Contiguous United States.
MirrorMate just redesigned their website, so they are also offering 10% off all purchases through July 3rd with the code WELCOME10. Good luck!
Disclosure: This is a sponsored post for MirrorMate. All the words and thoughts are my own. I was given a frame to install in my home, and I have been compensated for my time and for this post.
Love it and great giveaway!
It’s a toss up between Acadia Oiled Bronze & Bellemeade Vintage Champagne! Both would look lovely in my master bedroom. So pinning both to my master bath Pinterest board!
A great giveaway but wouldn’t work with my current mirrors. Good luck to the winner!
Awesome bath — did you make the item holding up the towels or buy it? I would be interested in putting one in my bathroom.
Hi Sarah,
I did make it! Here’s the tutorial: http://makelyhome.com/bathroom-accessories-towel-rack/
Chelsea cherry chocolate and watershed pearl would be perfect for my two bedrooms!
Fingers crossed! I’ve been wanting to frame out our mirrors for awhile!
This is such a quick, stylish fix, I love it! Fabulous tip!
Hey guys, I just installed a new bathroom vanity so I don’t have a use for this. But I thought I’d share in case any of you do! Cabinets To Go (who I got my vanity from) is actually giving away a free bathroom vanity. Just click the link: http://www.cabinetstogo.com/Bathroom-Vanity-Contest.asp and vote for which vanity you want. Then you’re entered to win that exact one…pretty easy! GOOD LUCK :))))