Makely

Let's Make Life Awesome

  • Home
  • Decorating/DIY
    • Create Your Decor
    • Decorate Your Home
    • Paint Your Walls
    • Transform Your Furniture
  • Healthy Living
    • Essential Oils
    • Family Wellness
    • Household Care
  • Project Gallery
  • Contact
You are visiting: Home » Decorating/DIY » Create Your Decor » Page 103

DIY Rosette Embellished Pillow

by Lindsay Ballard on March 2, 2011 1,880 Comments

Technology is an amazing thing. Last week, I spied a Dwell Studio for Target pillow I loved, only the colors were wrong for my home. I tweeted the picture asking for ideas on how to replicate it, and I had several replies within minutes saying it would be easy to do.
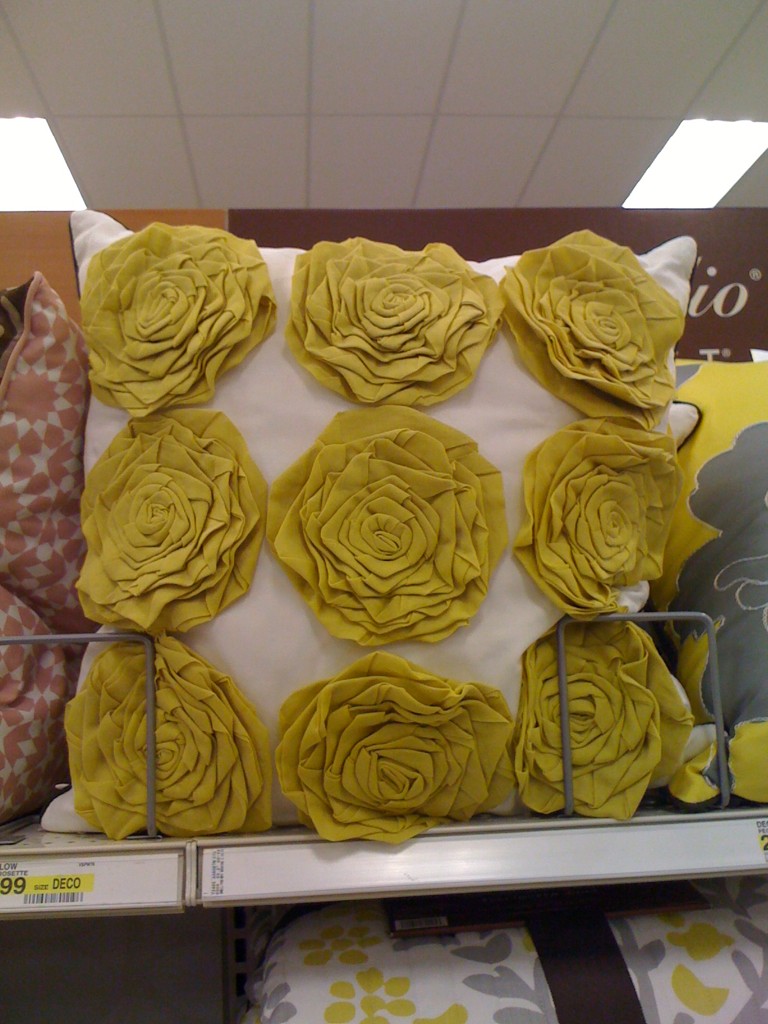
One such reply came from Gina @ Stampin’ with Gina.  She sent me a few pictures of different rosettes she made, and when I told her which one I liked the most, she even wrote a tutorial for me on her blog – all by that evening.  That’s technology at work, my friends!  {I have since found a nearly exact replica of the Dwell Studio pillow in a tutorial over at Crazy Wonderful!}

Since I figured out how to make the rosettes (with Gina’s guidance), I could go crazy and create my own design inspired by not only the Dwell Studio for Target pillow but also this amazing Ankasa ($540!!!) pillow I spotted in the March edition of House Beautiful:

House Beautiful

I put together a tutorial of the process I used so that you can put your own twist on the rosette embellished pillow.

Rosette Embellished Pillow

Supplies:

  • Pillow cover (mine is a 20 x 20 ivory “Aina” from Ikea)
  • Pillow insert (I used a down “Fjädrar” insert, also from Ikea)
  • Fabric for rosettes (any fabric will work – I used 1 yard of cotton gauze)
  • Felt
  • Glue gun w/ glue sticks
  • Straight pins
  • Aluminum foil
  • Fabric glue (permanent)

Directions

1.  I began by cutting my fabric into 2 inch wide strips, per Gina’s instructions.  I just sort of eyeballed it because they don’t have to be perfect.  Because I was using 1 yard of fabric, my strips were 1 yard long and 2 inches wide.

2.  Next, I put a dot of glue…oh, wait.  Just see for yourself.  Here’s the video I put together on making the flowers, which is slightly different for this project than Gina’s technique:


3.  After I made all of my flowers, I laid them out in a design on the pillow cover WHILE the pillow insert was inserted.  You will want to see how it looks with the dimension of the pillow in the cover, not just with the cover lying flat.  After you have arranged your flowers in a fun design, pin them in place as best you can with the straight pins.
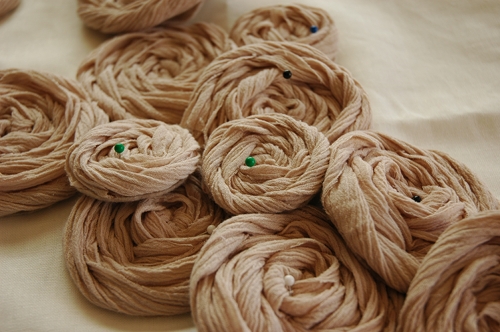
 

4.  Slide the pillow insert out of the cover and insert some aluminum foil in its place.  This will keep the fabric glue you are about to use from gluing your cover shut.

5.  On the felt side of the rosettes, apply a good amount of fabric glue.  I applied the glue in a circle around the edges and then made an X in the center.  If your rosettes are layered in your design, work from the bottom up.  It helps to take a quick photo of your arrangement in case you have to move them around when gluing.
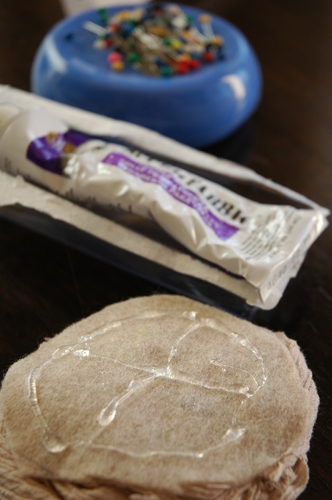
6.  Once your rosettes are glued to the pillow cover, find something heavy to lay on top of them while the glue dries.  I used a few heavy books and left them there for a few hours.  Then, I removed the books and let the glue set overnight.

7.  The next morning, the pillow was ready to go in the insert, and I was ready to have a gorgeous designer-inspired throw pillow!
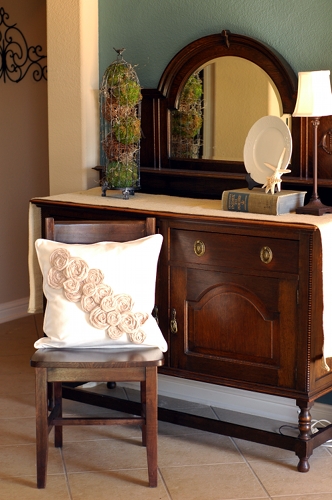
Want to add some color to your decor?  Look beyond my beige flowers and try some in brightly colored fabrics.
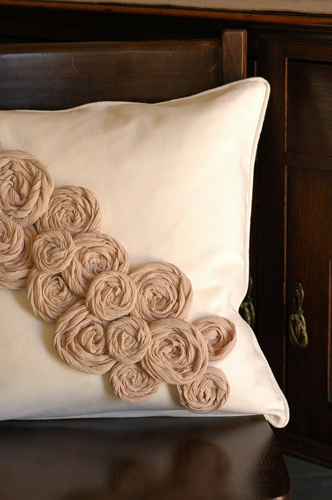
Seems like an easy weekend project, huh?  Get to it!

P.S. My pillow and I are partying at Gina’s Transformation Thursday at the Shabby Chic Cottage.
Stick a Fork In Me

by Lindsay Ballard on February 17, 2011 500 Comments

Last week, I took a whirlwind of a trip to New Orleans so that the fine folks at Rust-Oleum could show off their new Transformations products to me and a handful of other Bloggers.  I think the new products are really, really going to change a bunch of people’s lives (or at least the lives for their kitchens), and I will be sharing all about them very soon.

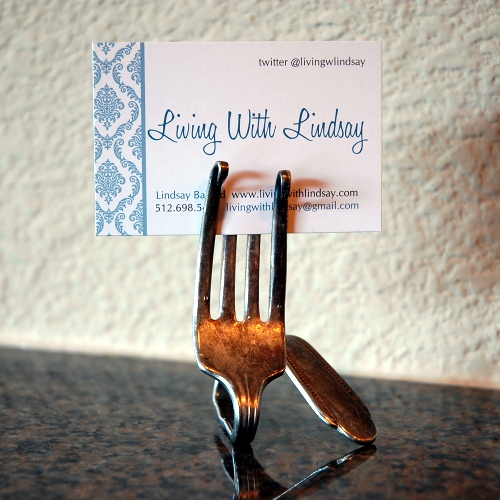
In the meantime, I want to show you a little craft I picked up while I was in the Big Easy.  During our Welcome Dinner, my friends at Rust-Oleum used the most adorable place card holders on the tables.

They used real place cards, not business cards.  But, alas, I forgot to bring my place card home with me to demonstrate.

You should have heard us squealing in delight.  Then, when we were told we could take them home, we acted like we were just given diamond rings.

I have no idea where they bought these cute fork place card holders, but I think they would be adorable for business card holders, recipe card holders, photo print holders, and everything else in between.  I knew I had to figure out how to make them.  So, the day after I got home, before I even unpacked my suitcase, I ran to the antique store to buy some forks so that I could show the process to you.

(UPDATE! The original fork place card holders were made by David of the incredible shop BasilicusJones on Etsy.  Please check out his shop – I am dying over what he does with vintage flatware – and his forks are way better than mine and come at a great price.  Also?  I seriously want his spoon bracelet…)

Fork Place Card Holders

Supplies:

  • Silver Plated or Sterling Silver fork – obviously, the SP is cheaper than SS (mine were 75-cents a piece).  Steer clear of stainless steel (which you probably use on a daily basis), because it’s too hard to bend.
  • Vise
  • Rubber mallet
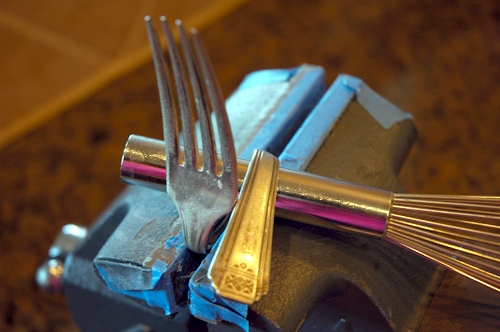
  • Utensil w/ cylindrical handle – I used a wire whisk
  • Pliers

Instructions:

Now, I’m sure that there are a hundred different ways to do this.  My husband, who does a lot of metal working as a hobby, was pretty flabbergasted that this was the way I decided to do it.  He said it would be a lot easier with a propane torch, but I wanted to keep the supplies limited to what my readers most likely had at home.  Do a lot of you have propane torches?  I didn’t think so.

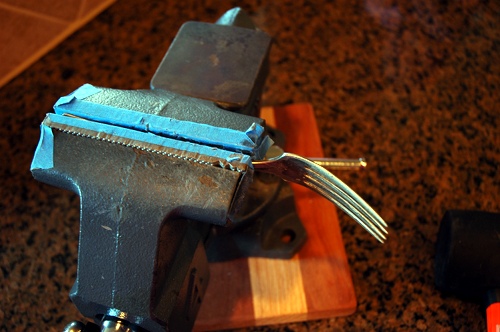
1.  To begin, I brought my vise in from the garage and set it right on top of a cutting board on my granite counter top.  Yep, I’m fancy (and am apparently lucky I didn’t crack my granite).  I put one of the forks in the vise like so:

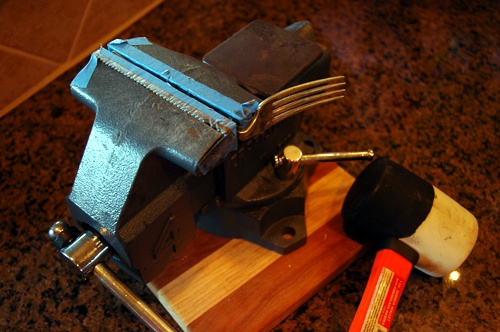
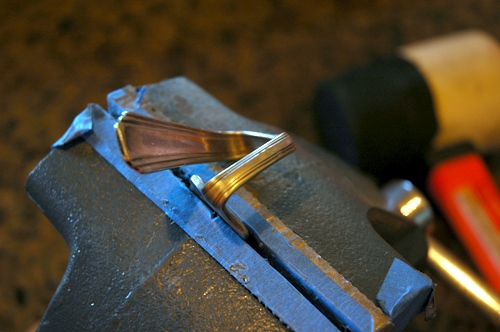
2.  Using a rubber mallet, I hammered the top of the fork backwards into a 90-ish-degree angle.

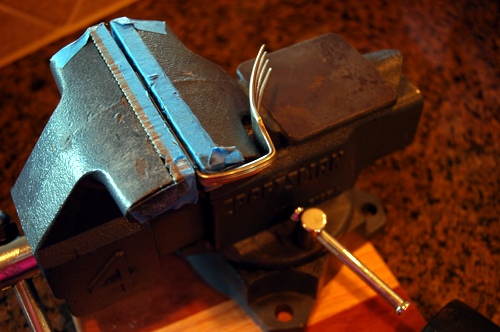
3.  Then, I pulled the fork out of the vice about and inch and hammered that part backwards into another 90-ish-degree angle.

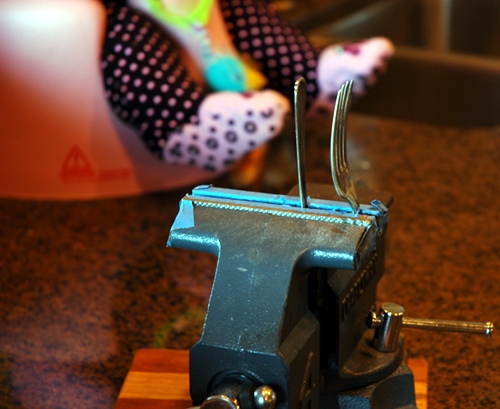
4.  Then, I adjusted the fork so that it was in the vice like so.  Do you see how I have my little pink footed helper in the background?  That’s certainly not a requirement, but it does help.

5.  With the rubber mallet, I hammered the handle of the fork over to the left a bit.  I know the “a bit” part is really scientific, isn’t it?

6.  Then, I stuck my wire whisk into the bend and folded the handle over so that it made a curved bend.  I was able to do that part with my fingers, so I didn’t need to hammer my whisk.

7.  Next, I flipped the fork around so the tines were in the vice and hammered the flat edge to make sure it was nice and flat.  If there’s much curve to it, the fork isn’t going to sit upright.

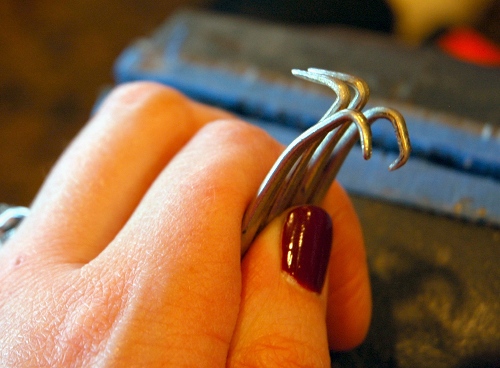
8. With a pair of needle nose pliers, I bent the tops of the outside tines forward and the middle tines backward.  Then, I stuck them in my vice and crushed them.

9.  Here’s where the fine tuning comes in.  I just had to bend and play with it a little bit to make sure the fork stood up straight.  I just used my fingers to do this.  Every fork is styled differently, which means it’s weighted differently, so you’ll just have to play around with your particular fork.

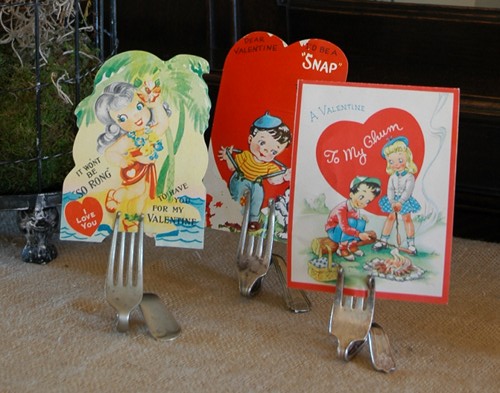
These little forks are just so fun an unexpected.  I used them to hold my 1940s vintage valentines, but they will soon move on to displaying printed photos.

What would you display in these whimsical holders?

P.S.  From the bottom of my heart, I really want to thank everyone for voting for my Emmy in the contest last week.  We didn’t win, but we came in 2nd place to a set of triplets.  How dare those little stinkers gang up on her!  LOL  At any rate, it really melted my heart to see so many of you vote for her.  You guys make me feel like the luckiest little Blogger on Earth.

P.P.S. The search is still on for my friend’s missing brother.  Please keep their family in your thoughts and prayers.  The latest news is that his credit card was last used at a Shell station on 2/5/11 in Tonopah, NV.  Since then, there has been no credit card, email, or cell phone usage.  His friends have set up a Facebook page – www.facebook.com/helpfindadam.  UPDATE 2/17 @ 8 am – His car has been located in a remote and rugged area in NV.  Search and rescue crews will begin looking for him this morning, but the family has been told not to expect updates until this afternoon due to inclement weather.  Please, please, please keep the family in your mind this morning.

P.P.P.S. – I linked this post at Gina’s Transformation Thursday – my first blog party in like a year.  Go me!

« Previous Page
Next Page »
  • Email
  • Facebook
  • Instagram
  • Pinterest
  • Twitter

About Makely

Lindsay Ballard is a former college mascot turned political geek turned roller derby playing, DIY fanatic.

Lindsay chronicles her projects, design ideas, and lifestyle tips here at Makely, where she shares tutorials and inspiration. Her DIY designs are bold and graphic, while her spirit is fun and full of color.


Archives

Categories

PRIVACY POLICY
Copyright © 2009-2019 Makely School for Girls | All Rights Reserved | Posts may contain advertising content or affiliate links