When the February issue of Country Living arrived in my mailbox, I was happy to see it was the white issue. I had just completely undecorated my home, and the fresh, clean white designs in the magazine where just what I needed.
Country Living highlighted a few of their very favorite white accessories, and these etched silhouette hurricanes from Ballard Designs certainly caught my eye. I am obsessed with silhouettes, so when I love something, it becomes all I want until I get sick of it. Wait until you see what I’m going to show you in the next week or so…
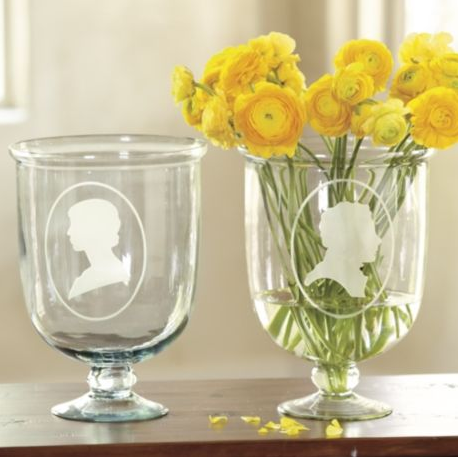
Anyway, I only wanted the male version of the vase, but at $49, I really couldn’t justify it. Then, I remembered that I had my Silhouette machine and etching cream. I’ll be the first to admit that I’ve totally screwed up glass etching before (just ask my friend Kelly why she doesn’t have a full matching set of monogrammed glasses I gave her when she got married), so I was a little concerned about messing up a hurricane.
Well, Silhouette America came to my rescue! They now offer frosted vinyl that looks exactly like etched glass when you put it on clear glass or a mirror. I love that I can apply the frosted vinyl to get the look I want, and then remove it when I’m ready for a change.
I set out to make my Ballard Designs knock-off with a large hurricane that Tom and I had received as a wedding gift. It wasn’t footed like the Ballard hurricane, but it was free, so it was good enough. I googled “Victorian Man Silhouette” – lo and behold I found the EXACT same silhouette Ballard Designs used to make their etched version. Score!

With the Silhouette software, it’s easy to make a vinyl (or paper) cut out of a silhouetted shape. You simply open the picture in the software, open the trace window, and select the silhouetted shape as the area to trace. Then, uncheck “High Pass Filter” and select “Trace Outer Edge.” It’s really that easy.
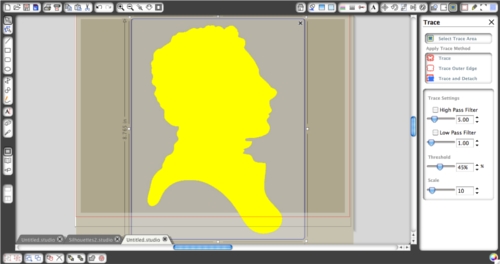
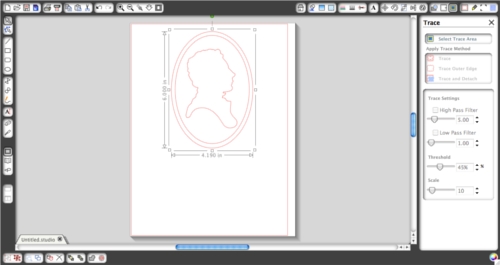
Now that I had my outline, I added two ovals with the Ellipse Drawing Tool and I was ready to cut.
I didn’t realize that applying vinyl to such a large curved surface would be so difficult, and it was a miserable failure. I cut it 2 or 3 times and tried different application techniques, only to get folds in my vinyl. I’ll have to work on figuring out how to do that.
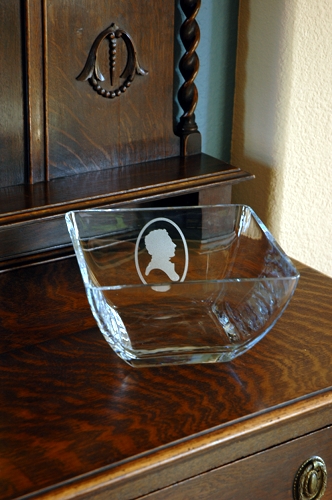
So, I went back to the drawing board and remembered that I had a lovely square glass bowl that we also received as a wedding gift. I cut two smaller versions of my silhouette design (since I figured I’d screw one of them up!) and applied only one on the inside of one of the bowl’s sides.
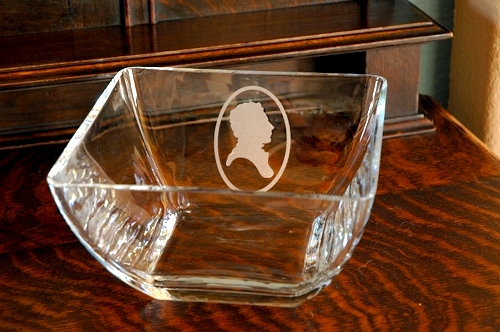
I am really happy with the way it turned out. I think the juxtaposition of the vintage-themed silhouette with the modern lines of the bowl is really fun. What do you think?
P.S. Silhouette is running a great promotion this month! If you go here and use the code LINDSAY, you can purchase your very own Silhouette SD machine package that includes 2 rolls of premium vinyl, 1 roll of transfer paper and a CD of Home Decor designs. This is a $395 value, but the code lets you grab it for $225! This promotion runs through January 22nd.
P.P.S. Already have a Silhouette SD but need more vinyl – if you are like me, you can never have enough! Go here and use the code LINDSAY to purchase the premium vinyl (the indoor/outdoor stuff) for 25% off. This promotion runs through January 22nd.