Makely

Let's Make Life Awesome

  • Home
  • Decorating/DIY
    • Create Your Decor
    • Decorate Your Home
    • Paint Your Walls
    • Transform Your Furniture
  • Healthy Living
    • Essential Oils
    • Family Wellness
    • Household Care
  • Project Gallery
  • Contact
You are visiting: Home » Decorating/DIY » Create Your Decor » Page 120

Falling for Neutrals

by Lindsay Ballard on October 9, 2009 28 Comments

I promised that I’d show you some of my Fall decorating when it started feeling more Fall-like around here. Well, that day has finally come! It’s raining (and raining and raining) and quite chilly. I’m wearing fleece pants and a long sleeved t-shirt and loving every minute of snuggling with my son under a down blanket.

Okay, so it’s 57 degrees, but that’s COLD for us!

I don’t go overboard with seasonal decorating since we don’t exactly have four seasons in Central Texas, but I do add some simple touches here and there. The centerpiece on my dining room table is usually the first place I start.
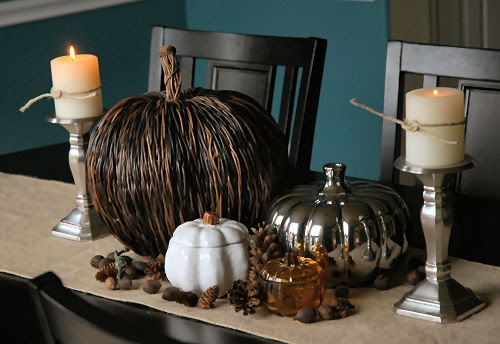
I try to decorate for Fall and Halloween all in one big pumpkin fest. By keeping my seasonal items more neutral in color instead of bright oranges and red, I think I’ve been able to achieve the right balance. We don’t exactly get the bright fall colors in my neck of the woods, so those types of decorations in my home never seem very realistic to me.

Plus, with neutral decor I won’t have to change anything on November 1st, except to take down the light-up ghosts Zack wanted to put in our front yard. I can be kind of lazy, so that totally works for me.

My sweet son brought back the pine cones and sticks for me from his trip to the lake house in Minnesota. While he was there, I completely transformed his room. A mural for some pine cones. An even trade, don’t you think? Sadly enough, I totally thought so.

I picked up the acorns at a rest stop in Alabama when I was visiting my parents earlier this year. Don’t judge me, okay? Our acorns around here are tiny compared to these! And they say everything is bigger in Texas…
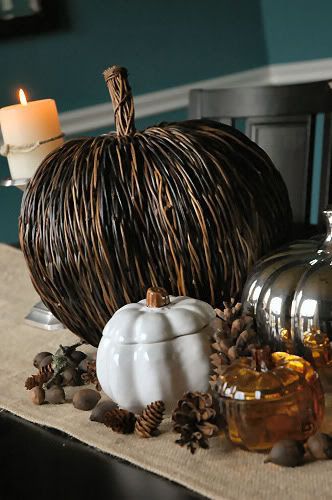
I always have white candles on the silver pillar holders we received as a wedding gift. I tied some jute twine around the candles to dress them up a bit. I’m one of those people who only likes white candles, so that’s all you’ll find in my house. Isn’t that weird? White candles only?
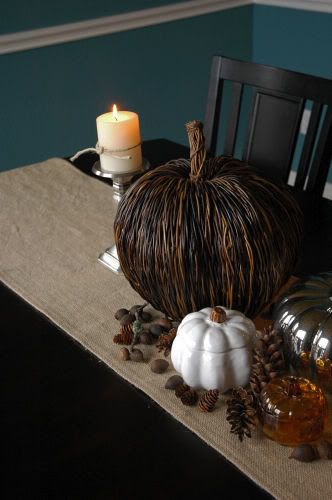
The pumpkins and other assorted goodies sit on top of a burlap table runner I threw together one day. I’m going to teach you how to make both the sew and no-sew versions next week. It’s seriously easy, works with most decor, and can be used year around. Oh, and it only cost me about $7.

Do you take a neutral approach to decorating for the Autumn season or do you mix it up with Halloween-themed AND Fall decorations?
An Unconventional Use for Placemats in the Dining Room

by Lindsay Ballard on October 5, 2009 117 Comments

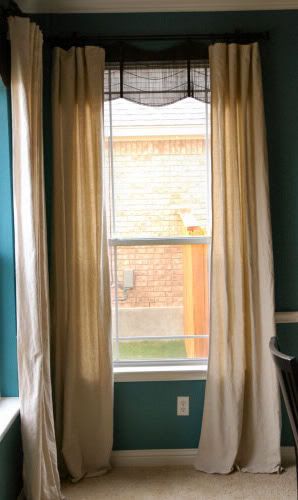
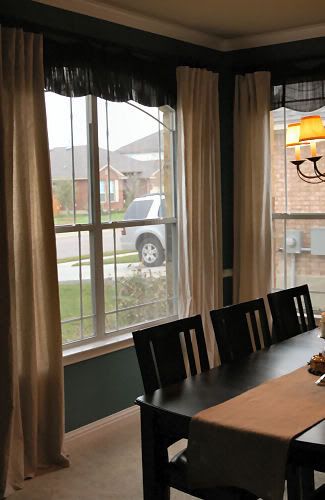
Over the past few months, I’ve been feeling that the drapes in my dining room were just way too heavy. They were custom treatments that I rushed into like 2.5 seconds upon moving into our house, and they blocked too much light. I knew that they had to come down once I realized that I was going out of my way to keep them from being photographed.

Once the curtains came down, I loved how light and airy the room felt. I wanted to put new treatments on the windows, but I wanted to make sure they let enough light in. Oh, and I wanted a super cheap solution.

I ultimately decided to hang drop cloth drapes like you’ve seen all over Blogland. I will admit, I really hated the look the first few times I saw them online. However, I’ve grown to love them (beat it into my head enough and I might change my mind!) and thought they were a nice solution for my dilemma.

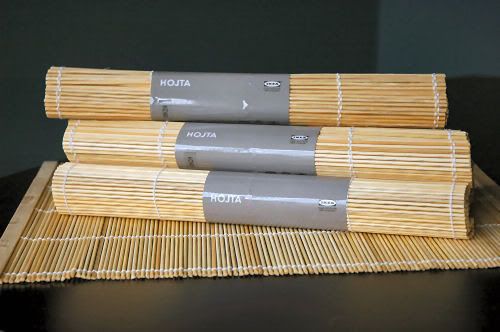
My windows needed a little more “oompf” than just plain drop cloths, though. They needed something with a natural texture. They needed something to highlight one of the window’s arches. They needed 99-cent Ikea bamboo placemats.

I’m pretty sure ‘Hojta’ means ‘really cheap placemats’ in Swedish. Thanks, Ikea!

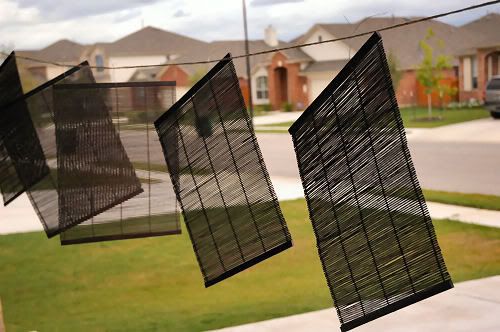
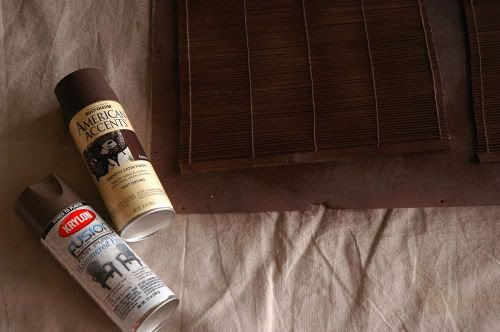
The light color of the placemats wouldn’t work for my dining room, so I headed out to my garage and spray painted both sides of each placemat with dark brown spray paint (Espresso by American Accents). I didn’t want them to have an even color – because when do you ever seen an even color in nature? – so I randomly hit them with a little left over Krylon Hammered spray paint in Chocolate Brown.

In order to make sure that both sides dried without getting messy, so I strung some twine across the rails of my garage door and hung them with wire.

Then, I apologized to my neighbors for turning our street into the ghetto for a few hours. I swear, they must always wonder what in the heck I’m always doing in my garage.

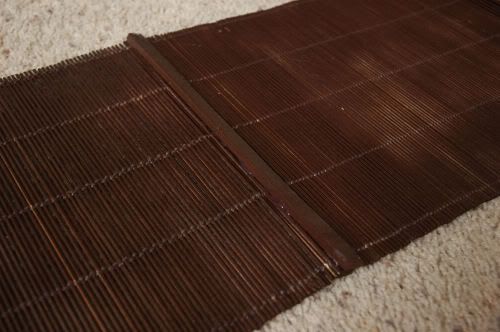
After the placemats were dry, I took them inside and fired up my trusty glue gun. I overlapped the ends of the placemats and glued them together…right there on my living room carpet. Don’t worry, Tom! I didn’t get any glue on the floor later picked the bits of dried glue out of the carpet pile.

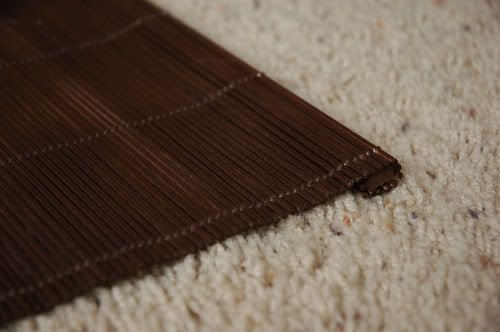
The valance was a little wider than I wanted for my window (and I didn’t want to cut it because it would mess up how the bamboo was strung), so I rolled it up on both sides and glued it together.

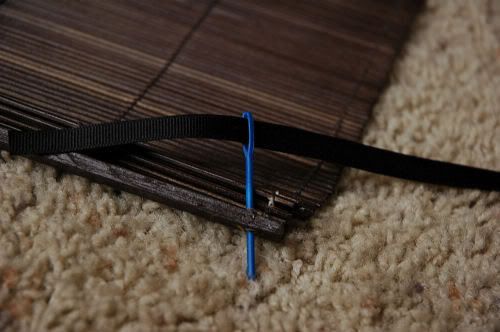
Next, I grabbed my drill and drilled little holes in the top of each section that I glued together. I then used a plastic needle and threaded some thin black ribbon through each hole.

I already had a double curtain rod hung in my dining room, so I just tied each black ribbon to the top of the 2nd rod. When I stepped back, I had a gorgeous scalloped valance.

I was originally planning on using invisible thread to pull up the middle of each placemat so the valance hung straight across, but I was so pleased with the scalloped look that I scrapped that idea. Don’t you love it when things work out like that?

So, just remember that you don’t have to spend big bucks to get a great custom look. I spent about $10 on my valances, and I think they are so much more exciting than anything I’ve seen in stores.

Love the look? Check back for tomorrow’s Teach Me Tuesday to see a very elegant way to update those plain drop cloth drapes. You’re gonna love ’em!

Added to Kimba’s DIY Day at A Soft Place to Land…

« Previous Page
Next Page »
  • Email
  • Facebook
  • Instagram
  • Pinterest
  • Twitter

About Makely

Lindsay Ballard is a former college mascot turned political geek turned roller derby playing, DIY fanatic.

Lindsay chronicles her projects, design ideas, and lifestyle tips here at Makely, where she shares tutorials and inspiration. Her DIY designs are bold and graphic, while her spirit is fun and full of color.


Archives

Categories

PRIVACY POLICY
Copyright © 2009-2019 Makely School for Girls | All Rights Reserved | Posts may contain advertising content or affiliate links