Makely

Let's Make Life Awesome

  • Home
  • Decorating/DIY
    • Create Your Decor
    • Decorate Your Home
    • Paint Your Walls
    • Transform Your Furniture
  • Healthy Living
    • Essential Oils
    • Family Wellness
    • Household Care
  • Project Gallery
  • Contact
You are visiting: Home » Decorating/DIY » Create Your Decor » Page 121

Pottery Barn Style on a Budget: Halloween Edition

by Lindsay Ballard on October 1, 2009 182 Comments

As soon as the Halloween-themed Pottery Barn Kids catalog hit our mailbox, Zack got busy pointing out all of the things that he “wished he could have.” Yeah, you and me both, Kid.

One of the things that he kept going back to was the Pirate Build-A-Pumpkin kit.
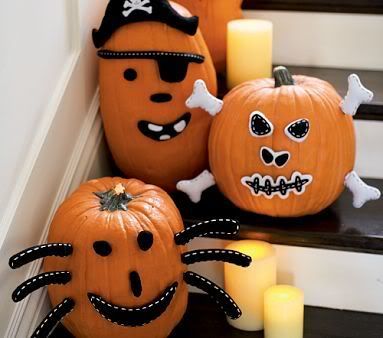

Pottery Barn Kids

After looking at the photo in the catalog and reading the description, I figured I could make my own version of the adorable pumpkin accessories. Pottery Barn wants $12 each for the Pirate, Cat, Skull, and Spider sets, but I knew I could make all four of them for half of that.

Wanna know how? Yeah, of course you do. 🙂

Pottery Barn Inspired Pumpkin Accessories

1. I began by drawing out each of the pieces I wanted to add to each pumpkin.

Don’t fancy yourself an artist? No worries. I did the hard work for you and drew out everything you need for the four pumpkins. Click here to download the .pdf file of the artwork. The artwork is scaled for a medium sized pumpkin, so you will need to enlarge or reduce if you are using a large or small pumpkin.

2. Print out the .pdf and cut out the shapes for the pumpkin(s) you want to put together. For this tutorial, I am showing the Skull accessory kit.

3. At your local craft store, pick up some sheets of sticky-backed felt (about $1 each). You will need white and black for each set. I put all four sets together and only ended up using one sheet of white and two sheets of black.

I advise against using the “soft” sticky-backed felt. It’s a pain to peel the backing off of it.
4. Trace and cut out the shapes on each piece of felt. On the artwork, I labeled each piece with the color and the number of each shape you will need to cut out. Some are labeled front and back, which means you need to trace the front side (the side with the writing on it) and the back side (without the writing), so you’ll have mirror images of each piece.

Note: On the Cat set, you actually need to cut out 4 front and 4 back of the white rectangles, not 2 of each as noted on the artwork.

5. On the pieces that stick out of the pumpkin, I inserted a toothpick in between the front and back shapes to make a little toothpick sandwich. I just left a small portion of the toothpick sticking out to stick into the pumpkin. I had to break a few of the toothpicks in half so that they wouldn’t be too long. Once your little sandwich is put together, you will probably need to trim the edges so that the pieces match up nicely.

The pieces you will need to set up with a toothpick are:

  • Pirate – Hat (I put one toothpick in the center and one on each side)
  • Cat – Ears, whiskers
  • Skull – Bones
  • Spider – Legs

6. After assembling the rest of the pieces that layer on top of each other, draw in the faux stitching. On the white pieces, I used a thin black marker. On the black pieces, I used a silver metallic marker I found at the craft store for a few dollars.

Sorry that picture is so oddly lit. I’m not sure what’s going on there.7. Now, all you have left to do is to peel the backing off of the pieces and stick them directly to your fresh pumpkin or craft pumpkin. The pieces on toothpicks can be easily stuck directly into the pumpkin.

8. Display your new friends proudly!

I can’t believe how much my knock-offs look like the “real” ones!
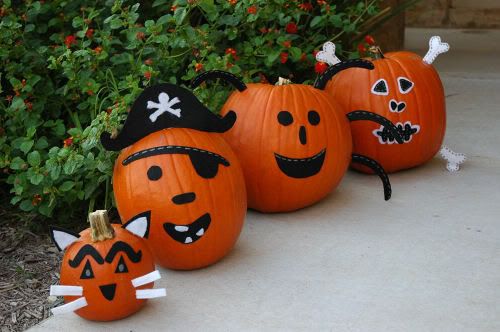
You can create your own Pottery Barn-inspired pumpkin kits for under $5 for all four of them. The only difference between these knock-offs and the real thing is some polyester stuffing in some of the pieces and actual stitching instead of faux stitching. Oh, and $43.

Zack really wanted his picture taken with his new pumpkins. Here he is posing with his favorite, “Fat Cat.”
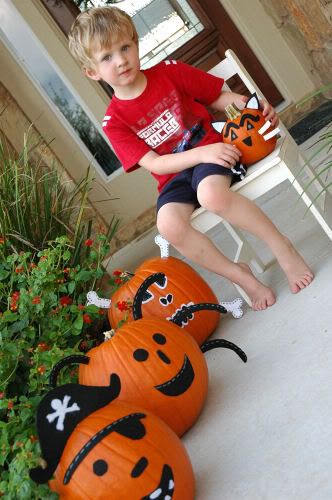
Our pumpkins will eventually be carved into Jack-O-Lanterns a few days before Halloween, but until then, we’re going to enjoy Fat Cat and all of his fun little friends.Will you create a set of your own?

***********

I’m in the mood to party! You can find this post linked to Rhoda’s “It’s Fall, Y’all!” party at Southern Hospitality and to Jane’s Frugalicious Friday party at Finding Fabulous!

One Man’s “Oops” is Another Man’s Treasure

by Lindsay Ballard on September 27, 2009 2,407 Comments

When I went into Sherwin-Williams to buy paint to transform my son’s room, the sales guy asked me if I paint a lot. I started laughing, and I think my response was something along the lines of, “Um, yeah.” He entered my information in his system as a “professional,” so now I save a small percentage each time I buy paint there.

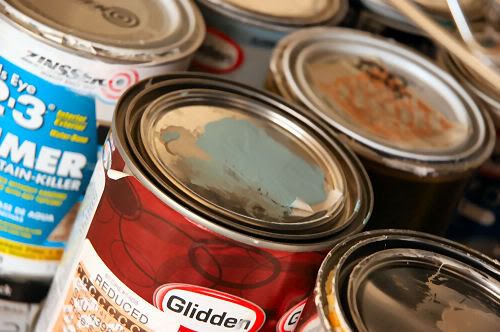
If you do as much painting as I do, it’s not hard to end up spending tons of money. Paint is really expensive when you get down to it. A quart of cheap paint runs you about $10; a gallon is around $20. The price skyrockets from there if you are buying higher quality paint. Then, after your projects are completed, you end up with tons of half empty paint cans stored in your garage.

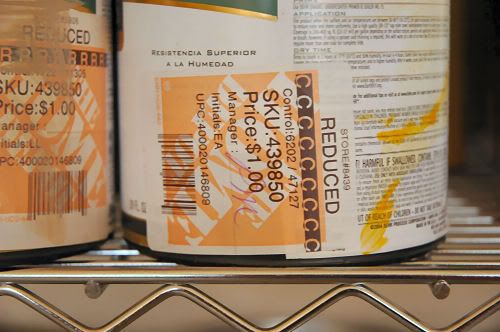
Recently, I’ve taken a smarter approach to paint buying. By shopping the “Oops” paint section at home improvement and paint stores, I’ve been able to buy some great colors for much cheaper prices. “Oops” paint is just paint that has been custom mixed at the store, but the customer decided not to purchase it for some reason – most likely the color didn’t come out quite like they wanted or they completely abandoned their paint can at the counter. Their loss is your gain!

I check out the “Oops” paint section each time I go to Home Depot. Occasionally, I am able to pick up a quart of a very neutral color. However, most of the time I find myself purchasing a super cheap quart of bright yellow, turquoise blue, or pinky brown. I usually ask myself why someone would want that particular mixed, but who am I to judge when I get the quart for just $1 (or the gallon for $5)?

Why would I buy colors that aren’t exactly what I want to use? That’s because of color theory, my friend. You can do an Internet search for “color theory” if you are interested, but the gist of it is that you can mix some colors together to get other colors. Very scientific, huh? It’s just like when you learned in elementary school that yellow and blue make green.

For instance, I mixed four parts white paint with one part yellow and one part beige to create a creamy, antique white for a table (yes, the table), I’m working on. I loved that I spent a total of just a few dollars to create the perfect hue…and it’s a color no one else will ever have.

Don’t be afraid to mix leftover paint from other projects with “Oops” paint. You probably have some white just hanging around your garage that would love to jump into a brightly colored paint to create a lighter hue. You see? There is a use for all of that bright yellow and navy blue “Oops” paint you spy at the store.

Have you used “Oops” paint before? What have you painted with it?

« Previous Page
Next Page »
  • Email
  • Facebook
  • Instagram
  • Pinterest
  • Twitter

About Makely

Lindsay Ballard is a former college mascot turned political geek turned roller derby playing, DIY fanatic.

Lindsay chronicles her projects, design ideas, and lifestyle tips here at Makely, where she shares tutorials and inspiration. Her DIY designs are bold and graphic, while her spirit is fun and full of color.


Archives

Categories

PRIVACY POLICY
Copyright © 2009-2019 Makely School for Girls | All Rights Reserved | Posts may contain advertising content or affiliate links