Makely

Let's Make Life Awesome

  • Home
  • Decorating/DIY
    • Create Your Decor
    • Decorate Your Home
    • Paint Your Walls
    • Transform Your Furniture
  • Healthy Living
    • Essential Oils
    • Family Wellness
    • Household Care
  • Project Gallery
  • Contact
You are visiting: Home » Decorating/DIY » Create Your Decor » Page 129

Four Tips that Take the “Pain” Out of Painting

by Lindsay Ballard on May 6, 2009 1,013 Comments

I’ve been a bit quiet this week, because I’m working really hard on my Procrastinators’ Party projects. I am so excited about how much work I’ve already done, and I can’t wait to share them with you next Thursday!

The largest project has involved some major priming and painting. Today as I was painting away in my garage in the 90 degree/90% humidity Texas heat, my mind started to wander. No, I wasn’t about to have a heat stroke (although seriously? So hot already? It’s only May for crying out loud!), although it felt like it could happen at any minute.

I actually started thinking of all the little painting tips I’ve learned throughout the years. It is all routine for me now since I’ve been painting for a while, but at one point painting was not so easy. In an effort to help you avoid my mistakes and to make painting a little easier for you, I’ll let you in on a few of my little secrets. I’m nice like that. You see, I didn’t read any of these tips on the Internet, a DIY book, or learn them from the guys at Home Depot. These are all lessons I’ve learned myself…the hard way.

1. Tack Cloths Make for Sticky Hands – I really love using tack cloths on my projects after sanding and in between every coat of paint. Since I discovered them, I can’t paint without them. They really do remove dust and particles much better than a microfiber cloth or anything else I’ve tried. The good and bad thing about them is that they are sticky, so they make your hands or gloves very sticky, too.

I hate the feeling of sticky hands, so I used to go inside and wash my hands after every swipe of the tack cloth. Then, I realized I could put a paper towel on top of the tack cloth and save my hands from the curse of the sticky.
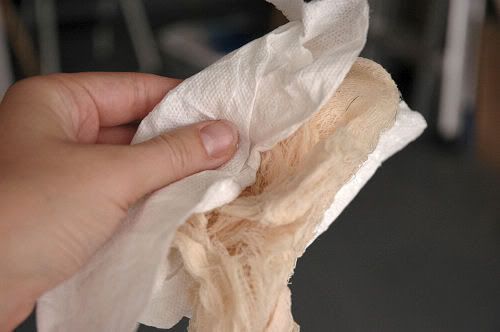
This technique saves a lot of valuable time when you only have a small Zack-Is-Napping-So-Now-Is-The-Time-To-Paint window.

2. Use Disposable Products When You Can – This tip is definitely not very “green” of me, but it makes panting 95% less of a hassle. I have ruined so many bristle paint brushes by not completely rinsing the paint out of them and almost ruined some projects by using old, crusty brushes.

Now, I use foam brushes, disposable paint tray liners, and plastic Solo cups. For large projects where I will be using foam rollers (the handle is easily cleanable, but the roller itself is not), I pour the paint into a disposable paint tray liner and work from there. If I’m just using small foam brushes, I pour the paint into a plastic cup.
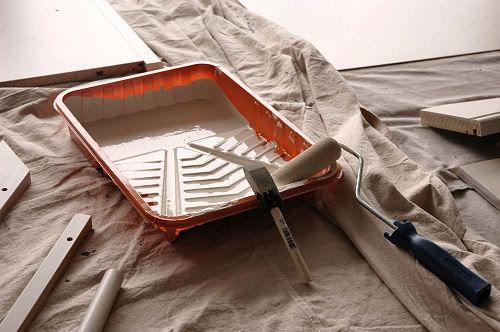
When I’m finished painting for the day, I put the foam brushes, cups and liners into a plastic grocery bag and throw the bag in the garbage can. The next day, I use a new brush and liner and start over. It really makes cleaning up a cinch.

3. Pouring Paint is Easier With a Spout – There is just something about pouring paint from a gallon can into a liner that makes me incredibly clumsy. I end up covering the entire side of the can in paint and scramble to mop up my mess with paper towels. I usually throw in a few choice words, just for the dramatics of it all.

We now have a few of the paint can spouts and they make pouring much easier. I still have to wipe up a few drips, but it’s nothing like before.
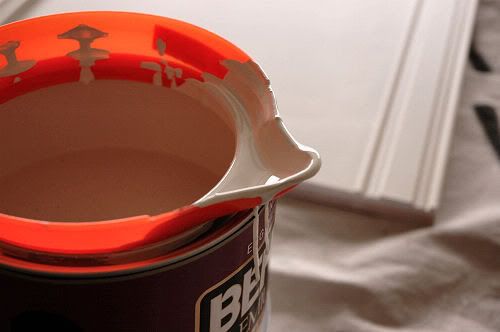
Spouts cost a buck or two at home improvement stores and can be easily washed (if you are using water-based paint) and reused. I think they also come sized for quart cans, but I don’t have any of those.

4. Paint as Many Sides as You Can at Once – A good paint job requires two things – time and patience. You need to take your time to make sure you get good coverage and avoid drips. You have to have patience because you have to let your coats completely dry before you can paint additional sides of the project. If you don’t paint a lot, just trust me on that last one. If you push it, you will ruin your project.

Meet my friends, the painters triangles. They elevate a multi-sided project so that you can paint several sides at once. They can be purchased at a home improvement or paint store for about $5 for a pack of 10 triangles.
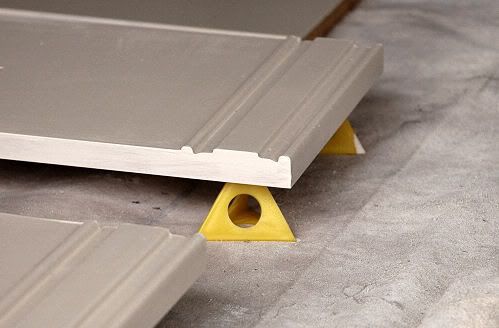
Here, I can paint the top and four sides of a board at the same time. Once that paint is dry (about four hours for the paint I used), I can flip the project over and paint the bottom. The triangles touch a very small portion of the surface of your project, so you don’t run the risk of damaging your paint job. They also clean up easily if you do happen to get paint on them.

Using these four simple tips has really made my love/hate relationship with painting swing to the love side. Do you have any painting tips to share? I’d love to hear what you do to take the “pain” out of painting!

I’m hooked on transforming furniture with paint! Visit Hooked On Houses to share what you are hooked on this week.
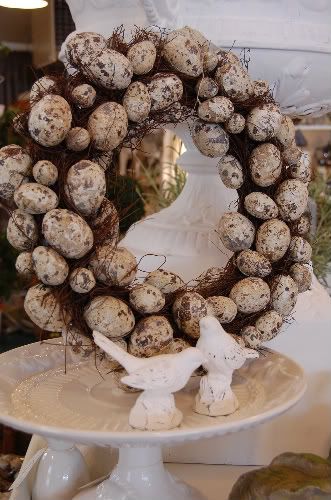
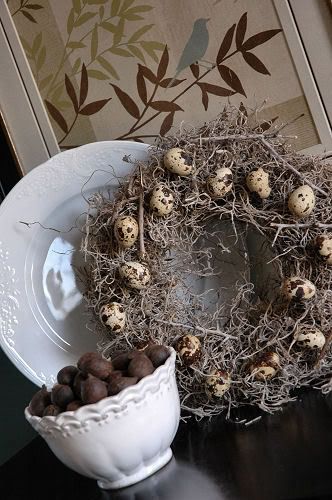
Make Your Own Quail Egg Wreath in Fifteen Minutes

by Lindsay Ballard on April 16, 2009 61 Comments

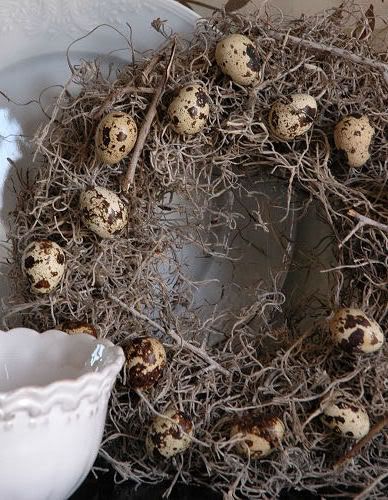
Remember this wreath? The one that I loved so much that I tried to recreate and then lots of you recreated my recreation and emailed me your gorgeous projects and all was happy in the world?

Urban Farmhouse

Yeah, well, I’m still not over it. In fact, I think about it every time I see my the wreath on my own front door. I think about it every time the Urban Farmhouse blog is updated. I think about it every time I see a new Kimba post (because she is completely responsible for this entire obsession). I’ve mentioned before that I have just a wee touch of an obsessive personality, right?

I decided that I really needed to try again to make a wreath closer to the original beauty. In order to do so, I needed quail eggs. The original wreath is made with faux quail eggs which is why they are so large, but I wanted some real quail eggs for a nest I have in my home and decided to buy extras for the wreath.

The only place in town I could find quail eggs was at the big Asian market. They were $7.99 for 24 eggs so I bought them and went on my marry way. I was trying to be a big girl about the whole situation – particularly given my whole aversion to foods I randomly deem “weird” – but when I went to blow the eggs and bits of tiny feathers came out of the hole, I promptly threw all 24 eggs in the garbage can and double bagged the garbage.

And then I ordered some blown quail eggs off of Ebay. Yes, I’m totally that much of a weenie.

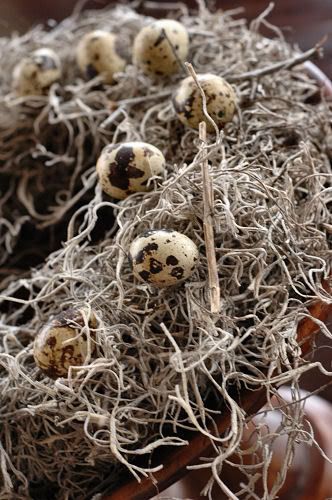
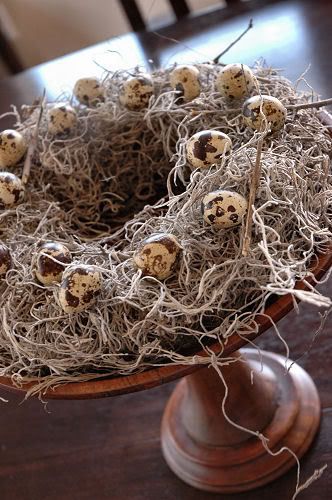
Once my eggs arrived in perfect condition (I highly recommend that seller if you are in the market and share my weenie-ness), I set out to make *the* wreath. It was super easy to make with $2 worth of supplies from the Dollar Tree, the eggs, and a few sticks I found in my front yard. And, it turned out beautifully.

Steps to Create Lindsay’s Second Version of the Most Wonderful Wreath Ever:

1. Gather your supplies. You’ll need a bag of Spanish Moss, a small grapevine wreath (mine is 10 inches), quail eggs (I used 15 on my wreath), twigs, spray adhesive, and your glue gun.

2. Spray the adhesive on a 3 inch section of the wreath, font and back. Wrap a generous amount of moss around that section of the wreath. You may find you want to spray it again and add more moss to that section or you can just move on to the next section. You’ll just have to see how it looks and if it’s as fluffy as you want.

3. Continue the adhesive/moss wrapping until you have your wreath fully wrapped. Go back and fill in any spaces where you can see the grapevine through the moss.

4. Heat up your glue gun and glue your eggs randomly onto the wreath. I always lay mine out and do a “dry fit” before I attach them.

5. If you’d like to add some small twigs, you can hot glue them into place just as you did the eggs.

6. That’s it! Seriously, it’s only five steps.

Can you believe how easy that was to put together? It honestly took me a total of 15 minutes to complete and it’s probably my favorite thing that I’ve created. In fact, I’m just going to go ahead and say that I like it even more than my inspiration wreath. GASP! That, my friends, is a crafting success!

I put the wreath on top of a wooden pedestal stand I found on clearance at Sears, and we now use it as the centerpiece on our Breakfast Room table.

I’d like to put something in the center of the wreath (a glass cloche perhaps?) to add some more height. Any suggestions? Let me know!

I encourage you to try to make one of these great wreaths, too! I think it’s going to fit perfectly in my home all year long. Wouldn’t it look great in yours, too? I’ll totally give you major props if you have the guts to blow your own quail eggs, too.

Clearly, I’m completely hooked on quail eggs. What are you Hooked On this week?

« Previous Page
Next Page »
  • Email
  • Facebook
  • Instagram
  • Pinterest
  • Twitter

About Makely

Lindsay Ballard is a former college mascot turned political geek turned roller derby playing, DIY fanatic.

Lindsay chronicles her projects, design ideas, and lifestyle tips here at Makely, where she shares tutorials and inspiration. Her DIY designs are bold and graphic, while her spirit is fun and full of color.


Archives

Categories

PRIVACY POLICY
Copyright © 2009-2019 Makely School for Girls | All Rights Reserved | Posts may contain advertising content or affiliate links