Makely

Let's Make Life Awesome

  • Home
  • Decorating/DIY
    • Create Your Decor
    • Decorate Your Home
    • Paint Your Walls
    • Transform Your Furniture
  • Healthy Living
    • Essential Oils
    • Family Wellness
    • Household Care
  • Project Gallery
  • Contact
You are visiting: Home » Decorating/DIY » Create Your Decor » Page 92

New Ideas for a Handmade Holiday

by Lindsay Ballard on November 18, 2011 1,806 Comments

Can you believe that this is the last weekend before the Holiday Season descends upon us?  It won’t be long before the presents will be ripped open, the cookies will be eaten, and I will be ready to get that needle-dropping tree out of my house.  🙂

As I ease into the holiday spirit (we can still wear shorts here most days, y’all!), I was delighted by the new digital magazine Splendidly Homemade put out by a few great bloggers, including my dear friend Gina from The Shabby Creek Cottage.  The magazine has some neat decorating ideas (Gina’s found object holiday mantel on the cover is gorgeous) and handmade gift tutorials (the yo yo socks are darling!).  There are also some yummy looking recipes, but we all know that I’ll never try them because baking makes me crazy.  Y’all will just have to tell me how they taste!

I’ve been working on some handmade holiday gift tutorials myself, and I hope to start bringing you those early next week.  Get your paint brushes ready!

********************
I have a few giveaway winners that I have neglected forgotten to announce!  The winners are:
  • Elmer’s Craft and Tell Giveaway: Jamie Bennett and Linda S
  • Sleep Number AirFit Pillow Giveaway: Stacie Johnson
Congrats!!
********************
Don’t forget that Sunday, November 20th is the last day for me to receive entries in the Home Depot Gift of Good program.  All of the details are here.
Have a fabulous weekend before the holiday weekend!

Mastering the Master Bedroom {Updating an Outdated Light Fixture}

by Lindsay Ballard on November 14, 2011 1,663 Comments

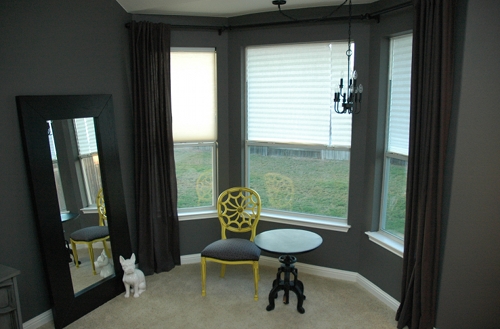
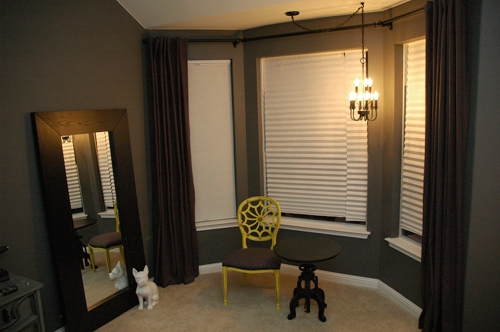
It’s been a while since I’ve updated you on the progress in our master bedroom.  It’s been slow going, but we are thiiiiiiissssssss close to being finished.  Today, I’m going to show you my little chandelier that now hangs in our bay window.

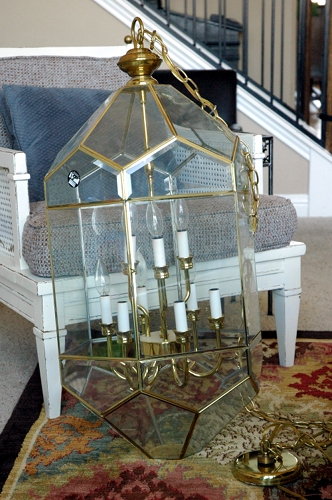
A few months ago, my sweet friend JJ from Blah Blah Blahger came to visit, and we hit up some thrift stores looking for a project.  I needed a small chandelier for the bedroom, and she had the brilliant idea of gutting this early 1990s brass beauty that we found at the ReStore for about $15.

I’ve shown you that photo before, and several readers have emailed that they have the exact fixtures hanging in their entryway and want them gone.  Have no fear!  I can help.

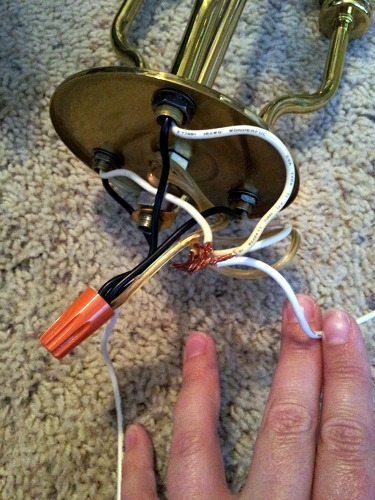
The process I used to transform this outdated fixture is very straight forward.  I simply unscrewed the pieces until I was able to separate the glass enclosure from the chandelier.  I then took apart the top section of sockets from the bottom section so that it would be easier to paint.  When I am taking apart wiring that I want to put back together, I always take pictures so I’ll know how to reassemble it.

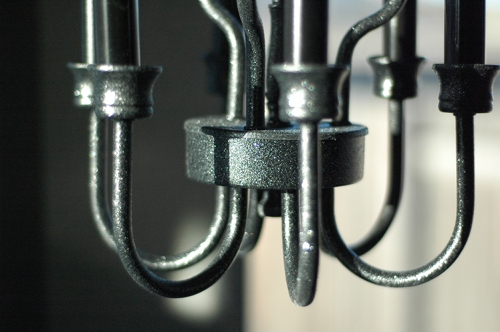
Once I had it apart, I spray painted the pieces I was reusing – the 2 sections of lights, the socket covers, the pipe that holds them together and the pieces you use to connect the fixture to the ceiling.  I spray primed them with gray primer and spray painted them a black gloss.  Then, I used the new Krylon Glitter Blast in Starry Night on just the main part of the chandelier.  I also sprayed the Glitter Blast clear sealer on it so that the glitter wouldn’t flake off.  I’ve been wanting to try the Glitter Blast for a while, and I really liked the look it gave the fixture (although I wish the glitter was solid black and not black and silver – there’s currently no solid black option).  You can see that it’s not incredibly sparkly, but it glimmers in the sunlight, which is perfect for my space.

I rewired the chandelier back together (here’s a step by step tutorial if you need it) and hung it using a new black chain that I picked up at Home Depot.  My sweet husband had to add a box in the ceiling for this since there was no place to install it where I wanted it to go.  At one point, he was hanging from a ceiling joist in the pitch black attic with one arm, looking for a tiny LED light and hoping not to fall through the ceiling.  He’s a good man.

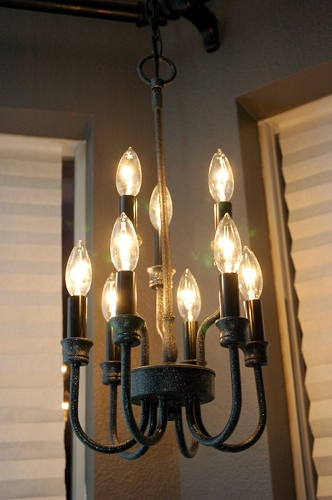
In the end, it looks so charming hanging in our bay window by day…

…and by night.

Next up, accessories and non-temporary shades.  I can see the light at the end of the tunnel!

Have you ever taken apart an old light fixture to create a “new” one?

« Previous Page
Next Page »
  • Email
  • Facebook
  • Instagram
  • Pinterest
  • Twitter

About Makely

Lindsay Ballard is a former college mascot turned political geek turned roller derby playing, DIY fanatic.

Lindsay chronicles her projects, design ideas, and lifestyle tips here at Makely, where she shares tutorials and inspiration. Her DIY designs are bold and graphic, while her spirit is fun and full of color.


Archives

Categories

PRIVACY POLICY
Copyright © 2009-2019 Makely School for Girls | All Rights Reserved | Posts may contain advertising content or affiliate links