Makely

Let's Make Life Awesome

  • Home
  • Decorating/DIY
    • Create Your Decor
    • Decorate Your Home
    • Paint Your Walls
    • Transform Your Furniture
  • Healthy Living
    • Essential Oils
    • Family Wellness
    • Household Care
  • Project Gallery
  • Contact
You are visiting: Home » Decorating/DIY » Page 227

Librarians, Please Avert Your Eyes

by Lindsay Ballard on November 2, 2009 2,509 Comments

When we came upon my now-favorite booth during our trip to the City-Wide Garage Sale, I think an audible gasp could have been heard from within our little shopping group. It was one of those booths that has something you want to buy in every square inch of space. I found a wonderful chippy side table exactly like I’ve been looking for, but the vendor wanted $50 and I wanted to pay more like $10. Thrifting has certainly spoiled me!

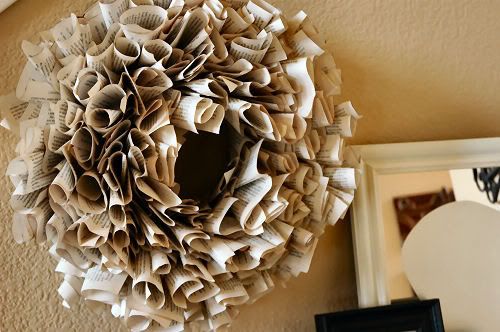
At the same booth, we came across a pair of simple, but stunning wreaths made from book pages. The vendor told me that she made them sitting in front of the television. That’s my kind of crafting.
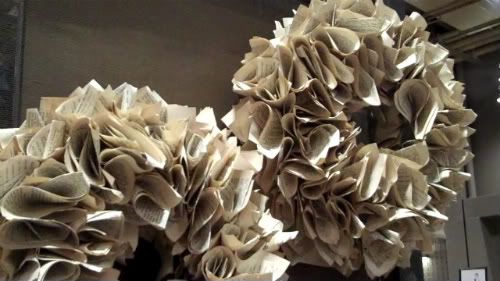
I honestly don’t remember how much she wanted for these lovelies, but I think it was at least $40 a pop.

Yeah, um, that’s way too rich for my blood. How about I show you how to make my version of the same wreath for just $2? Librarians and book lovers, please avert your eyes.
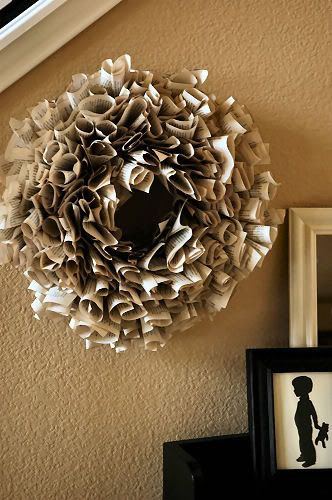
Book Page Wreath Tutorial
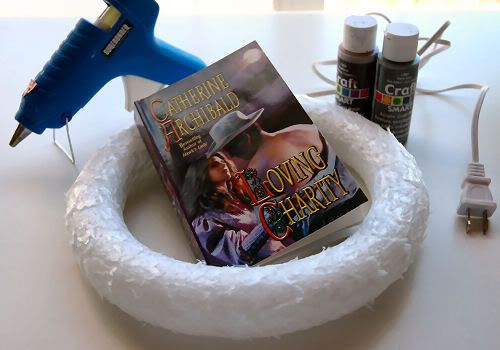
Supplies:

  • 10″ foam wreath ($1 at Dollar Tree)
  • Paperback novel ($1 at Dollar Tree – depending on the length of the book, you may need two)
  • Brown and/or gray craft paint
  • Glue gun & glue sticks
  • Small strip of ribbon
  • A few paper towels
  • A few straight pins (optional)

1. Assemble your cast of characters. I felt slightly guilty about purchasing an author’s work from the Dollar Tree for the sole purpose of ripping up. I read a few pages of Loving Charity just to make sure I wasn’t about to destroy a literary classic; let me assure you that I wasn’t.

You could definitely use vintage books, magazines or sheet music for this project or even select a book off of your own bookshelf that you don’t think you’ll read again.
2. Using the paper towels, I applied the brown paint to the edges of the book. I simply squirted some paint onto the towel and wiped it on the book. I painted the brown first and then applied a bit of gray. This will give your book pages a vintage look. To be honest, two colors aren’t completely necessary, so you can use just gray or just brown if you would like.
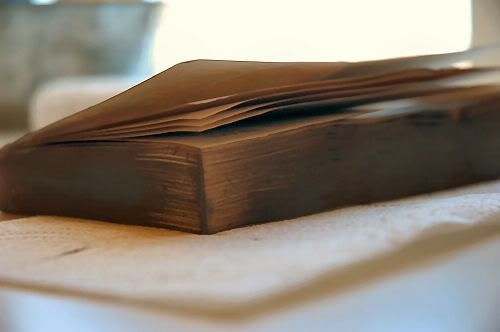
Lay the book on a clean paper towel for about 5 or 10 minutes to let the paint dry.

3. Cut or tear a page out of the book and roll it in a method of your choosing. I put together a video tutorial to show you some different ways to roll the page if you are interested in seeing how I did it. The main thing to remember is that you want to roll the paper and not actually fold or crease it.

4. After rolling the page, apply some glue at the end of the roll and glue it to the wreath. Make sure that the painted edges are facing up.
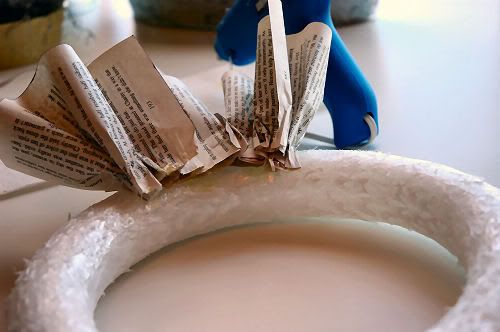
You will do this layer all the way around the wreath. When you have finished the full circle, flip the wreath over. That layer will become the bottom. If it won’t lay flat, put something heavy on top of it to flatten it out for a few minutes.
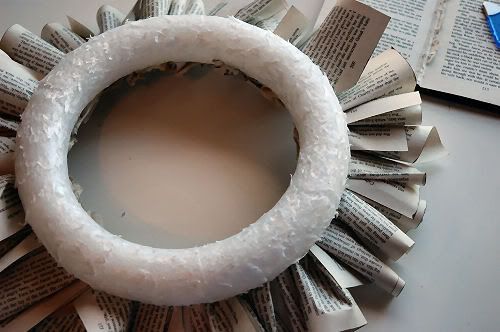
5. Continue rolling pages for your wreath. You will now fold a little tab on the bottom edge and apply glue only to that tab. Work your way from the bottom of the wreath up to the top, finishing one layer before moving to the next.
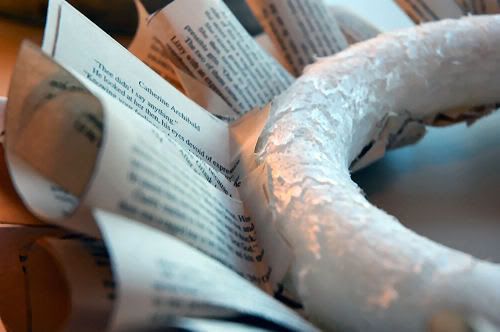
6. Once you get to the inside of the wreath, roll the paper and apply glue to the edge much like you did with the bottom layer. When you glue it on, the pages will be shorter than the wreath of the wreath. That’s okay.
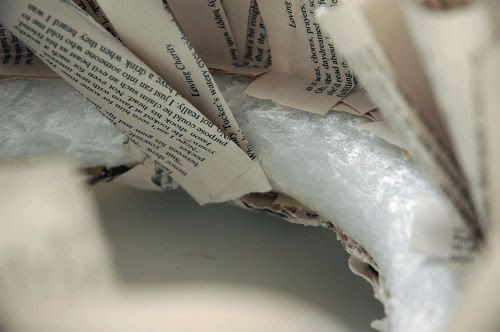
7. At this point, your wreath will be mostly done, but there will be some sections you need to fill in. It should look roughly like this.
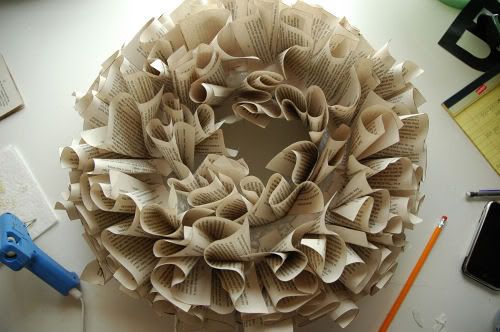
To fill in your spaces, you’ll simply roll a page, apply glue to the ends, and just stick it in the wreath. The filler pages don’t necessarily need to touch the styrofoam wreath; they can stick to the pages already glued to the wreath if need be. Use the filler pages to fill in holes and add some height and visual interest to your wreath.

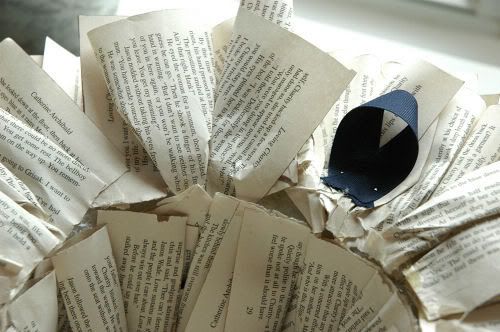
8. After I was finished filling in, I flip your wreath over and glue your scrap of ribbon on the back to serve as a hanger. I stuck a few straight pins in it to make sure it held tight to the wreath, but that’s purely optional if you glue it on well.

All that’s left to do now is to find a spot to hang your new creation!
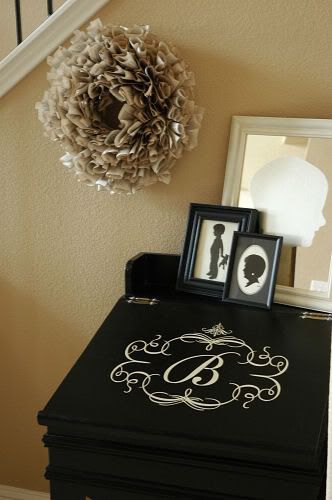
Who says that books can only be used to decorate bookshelves and tabletops? Try one on your wall!Added to Kimba’s DIY Day party over at A Soft Place to Land.

Inquiring Minds Want to Know

by Lindsay Ballard on October 30, 2009 74 Comments

I get a lot of repeat questions emailed to me and left in the comments section of the blog. I love reading what you guys want to know that I haven’t told you. Here are a few answers to your most burning questions.

Dining Room

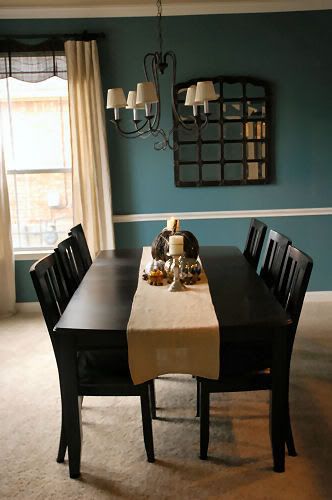
What color is your dining room painted?

It’s Smoked Turquoise by Glidden, and I love it. We painted it this color the day we closed on our house. Other than my son’s room, it’s the only other room that’s not currently builder’s beige. The next room that’s going to get a coat of paint will be our powder room, and it’s going to be in the same shade family as the dining room.

Where did you purchase your dining room furniture?

We bought our furniture at Ashley Furniture. We’ve had it for about four years now, but I think they still sell this collection in their stores. Although it looks black, it is actually a very dark espresso brown. We have the table, six chairs, and a china cabinet from the same collection. I’d like to add another piece under the mirror, but I want to vary the furniture in that room a bit. The mirror itself was 50% off at Hobby Lobby years ago.

Coffee Table

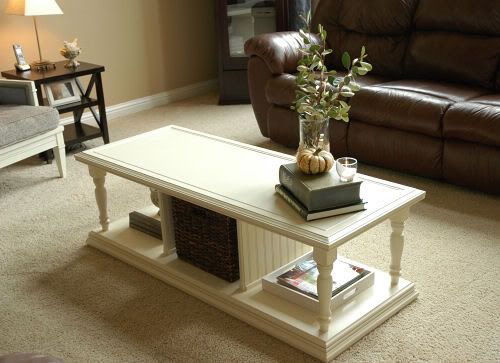
What color paint did you use on the Britney Spears table?

This poor table has about five coats of paint. I started with my free can of Antique White from Glidden, but it was too bright white. So, I started mixing colors together from my stash. I still wasn’t happy. I eventually found a half-used can of Behr Antique White from this project, and it was perfect.

Did you paint it was a brush or spray it?

I painted the table with a brush. I’ll be honest that I didn’t use enough paint at first and there were visible brush marks. I had to sand down the paint at bit and reapply with two thick coats. It’s not perfect, but it’s perfect for me.

What type of trim did you use?

At the bottom of the wainscoting, I just applied a section of half-round trim that you can find in any home improvement store. It’s not fancy, but it gets the job done.

Where did you get the table legs?

I bought the legs at Lowe’s. I was very interested in some legs found at TableLegs.com, but I was too impatient to order them and too cheap to pay shipping.

How did you seal the table?

Normally, I use wipe-on poly to seal my furniture. But, I was worried about it yellowing on this white table, so used spray-on Polycrylic for the first time. It was easy to apply (it comes in a can like spray paint) and I didn’t have to let it dry for as long as I do with regular poly. Also, since it’s acrylic, it’s able to be cleaned up with water. Polycrylic can be found at home improvement stores in the same aisle as the polyurethane.

Painting Laminate Furniture

Do I have to wait the full cure-time of my primer when painting laminate furniture?

Well, I guess you don’t have to wait that long, but I wouldn’t recommend it. You have to remember, when painting laminate furniture, you are basically painting plastic. If you let the primer fully cure (not just “dry,” but “cure”), it gives it the chance to fully cling to the plastic surface and make it much less resistant to scratches once you paint the surface. I know it’s a pain to leave a piece of furniture curing in your garage for a week, but I think it’s a bigger pain to have to redo a scratched paint job later.

Any other questions you guys have for me? Leave a comment or send me an email and I’ll do my best to answer it!

« Previous Page
Next Page »
  • Email
  • Facebook
  • Instagram
  • Pinterest
  • Twitter

About Makely

Lindsay Ballard is a former college mascot turned political geek turned roller derby playing, DIY fanatic.

Lindsay chronicles her projects, design ideas, and lifestyle tips here at Makely, where she shares tutorials and inspiration. Her DIY designs are bold and graphic, while her spirit is fun and full of color.


Archives

Categories

PRIVACY POLICY
Copyright © 2009-2019 Makely School for Girls | All Rights Reserved | Posts may contain advertising content or affiliate links