Hi, it’s Jackie here from Teal & Lime. Sometimes I am not sure if it is a blessing or a curse, but as a DIYer, I can rarely see something for what it is. I see a cool rug and think ottoman. I see a wastebasket and think pendant light. I see tablecloth and think slipcovers.
You see, my brain is always analyzing something for what it could be, not what it is. I suppose, for someone who likes to DIY, it is a blessing. This ability to think outside the box has helped me personalize my home and save a lot of money in the process.
My latest victims were these driftwood chargers from World Market. I loved the light, almost gray-washed wood. But, let’s be honest, I rarely set the table, let alone use chargers. Just trying to keep it real. So naturally, my mind starts to wander and think of alternative uses for the chargers.
Then, comes the lightbulb moment. That moment when you realize just what to do and can’t wait to get started.
Let me step back a moment and profess one of my decorating loves. I love accent mirrors, but am usually put off by the prices. I love round and shapely accent mirrors, but am even more put off by those prices. I melt to pieces over the idea of a set of round accent mirrors, but can barely bring myself to look at the prices.
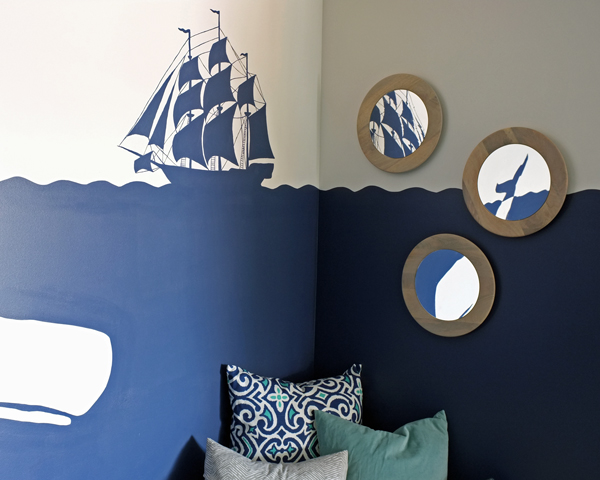
Since the day I started planning the pirate playroom for my boys, I knew the space needed a set of round mirrors to mimic portholes.
I am sure you can see where this is going. When I saw the driftwood chargers for $10 each, it only took me about 2 minutes to realize I could turn them into mirrors.
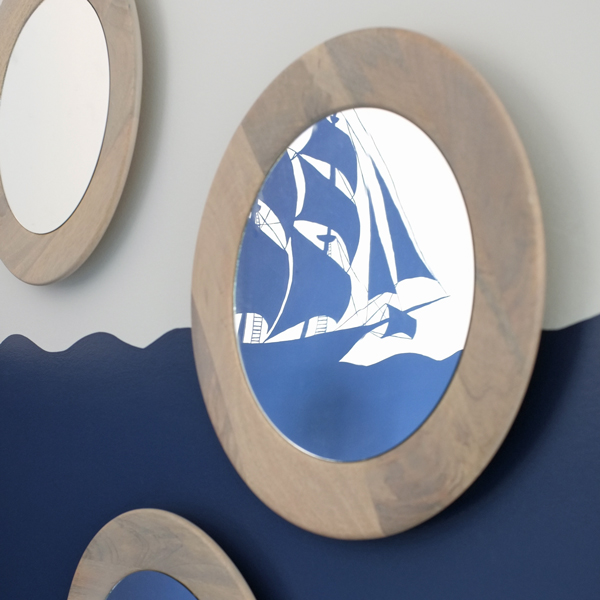
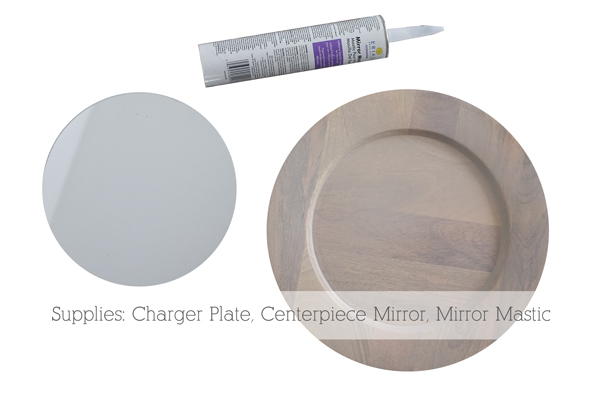
All I needed were some inexpensive centerpiece mirrors (mine were only about $2 each), the same diameter as the inside of the charger, and some mirror mastic (which I already had at home from this mirror project). Oh, and about 5 minutes of my time.
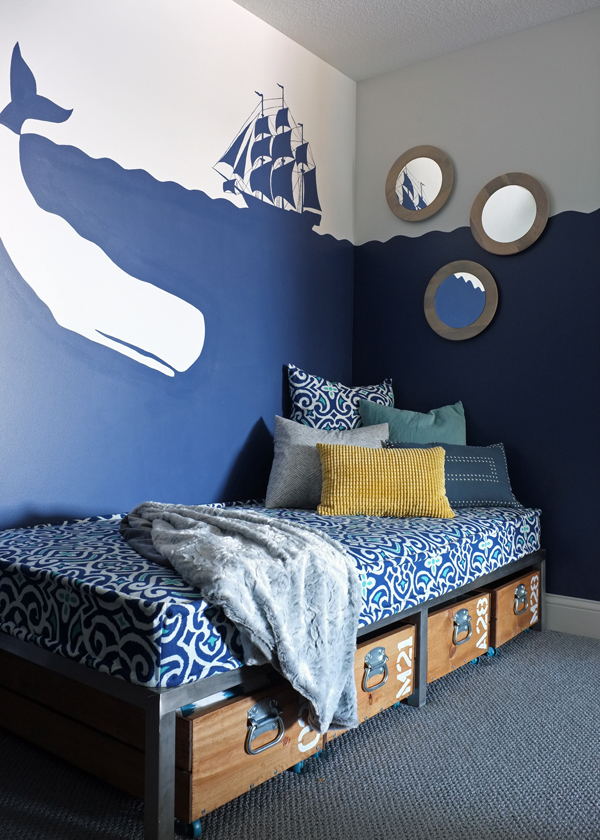
For under $40 and in less than 5 minutes, I made this set of three driftwood mirrors…the perfect portholes for the pirate playroom.
To turn a charger plate into a mirror, purchase centerpiece mirrors from the craft store that are the same size or slightly smaller than the inner rim of your charger.
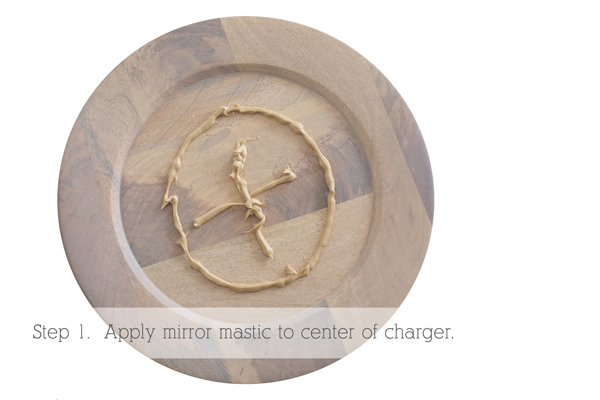
Apply mirror mastic to the center of the charger. Mirror mastic is a special adhesive sold at home improvement stores for gluing mirrors. Do not use any other type of adhesive with mirrors. Normally, if you were hanging a large mirror on a wall, you would put globs of mirror mastic every foot or so. In this case, I just made a fun little circle and X doodle in the center of the charger…these mirrors aren’t going anywhere.
Carefully set the centerpiece mirror into the mirror mastic and press down gently, but firmly. Follow the directions on your mirror mastic to tape or hold the mirror in place until the mastic cures.
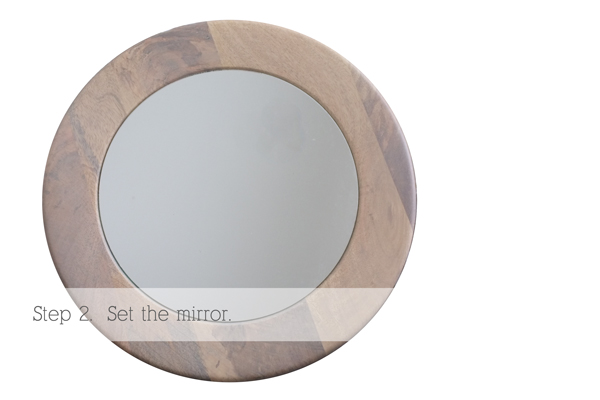
That’s it. Easy, cheap, DIY mirrors!
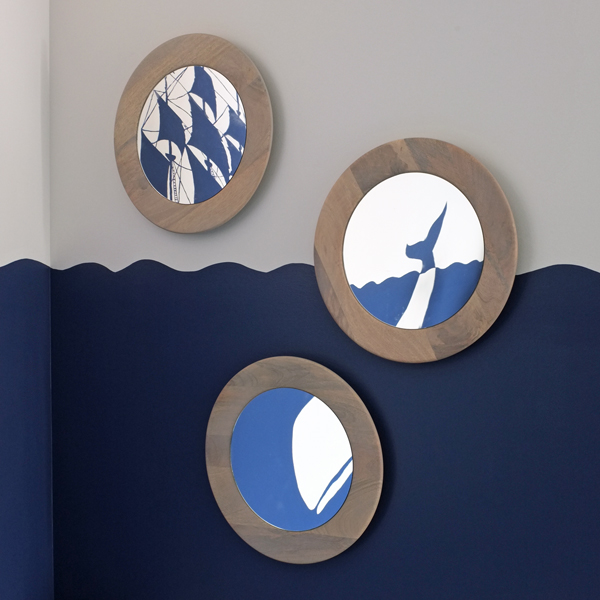
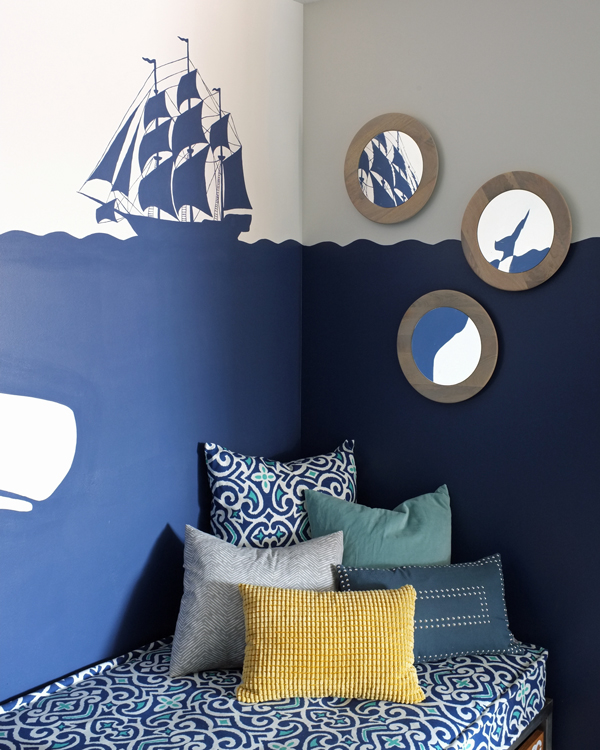
To keep with the simple streak, I used 3M Command Picture Hanging strips to mount the mirrors to the wall. Finally, I can call this little slice of the playroom complete. The porthole-esque mirrors are the perfect finishing touch with the daybed and pirate ship mural. This corner is a cozy, fun spot for my little pirates to hang out.
Do you share my curse, I mean blessing? What was the last thing you bought planning to turn it into something else?
LOVE that idea, oh yes I do!! They turned out great and perfect in that nautical little guys room!!
Thanks Heather! The boys seem to love them…judging by the fingerprint smudges 🙂
Love the great thinking-out-of-the-box! Such creativity! You are blessed!
Aw, thanks Patty!
What a great idea! These look great and I love that they didn’t take you a zillion hours. What a great room. Going to check out how you did the daybed now!
Hi! I love this!! Can you tell me about the bed frame/drawers…did you buy it as is or create it?
LOVE!
I would also LOVE to know about the bed frame and drawers. That is perfect for my son!
Great idea! And I really L.O.V.E. that playroom!
I love the painting!! Where did you find the stencil for the clipper ship?
I love the walls. Is this a stencil? What paint color is that?