Several months ago, I was minding my own business in the painting section at Lowe’s when I almost ran into something in the middle of the aisle. It was one of those cardboard displays that they have every so often featuring an item that they were promoting. I generally ignore those displays since I know what I’m looking for when I go in there, but this one stopped me because it was bright orange.
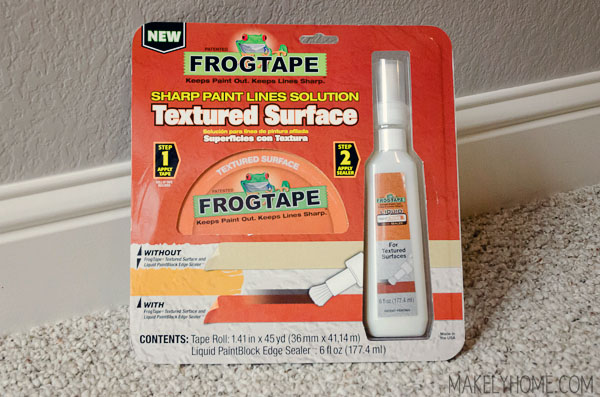
And because it was for a new type of painters tape kit from FrogTape…made specifically for textured surfaces.
Cue the heavens opening and the angels singing.
As someone who is obsessed with sharp, graphic patterns on my walls, having an entire house of knock down textured walls is the bane of my existence. I think knock down texture is largely a regional thing, so many of you probably don’t experience this. But, painters tape doesn’t properly seal on textured walls due to the raised texture, so the paint bleeds under the tape. In fact, I’ve had to develop my own time consuming system for working with regular painters tape on textured walls. And in all honesty, I don’t normally use FrogTape – neither the green nor the yellow versions. I have always thought that the 3M blue tape worked well (and am actually in love with this Bloc-it tape* that you can only get off of Amazon).
But, they had me at “textured surface, ” so I immediately bought one of the new orange kits. At $14 it wasn’t something cheap to try on a whim, but if it saved me hours of my time the next time I needed to stripe a wall, it was well worth it.
Fast forward to this weekend when I was striping a wall for a friend. She has textured walls, too, and I gave this new paint kit a shot.
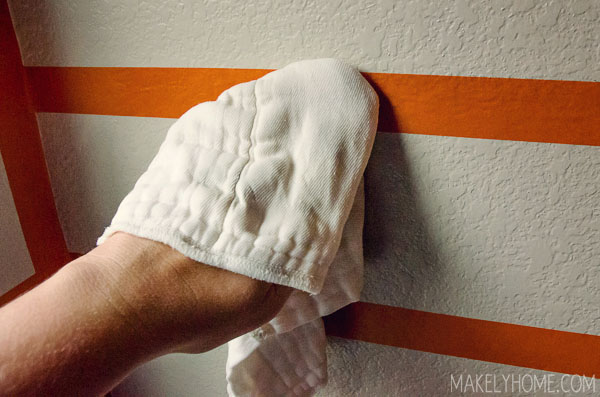
After I used a level and yardstick to draw out my stripe lines, I taped off the stripes with the orange tape. I made sure to press down on the edge of the tape that I would be painting to make sure it stuck well. Then, I ran a wet cloth over the tape to activate whatever special magic is in the tape’s adhesive that helps it to stick well on textured walls.
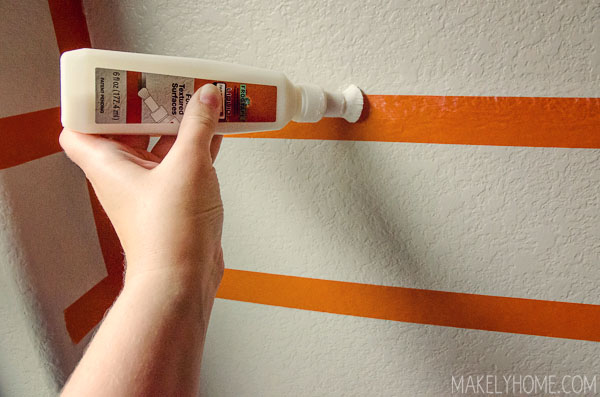
Next, I used the bottle of what I assume is thin glue to seal the edges of the tape that will be painted. It’s easy to do by just running the squeeze bottle along the tape line. Just be careful not to let the glue go on too thick, as I think you’d be able to see that once you get the stripes painted. And only put this glue on the edge of the tape to be painted, since you will be able to see it on the wall if you don’t paint over it.
After you let that dry for 15 minutes, you paint the stripes just as you would any other wall. I used an angled brush to cut in at the ceilings, corners, and baseboard, and I used a 6″ roller to paint the rest of it.
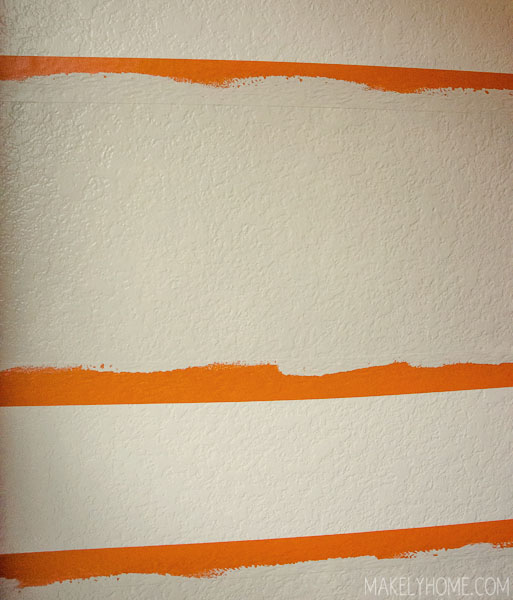
I painted two coats. Once the second coat was on, I peeled the tape. The results blew my mind, y’all.

I have painted a lot of stripes on a lot of textured walls, and I’ve never had one come out so perfectly. There was literally not one single paint bleed in the eight stripes that I painted. Not a single one! The lines are crisp and sharp. This stuff is perfection. (The image above does make it look like there is a bleed under the first dark stripe. That’s actually a stray pencil mark that I didn’t notice until I put the photos on my computer – it’s definitely not a bleed under.)
I’m going to give these stripes a few more days to dry before I go back and clean up my pencil marks and add another fun element to my friend’s wall. If you want to see a larger image of the wall after I painted these stripes, you can check out an image I posted on my Facebook page. It looks really awesome, if I do say so myself.
So, where do you buy this tape kit? Well, that’s the sticking point. Since this kit is so new, some Lowe’s have it, but not all of them. You can get it on Amazon here* (where it only has one review, which is bad – I need to go add my review as well). It looks like it’s available at Walmart.com, but not in stores. Home Depot may carry it, but it’s out of stock online and isn’t carried in my local stores.
Many people also use regular painters tape and clear caulk to get the same effect. I’ve honestly never tried that because I was always worried that the caulk would come out too thick and messy. The glue/sealant/stuff that comes in this kit is really thin but didn’t run, so I really don’t think I’ll try the caulk method as long as this kit is available. It really was just that easy and totally worth the extra few dollars.
I’ll definitely keep you guys updated on this room’s progress and my future experiences with the new orange FrogTape. I’m so excited about the possibilities with this kit!
Oh, and because I know some of you will want to know – the stripes are 8 inches wide. The paint color is Mega Greige from Sherwin Williams – full intensity for the dark stripe and 50% intensity for the main wall color.
*affiliate links.
Holy Cow! I wish I had this when I was painting my kitchen walls! I have all textured walls (like you) but just for fun, mine go back and forth between knock-down texture and orange peel.
I will definitely be tracking this down to use moving forward. This looks like a great solution!
WOW~!!!! that looks awesome! now to stripe a wall!!!
We’ve always used the caulk method which comes out very nicely with nice straight lines, but the caulk is a bit messy to work with. I’m excited to give this a try! Thanks for the review!
I dont usually like muted colors but the way you did these stripes with this color has me changing my mind!! Great job! 🙂
You can do the same thing using acrylic medium. Makers of fine art acrylic paints sell small bottles of the medium. Paint it over the tape edge just as you did and let dry. Here’s a link to Golden Acrylics info sheet on the process.
http://www.goldenpaints.com/technicaldata/hardedge.php
I used this in my son’s room. The stripes turned out great, but I can also see a glue line that won’t go away….
when I paint stripes I use a laser level to get nice straight line then I use the blue painters tape then I seal the tape edge with a clear GLAZE. So easy and it works every time… and the can of glaze lasts forever, I been using the same can for years. got this tip from a professional painter…
I do the same thing with doing any stenciling project as well – if you do a clear coat first and let it dry and seal and then paint over it with the paint only the clear will bleed and the paint will look perfect- use this for signs etc – use matte modpodge or acrylic clear coat varnish anything like that would probably work exactly the same. Very cool!
We recently moved from eastern NC where smooth, flat drywall rules, to Wyoming, where EVERY house has those textured walls. Honestly, I don’t like them…but whether new construction or old, they seem to rule in this region. Thanks for the hint on dealing with them should I ever want a crisp, painted line.
I have always put the blue tape down and then painted over the edge with the base color which seals the tape and then paint over with the darker color.
I live in Oregon and heavily textured walls are very common, especially in homes from the 50s, 60s, and 70s (both our first and current homes were built in the early 70s). Our current home is heavily textured from top to bottom (including the ceilings). It’s a look that is very ‘in’ again, but one I could easily leave behind. I’m not into ultra smooth walls (too blah), so need some type of texturing, but boy, this tape could have come in REALLY handy when I first painted our rooms (especially near the ceiling line). We’re in process, slowly, of using American Clay plaster to eliminate the texture in our home (or at least tame it), but I’ll definitely be on the lookout for this tape for the future. Thanks for sharing your find. 🙂
I have textured walls and a pro painter gave me a tip I use everytime now…after applying the tape (just regular green frog tape which is way cheaper as you know) I painted the edge with the original base color of my wall, let dry completely and then paint the new color. The first coat seals the edge just like the fancy sealers and glues you are using. I do this too when having to tape the corners of walls when I want to change the next wall color for an accent. Try it and maybe save you some bucks. Worked perfectly for me, hope it can help.
Thanks, Erica! I used to do that, too, and have actually written about it a few times. The reason I like the new tape and sealer personally is that it only takes 15 minutes to dry whereas the a coat of paint takes longer. I think it’s just a matter of preference. Thanks for the tip!
This tape is total waste of $$$. There are numerous other tapes that work just as well on textured surfaces, all it takes is basic knowledge of how to press down the edges. I think all Frog Tapes are over priced and nothing more than over marketed tape.
Hmm… I’d like to see it used with darker/brighter colors. I’m not completely sold given the top of the lower white stripe looks a bit like the tape did not do its job. I’m sure that could be easily fixed though, but would be a headache with darker colors and if that happened in more than one spot. Thoughts?
This is so great to know. I HATE textured walls with a white-hot passion.
You and me both, sister! 😀
I’ve done the same method with painters tape and caulk- same result, a-ma-zing lines, for about a quarter of the cost. I’ve used frog tape before and liked the product just not the price….
Hi Lindsay. What process do you use to remove the thin “lip” or ridge of paint that is created by the tape when you want to paint over a wall that you previously had “striped?” I’m up against this with a repaint of a room and I’m afraid that sanding the ridge of paint will change the texture compared to the rest of the wall. Any advice?
Thanks!