The year I went off to college, my parents left our home state of Texas and retired to the Florida Keys. They were too young to be officially retired, but thought of their new relaxing life as retirement nonetheless. Then life changed, as life tends to do, and they decided to move to Tennessee to be closer to my mother’s aging parents.
Going ‘home’ for me as an adult isn’t really going ‘home.’ My parents live in a gorgeous house, but it is in a teeny little town with little more than a McDonald’s and a Walmart. Their little Tennessee town seems like it’s on a different planet than my hometown of Austin, Texas. Things here are just so…strange.
I never feel comfortable out and about in their town, but I feel more comfortable than ever inside their home. Although the furnishings (other than the antique grandfather clock and armoire I lust after) are totally different than the ones I grew up with, they are warm and welcoming, just like Mom and Dad.
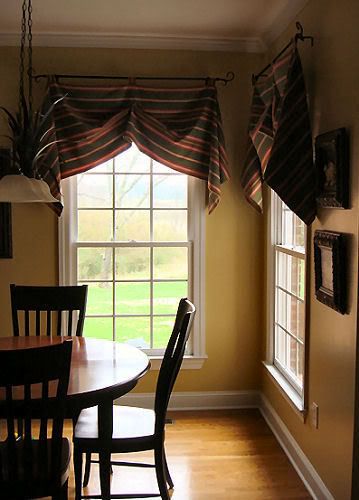
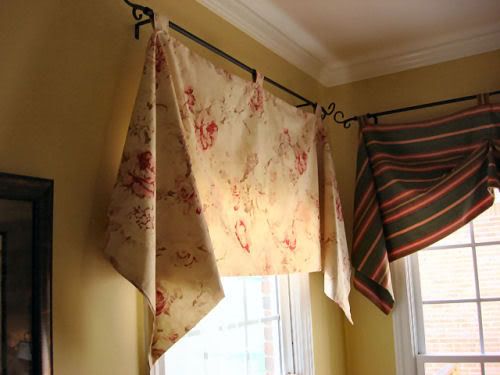
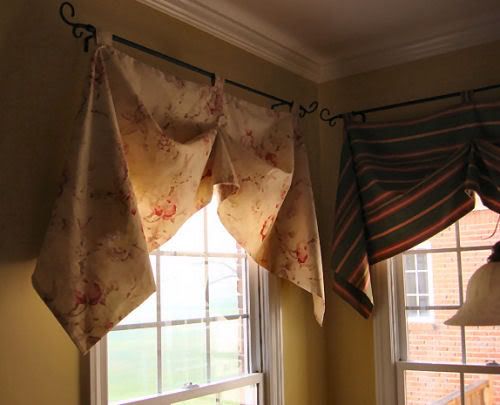
Every time I walk into their home, I am drawn to the custom window treatments that cover the breakfast room windows. They are simple, yet classy and unique.
SUPPLIES:
Home Dec width (54″) fabric – you’ll need 2 1/2 times your window width
Scissors
Iron
Glue gun or fabric glue
Safety Pin
Cut a 7″ width strip off the length of the short edge of your fabric and set that aside. You’ll be using that piece in a bit.
With your large piece of fabric, fold in half so that the raw edges with the printed fabric information (not the edges cut at the fabric store) are together at the top. This is likely how your fabric came off the bolt, so just make sure that the upper edges are even. Press the fold so that it creates a nice straight line.
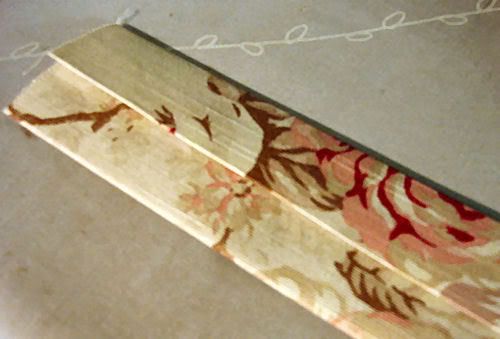
Next, open your fabric and press in every side by 1/2″. You’ll do this on the top and the sides.
Fold your fabric back in half lengthwise at the first crease mark you made. All of your raw edges should be folded inside the piece of fabric.
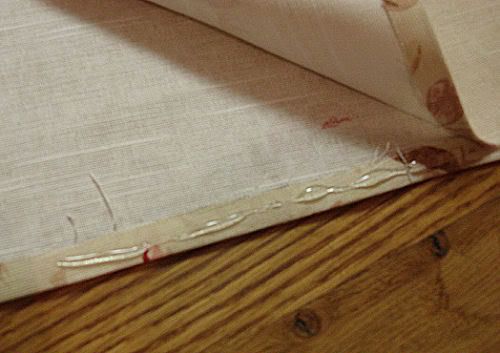
Using your glue gun or fabric glue, seam the short sides of the fabric together. This will essentially create a long rectangle with an open top.
Here’s where you have a decision to make. You can make the fabric tabs like the ones in the curtains above or you can use drapery rings to hang the curtain from the rod. If you want to use drapery rings, you can skip down to where I put a *** in the post. If you want to use the tabs, continue with the directions as written.
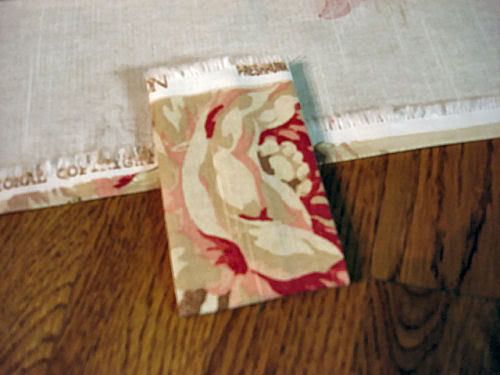
Grab the 7″ wide strip you set aside earlier, and cut three 8″ long pieces out of it. You should end up with three small pieces that are 7″ wide and 8″ long.
Go back to your ironing board and turn in the long edges 1/2″ on each of the small pieces. Then fold the long edges together so that the width of each piece is 2 1/2.” The sides of each piece will slightly overlap on the back. You just need to play around with it a bit to get it to work.
Then, fold each small piece in half so the raw edges meet and press a crease. You’ll end up with three small pieces measuring about 2 1/2″ wide and 4″ long (when folded in half).
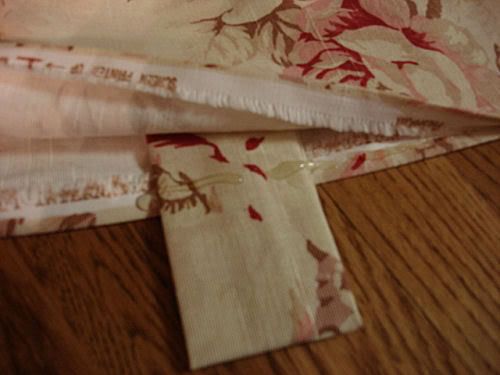
Go back to your large piece of fabric and find the center of the open side. With about 2 1/2″ of a short piece above the open side, glue the short piece in place.
Glue the other two short pieces in the same way, but space them so that these two tabs will hang on the outer edge of the curtain. Use your measuring tape or ruler. I just eye-balled the spacing for this tutorial, and you’ll notice later that I didn’t space them far enough apart.
(***Welcome back, drapery ring users!) Close the top seam with your glue gun or fabric glue.
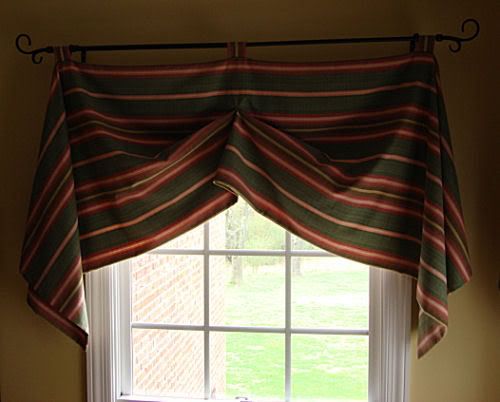
Your curtain is now ready to hang! You can hang it as is and I think it looks perfectly delightful. Fuss with the folds a bit, fluff them out, and you are good to go.
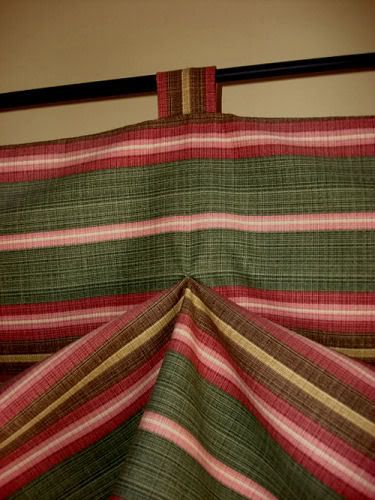
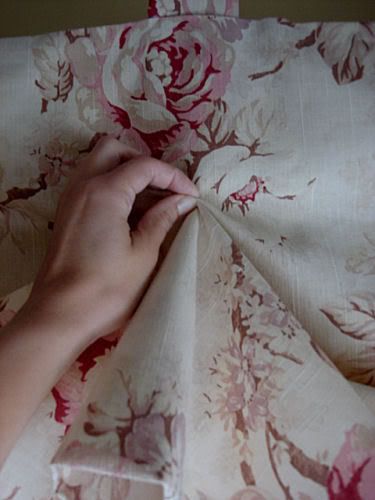
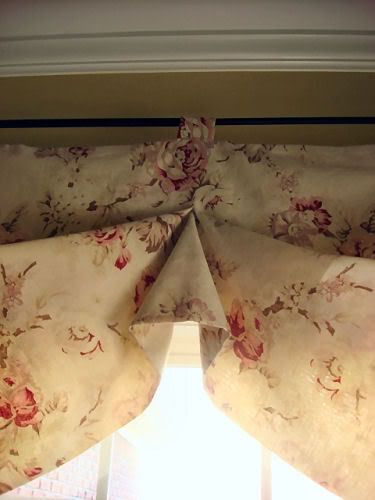
Or, you can take it one step further, which you is what I would do. 😉 Visually divide your curtain into three horizontal sections. Pinch the top of the bottom third and bring it up to the top of the middle third.
Use your safety pin on the backside of the fabric to pin the little pinch into place. You could be totally fancy schmancy and use a needle and thread to tack it in place, but why would you go through that effort when you could just use a safety pin? Yep, that’s how I roll.
My mother always told me that 95% of window
treatments is the fluffing, and she is absolutely right about that. Pull and tuck and fold and fluff until you get them exactly how you want them.
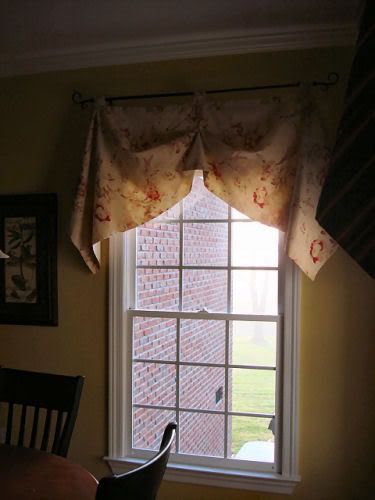
I think mine turned out really great – especially for $3/yard fabric, a glue gun, and a safety pin. Dare I say they look better than the ones that were custom made?
With using nothing but a glue gun and a safety pen, I think the Nester would be proud.
Does this window treatment work for you? It sure works for me! Visit Works for Me Wednesday over at We Are That Family to see more WFMW fun.
I am going to try that! It is such a great idea! You are so clever. Thanks
All the best,
Allison
Nice job, it looks fantastic! I need to find a bare window – shouldn’t be too hard around here 🙂
Nicely done, sistah!!!
Wow! It looks great…The Nester would approve I’m sure!
~Kim
I’m singing “You are my hero”. I can’t wait to try this!!! I need treatments sooooo bad!
Looks really good…I may have just found the treatment for my kitchen windows!
Oh that is sooo cool, even I can do this (possibly). I just re-did my kitchen and those would be perfect for it. Thank you!
I’ve been wanting to try something different with my curtains–thanks for the inspiration. Congrats on being Today’s Creative Blog!!!
tina 🙂
I LOVE that!!! You did a great job!
Beautiful job!
Absolutely fabulous!! Happy St. Patricks Day!
blessings, kari & kijsa
Came over from TCB! Love this idea…glue? I can glue!!! This is doable and I change my curtains all the time, this makes it easier!
Robin
All Things Heart and Home
Holy moly. I thought I was the only one on the planet that ever used a glue gun to hem curtains. I feel so much better now.
These look fantastic! I’ve been avoiding my dining room window because I thought a window treatment would be too much for me to take on. Great post!
I can’t believe that is $3 fabric – it looks great. Thanks so much for this post.
Super cute!
Love it! 😀 I’ve been looking and looking for a window treatment for our bedroom since we moved in our house a few years ago…this one is a winner!
Just GORG! Love them!
Luv this! I am looking for a window treatment of just this sort…something that will let the light in, and would be simple to do! Great WFMW post; thanks for sharin’…
You did a great job! The Nester should be proud!
I have to say, these are FABULOUS! I may possibly use this method in my bathroom instead of a Roman shade. So quick. So easy. So inspiring. You go girl!
I really like this!! I’m putting it on my list 🙂
Those look great! Fabulous job! I may have to try this in my master bath with the leftover bedroom fabric.
What a fabulous afternoon project!! Thanks for doing all the hard work for us!
Hi there Lindsay,
What color paint is in your Master Bedroom? I love it.
I just got through “hemming” my bedroom curtains with carpet tape. Shhhhhhhhh!
Love those!!!! I love the fabric too. Cute!
This is a great tutorial! I would love to make curtains for every empty window, my problem is the darn rods! I like very heavy twisted rods and they are pricey when you need so many! Maybe I will pull out some fabric scraps and see what I can whip up…
~Misti
Awesome! Even I think I could do this.
I LOVE it!!! And will def. have to try this, my kitchen and laundry room windows need just this thing! Thank You!
I love these treatments! I’m sewing challenged but it drives me nuts how much stores charge for window treatments…a little bit of fabric for $$$$$. These look elegant and beautiful!
This is perfect for me! Love it!
I know exactly what you mean – my ‘rents moved after college from Dallas to a small town with lots of acreage in North Carolina! Not a whole lot that looks familiar in their town! And I’m starting my no-sew curtains today – I can’t wait to see what they end up like!
I just found your blog.. I love this idea I will give it a try. Thank you for sharing.
I just found your site and I made one of these on Saturday. I found $2 yd fabric at Hobby Lobby and a super cheap rod from Ross. I love it! Thanks for posting such easy instructions.
Mine are not as pretty as yours, but I am pleased with them anyway!
http://www.hicksinhendersonville.blogspot.com
I was linked here by a fellow poster at Garden Web – glad she did. What a clever idea.
But what I really wanted to comment on is this;
Going 'home' for me as an adult isn't really going 'home.'
It kind of breaks my heart because because I know someday that will be how my boys feel. They're 20 and 24 now but we're still in the house they grew up in, so they do 'come home'. We're hanging onto the big old house as long as we can just for that reason!
You are my hero! You and The Nester are changing my life! I have been a HUGE fan of hot glue "sewing" for a really long time and have already done my kitchen sink window and breakfast room French door. You guys have made it "cool" to do, so I'm gloating a little as I look at my own handiwork! I have been hemming (haha) and hawing about my two large breakfast room windows for ages. I have the fabrics, trims and even the stuff to make beautiful, fluffy, birdy tassels. This is IT – the simple, yet beautiful solution I've been waiting for! Questions, though. I am going to use a coordinating fabric for the back instead of the same print (have that figured out, no biggie), but you say to use TWO AND A HALF times your window width. Hmm. It doesn't look like 2 1/2 it looks like 1 1/2. Is it really 2 1/2? I can't railroad my print, so I will have to seam the middle which is really okay with this design but really want to get this right before cutting. I'll e-mail you just in case you don't read comments this far back… LOVE your blog!
You are my hero! You and The Nester are changing my life! I have been a HUGE fan of hot glue "sewing" for a really long time and have already done my kitchen sink window and breakfast room French door. You guys have made it "cool" to do, so I'm gloating a little as I look at my own handiwork! I have been hemming (haha) and hawing about my two large breakfast room windows for ages. I have the fabrics, trims and even the stuff to make beautiful, fluffy, birdy tassels to hang from the bunched up middles. This is IT – the simple, yet beautiful solution I've been waiting for! Questions, though. You say to use TWO AND A HALF times your window width. Hmm. It doesn't look like 2 1/2 it looks like 1 ½ or 2 times at the most. Is it really 2 1/2? It seems like it would hang longer on the sides if it were. I can't railroad my print (the birdies in it would be laying down), so I will have to seam the middle which is really okay with this design but I really want to get this right before cutting…. I know you say to fold it so the selvages (fabric info edges) meet to double the fabric and make it finished on both sides. That seemed a little confusing at first, but I figured out what you meant. If I have to, I can actually pull out the ol’ machine and really sew the pieced areas if that will make the middle easier to work with. Answers?