*This is NOT a sponsored post.
As an incurable DIYer, I very rarely go to the salon for a manicure. I’m rough on my hands, so nail polish only lasts about a day before they start looking janky. I figured I was always destined to be an un-polished gal.
My friend Shelley at the House of Smiths told me that I just HAD to try a gel manicure. It costs more than a regular manicure (it’s around $70 where I live), but my nails looked fabulous for a week and a half and sometimes up to two weeks. The manicurist brushes a special polish on your nails and you cure it under the UV lights for about a minute. The polish was instantly dry. Instantly! Plus, since the polish is cured (aka hardened), it’s not as delicate as regular polish. I could be a rough DIYer AND have pretty nails. But, with two young kids and weekends filled with projects, its hard for me to find the time to go to the salon. I needed to learn how to do gel nails myself at home, so I put that on my growing “things to learn” list.
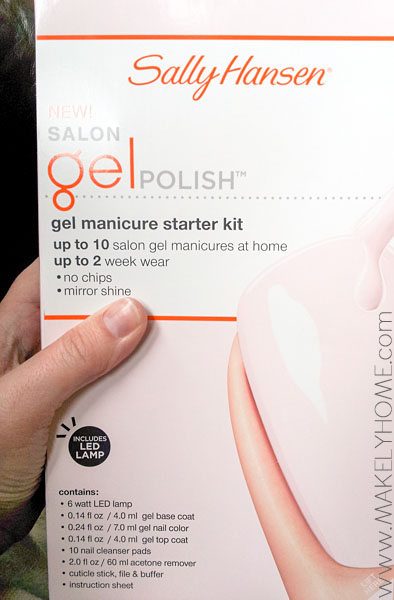
In the last month or so, these new Sally Hansen Gel Salon Gel Starter Kits have been popping up on store shelves. Have you seen them? They are available at CVS, Walgreens, Target, Walmart, Ulta…pretty much everywhere. The kit has everything you need to do your own gel manicure at home. They range in price from $100 a kit to $45 (the cheapest price I’ve found is here on Amazon), and there are lots of coupons floating around, too.
I eyed the kits for a few weeks and read some reviews online. Most of the reviews were really good and the kit cost about the same as one visit for a salon gel manicure, so I decided to buy myself a kit at Target (about $65). The box says that you can create up to 10 manicures with the kit, and you can buy a refill kit for about $15 when your run out of stuff in the original kit (we’ll talk about that later). There are a lot of color polishes you can buy separately, but the starter kit only comes in your choice of two colors – Wine Not (which is a wine color) and Shell We Dance (which is a light pink/nude). It also is supposed to come in Red My Lips (bright red), but I’ve never personally seen that one in stores. I used Shell We Dance.
NOTE: Make sure you are getting the gel polish kit. Sally Hansen also makes a gel strips kit, but the reviews for it haven’t been nearly as good – and since the gel polish dries immediately, you really don’t need to deal with the strips.
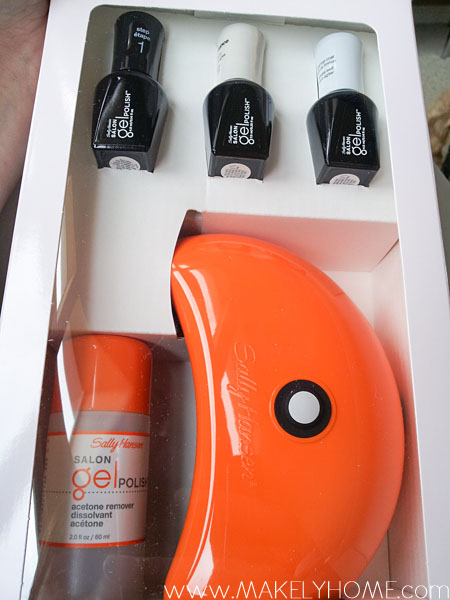
Inside the box, you’ll find a top coat, color coat, base coat and LED light. There’s also polish remover, a cuticle stick, nail file/buffer, nail cleanser pads and instructions.
The instructions are really easy to follow. You remove any current polish you have on your nails. Then, you push back your cuticles and file/buff your nails. Wipe them down with the nail cleanser pads and you’re ready to paint!
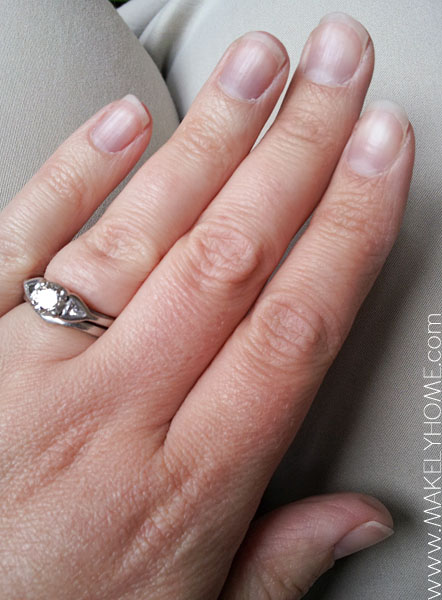
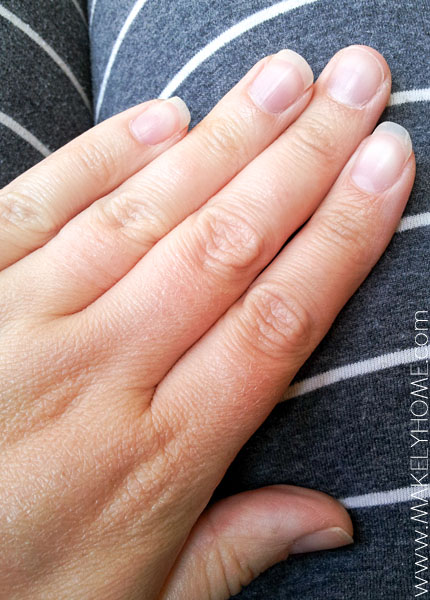
Just as an FYI, here’s what my nails looked like before I started the process.
After each step (base coat, color coat, top coat), you cure your nails under the LED light for 30 seconds. After the top coat, you wipe your nails again with the nail cleanser pads. Ta Da! That’s it. Your nails are dry. Go forth and live your life without worrying about smudging or chipping your nails.

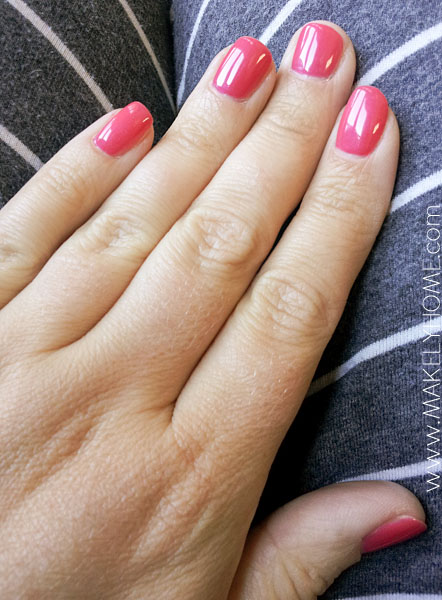
I left my polish on for two weeks so that I could be a good judge of how long this manicure would last. Within those two weeks, I painted a ceiling, planted flowers, built a sandbox for my kids and did everything else a mother does. Here are the week two results:
You’ll notice a few things:
- First, the manicure didn’t chip at all. I’m talking AT All. There’s some obvious growth at my nail bed, but that’s just what happens when your nails grow out of any manicure.
- On my ring finger, you’ll see the jagged bottom edge that happened after I picked at the polish. I applied it a little too thick at the nail bed on that finger, and it looked thick as it started to grow out. I tried to lift that part off myself, and it chipped the polish.
- Last, this polish color really yellowed over time. I find that most light color polishes do that on my nails (gel or not). Maybe it’s the polish or maybe my body emits weird nail polish yellowing chemicals. 🙂
Other things you should know that you may not notice:
- The instructions recommended that you do one hand at a time, from start to finish. I did that and it worked really well.
- The Starter Kit says that it has enough product for up to 10 manicures. I’m certain that there’s enough of all three polishes and the polish remover to last that long. The cuticle stick and file/buffer are always reusable, and cheap enough to buy again when you need to without it being an issue. The polishes are sold separately for about $10 each and the polish remover is just acetone remover that you can pick up for $1/bottle anywhere. The thing I sort of freaked out about was the 10 nail cleanser pads. They are little cotton pads covered in some sort of fluid, and I used three of them for my first manicure. I knew I’d run out of the other ones quickly and need to spend the $15 on a refill kit (includes base coat, top coat, remover and cleanser pads) when I’d likely only need the cleanser pads. Turns out, those pads are just 99% Isoprophyl Alcohol. Whew! Most rubbing alcohol is 70-90%, but that will work just fine.
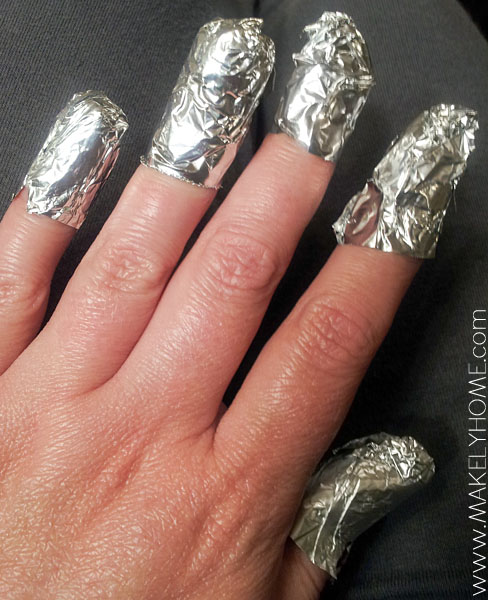
At the two week mark, I decided to take off the polish. To do that, you saturate a piece of cotton with the nail polish remover included in the kit (or any acetone remover), lay it on the nail and wrap your nail in aluminum foil. You leave it like this for 15 minutes.
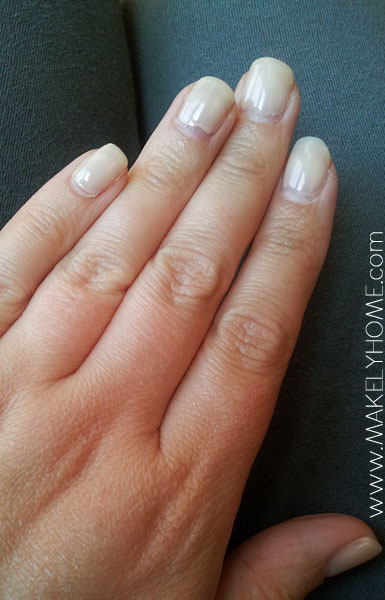
After the 15 minutes passes, you use the cuticle stick to lift off the polish. If it doesn’t come off easily, soak them again for 5 more minutes. Mine were fine after the first 15 minutes, though. Here’s what they looked like after I removed the polish and buffed my nails – no damage at all!
I thought I’d give it one more try before telling you that I thought this was an awesome product. I bought one more color – Back to the Fuchsia (Target, $11.99) – and tried my hand at the process for a second time. Again, the results were great and the color was gorgeous. I’ll update this post in a few weeks to let you know how it held up the second time around.
I am so excited to have found this product that let’s a rough DIYer like me be able to have pretty nails without a huge time and money investment. I love that I can take an hour to do this while I’m sitting on the couch watching TV after the kids have gone to bed. I give it two (beautifully polished) thumbs up!
What are your thoughts? Do you get gel manicures? Have you seen or tried this Sally Hansen set?
*This is NOT a sponsored post.
Thanks for the review. I’ve been wondering how these kits work.
I also tried that kit and blogged about it here! http://warfieldfamily.com/2013/02/diy-gel-or-shellac-nails/
Igot my kit on wish .com twevle nail coolersthe light set,for 34 dollars’you should go thereljust thought I’d share why pay more when you get ever thing,i got over 30 pices,
I have wondered about these kits. I’m glad you tried them for me! I don’t paint my nails, but I do my toes and wonder if it would be a good idea to try it on my feet. I don’t know if the foil removal would be hard to do on my feet…..just thinking out loud. Great post! Lisa~
I tried the other day to stick my toes in the LED light, and they fit! LOL You’d have to get someone to help you with your toes, though. I can barelyeven paint my own. I’m not as bendy as I used to be!
I’ve been wondering what gel nails were! I’d like to try this, but I wonder if the gel formula would aggravate my allergies like most nail polish does?
Hmmm…good question. I’d never heard of nail polish allergies before, but my neighbor’s daughter had to go to urgent care after getting her first pedicure. Wow! What kind of polish can you use (I thought I’d pass it along to my neighbor)?
I love getting gel manicures since they last so long, but I can’t afford to go to the salon every 2 weeks so I usually have several weeks of bare nails in between. How much did this kit cost?
SWEEEEEEEET!
I get gel manicures every two weeks. Love having my nails look pretty all the time. I was quite surprised that your salon charges $70 for a gel manicure. That is double what I pay (mine are $35) Although this looks like a great product and I believe it works, I don’t have the patience or steady enough hand to file my own nails and paint them neatly. Even though it would save me money, my nails would look sloppy and I would miss out on my mini shoulder massage and movie while getting my nails done. My friend has this kit and loves it. Thanks for the great review.
Yeah, I’m not the best nail painter. Ha! Maybe I’ll get better over time?
And I WISH I could pay just $35. That’s what a plain, chippy regular mani costs. Sigh. 🙁
Thanks for the post and review. I never paint my nails since I am so hard on them. A friend told me about getting the gels at a salon, but I wasn’t thrilled with the price, having to make an appt. I will definitely be trying this.
First of all, let us all write a “shame on you” review on yelp for your salon…$70 bones?! It can’t be! Mine costs around $35.
I started doing the gel because I’m rough with my nails too but I noticed that my nails were weaker when they changed out the polish. When they removed the gel I’d have tears in my nails. I’m not sure if anyone knows what I mean but they looked like I just got my acrylics off. Not good.
But your nails looked so healthy after you removed the gel….I might actually do this!!!
Thanks!
Christine
I know, right? It’s CRAZY! If I get a gel mani and a regular pedi, I don’t get out of there for under $100. It’s insane.
I know exactly what you mean about how they look when acrylics come off. My mom has been doing gel for a really long time now, and hasn’t had that problem at all. But, she’s always had really super strong nails. I wonder if that has anything to do with it?
Christine, I have had the same experience with my nails being weak after removing the gel or Shellac polish. Hopefully this kit won’t be so hard on them!
Lindsay, I get mine done at Tarrytown nails for $35 and they do an awesome job!
Thanks again! May I say, you have pretty hands, too. I’m going to find this kit asap!
huh. i think i’m going to give this a go. chipping is the entire reason i never get manicures (i don’t have that problem with pedicures)… it drives me insane. i would LOVE to have polish last a week or two.
Lindsay, thank you so much for writing this unsponsored review. I have had a few gel manicures at the salon and they last SO long, even for this DIYer who totally abuses my hands! But they are cost prohibitive to get on a regular basis so I have been eyeing the kits. I appreciate reading about your experience with it and will definitely give it a try at home myself!
THANK YOU for sharing this review! I’ve been toying with the idea of buying one of these kits and I think you have just sold me on it!!! 🙂 Only thing is I wish they made a french manicure that came out nice and neat automatically too. 😉 LOL
OMG! I thought there was NO WAY I’d ever have pretty nails, also because of my compulsion with scrubbing, sanding, and painting everything I encounter. I’m so excited to try this! You rock, my friend, thanks for sharing. 🙂
Hey, Lindsay, I’m so glad you tried this and I’m really tempted to get a kit. Not much stays on my nails and I would love have it stay on 2 weeks. Might be worth it for sure! Glad you tried it and gave a review.
Thanks for this review! I have gotten my nails done with gels for over and year and LOVE them. I will have to try this set. Just a quick tip — when I go to the salon, I get a French Shellac mani. As it grows out, I go back and fill in my nail bed with clear polish. The whole thing looks great, then, until I get it removed. 🙂 I have gone as long as 8 weeks with my nails still looking pretty good using this method!
I love this idea, Melis! Great thinking. I’m going to have to try that.
Gel nails are the best because I can clean, cook and use my hands with no worries about chipping, fading or breaking. The worst part is soaking them in acetone to get them off – it can take awhile.
I always seem to smudge my nails after a manicure. After I started getting gel I didn’t have that problem. Don’t think i’ll ever go back to regular polish.
I used to get gel manicures but I didn’t like the way my nails were left when removed. I am a nurse and wash my hands constantly so my nails will grow when I have a few days off and break from being the in water so much when I return to work. I usually get french tip manicures (looks so clean) and knew I would have to keep going every week since I can’t work on my own right hand (it looks like a 2 yr old did it). I recently tried something and it worked! I went to have my regular manicure done and when I got home I put a coat of the gel clear over my beautifully manicured nails and sat them under the UV light for a couple of minutes….viola! The french tip is beautifully sealed under the gel clear coat and my nails underneath will not be weak and flimsy from the treatment they do in the salon. It has been 4 days and not a chip so far.. finally!
Hi – I,m so glad I came upon your website…been wanting to try this too..does anyone know if you can start this gel program over acrylic nails, or use tips until the nails grow out. When I take the acrylic nails off for a new set my nails are SO short…thanks Kay
Hi! Found this on Pinterest. One of the best reviews I’ve read. Thanks!!
I love this review of the Sally Hanson Gel Manicure set! I’ve been intending to try this kit for months but haven’t yet. But I have one quick question (or two) … can I use nail tips with this? And if so, how? I like having the nail tips because my nails have always been short and I enjoy having long nails (thank God for tips!).
Thanks for the help!
– Amber
Hi Amber! I haven’t tried it with tips, but I don’t see any reason why it wouldn’t work the same way. I know they do it like that at salons. I’ve never done tips myself, though, so I don’t know how to do it.
I also forgot to mention that I found your gel manicure, nail hack on pinterest – which has lead me here!
I just want to know if you can use this on your toes?
You sure can!
I bought the same Sally Hanson Gel kit. I love it because as I’m aging I have ridges in my nails and the gel base coat, the color, and the top coat high the ridges. Also, I live the high gloss shine. In addition, my nails constantly break and chip and this seems to protect them from doing that. However, my manicures never last two weeks. I have to admit that sometimes I tend to absentmindedly pick at the polish and peel the color off. I know that’s a no-no and have been trying to stop myself. My favorite Sally Hanson color is Pink Pong. I usually don’t wear dark colors because my nails are too short and I think the dark colors only look good on longer nails.
Oops!! Forgot to mention that I, too, thought the wiping pads were too expensive until, like you, I read the ingredients and realized they are simply alcohol wipes. You can get a box of about 50 packets at the local Dollar Store for $1—a lot cheaper than buying the Sally Hanson brand. But you definitely have to wipe the nails with alcohol. I tried not doing it and it didn’t turn out very well.
Thanks for this revew…I just got the kit and the LED lamp…but I had got some of the gel products before awhile ago such as the gel strips (they are much harder to apply) so i put them on my shelf and forgot about it lol….but this time I really wanted to try it… I have been doing my own nails for about a year now because going to the salon is a rip off..around my neighborhood in Teaneck NJ…it costs $70 for a full set (acrylic) and $90 for a gel set….i spent the $70 once because i had a wedding to go to but never again! so after i put the nails on i started the gel nail polish…i don’t read instructions cuz i have a bad habit of thinking i can do it myself lol so i threw them away (stupid me)…SO i went online to find out how to do it because as u know the polish is NOT like regular polish and its weird lol….thankfully i found your site and was able to sucessully apply the polish and finish the process…it is GREAT…i have the ‘jaded’ polish on now and i also have the (sorry i don’t have them in front of me and don’t know the actual names of the polishes) white one, the silver one, and the deep blue one…i will be building my collection…Sally Hansen products are the best!…thanks again
This is a question about the Sally Hansen gel kit.
Can you use other Gel brand polishes that require the light to seal?
Or do you have to use Sally Hansen brand only
Have you tried any other brands of gel polish with the light that is included?
Hi Becky-
Yes, I have! In fact, I loaned it to a friend who does nails for a living because the light she had took 2 minutes to cure. I know she uses OPI (and some others I can’t remember), and it worked great for her.
Oh my gosh thank you so much for this post! I just did my nails but I only purchased the polish (I already had a light) and didn’t have the nail cleanser pads-I just got done doing munchies nails and couldn’t figure out how to get the tacky residue off at the end!!! A quick Google search lead me to your post-so THANK YOU for mentioning that those pads are rubbing alcohol! It did the trick!
It has been a very descriptive and useful article about manicure sets. Thanks
I just got mine today! I have to tell you that I loved the product. I used to have one that did a finger at a time. But this ones watyyy better and faster!
Thanks for sharing this with us. Very interesting information, worth recommending.
A good blog always comes-up with new and exciting information and while reading this article, I do get a vibe that this blog really has all those qualities.
I will definitely recommend this article to my friends and other communities.
I also prepared a similar content on my blog. Really this is more detailed! Thanks.
Purchase bulk detergent from one of the top B2B marketplaces, Trade Key, which will connect you with bulk detergent suppliers for your sole online store.