Makely

Let's Make Life Awesome

  • Home
  • Decorating/DIY
    • Create Your Decor
    • Decorate Your Home
    • Paint Your Walls
    • Transform Your Furniture
  • Healthy Living
    • Essential Oils
    • Family Wellness
    • Household Care
  • Project Gallery
  • Contact
You are visiting: Home » Decorating/DIY » Create Your Decor » How to Iron Wide Width Fabric (Without Pulling and Tugging)

How to Iron Wide Width Fabric (Without Pulling and Tugging)

by Lindsay Ballard on August 27, 2013 11 Comments

How to easily iron wide with fabric - think drapery, quilts, bedding, etc via MakelyHome.com

This summer, I have been working (occasionally) on making the most epic shower curtain of all times for my kids’ bathroom.  It was a huge project and was taking forever since every time I sat down to work on it, my kiddos needed something.  It was like I was trying to use the phone (and I know other moms know what I’m talking about).

When I finally got to the point of needing to iron the 90-inch wide project, I realized how much I hated to iron wide width fabric.  It’s the same with drapes, quilts, bedding – anything that’s wider than my ironing board.  I’d always have to iron one section, pull the other section onto the board, iron it, and tug down to the next part.  By the time I was finished, I was sweating from all of the pulling and tugging.

But no more!

How to easily iron wide with fabric - think drapery, quilts, bedding, etc via MakelyHome.com

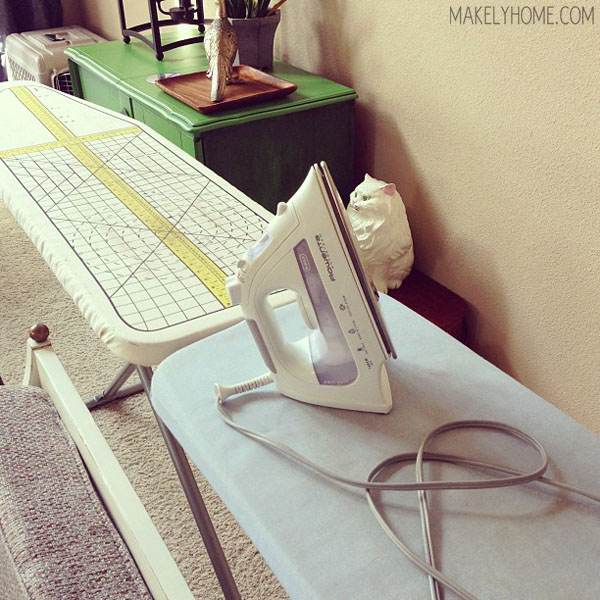
Right before I got started, the old gears in my head reminded me that I actually had two ironing boards (and two irons).  I use one (the blue one) for our clothing and the other (the ruled one) for craft and decorating projects.  Why?  Well, I’ve learned the hard way that things like iron-on stabilizer can smear onto an ironing board cover and iron and end up ruining the next thing you press.  Instead of taking that risk with my clothing, I only use my craft board for ironing anything that could smear.  I think every crafter/decorator should have two irons and ironing boards.

I butted the two long ends of the ironing boards together and adjusted their heights so that they were level.  Then, I laid my project across the top of them.

How to easily iron wide with fabric - think drapery, quilts, bedding, etc via MakelyHome.com

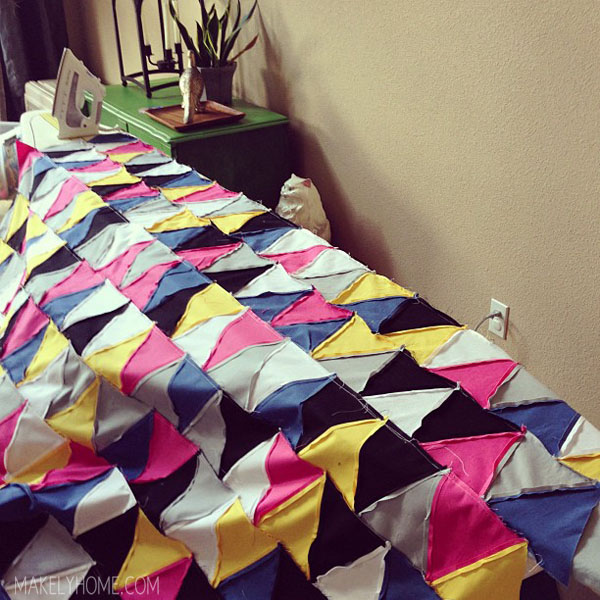
BAM!  I was able to press the whole width of the fabric at one time.  It made the process go twice as quickly and kept the project from getting wrinkled due to the pulling and tugging.  Why can’t my genius be used for big things like curing cancer and ending hunger?

I’m proud to say that I got the entire project finished last night, and I’m eager to get it hung up in the bathroom.  You better believe that there will soon be a post with more details!  Until then, grab yourself another ironing board the next time you are at the store, and get ready to have your mind blown.

About Lindsay Ballard

Lindsay Ballard is a former college mascot turned political geek turned roller derby playing, DIY fanatic.

Lindsay chronicles her projects, design ideas, and lifestyle tips here at Makely, where she shares tutorials and inspiration. Her DIY designs are bold and graphic, while her spirit is fun and full of color.

Lindsay lives outside of Austin, Texas with her husband (Tom), children (Zack and Emma), and dogs (Duke and Jill). She plays roller derby for the Rockin' City Rollergirls out of Round Rock, Texas.

« Feature Wall Friday: A Plate Wall with Movement
Feature Wall Friday: Mirrored Window Walls {and a Discount Code to Payless Decor} »

Comments

  1. Laurie says

    August 27, 2013 at 7:43 am

    What a great idea! This IS genius! I like to use the ironing board to pin things out on too and faced the same irritation with limited length. Problem solved!

    Reply
  2. Lindsay O. says

    August 27, 2013 at 2:22 pm

    This definitely falls under the “why didn’t I think of that?” category! And you may not have cured cancer of ended hunger, but you just saved a lot of mamas A LOT of frustration, which means they’re less likely to strangle their families. See? All good!

    Reply
  3. Lin says

    August 27, 2013 at 3:45 pm

    Oh my goodness…I can’t believe someone hasn’t thought of this before….you are one smart cookie! Thank you for this awsome idea!

    Reply
  4. Jeannine says

    August 27, 2013 at 5:08 pm

    Way to go! Thanks for sharing.

    Reply
  5. Julia @ cuckoo4design says

    August 28, 2013 at 4:55 pm

    I knew it, you are a genius! 😉

    Reply
  6. Millie says

    September 12, 2013 at 12:20 pm

    Where did you purchase the ironing board cover with the measuring diagram on it? I want one!

    Reply
  7. Carol says

    October 18, 2013 at 11:09 am

    Pure genius, as previously posted, why didn’t I think of that. Thanks so much for sharing.

    Reply
  8. car54 says

    December 4, 2013 at 9:49 pm

    I’m a quilter and I’m always working with super wide things. I am too old to get down on the floor to baste I have a bad leg that hurts when I bend it the wrong way–so I bought 2 sheets of super thin laminate board at Home Depot—they are 2 ft wide by 8 ft long. It is the kind of stuff you see on the back of book cases.

    I lay them over my dining room table–and depending on what I am doing–i can overlap them and make them even longer, or lay them side by side and make them wide.

    I am pressing a lot I drape a blanket under whatever I am pressing.

    For basting a quilt–I layer my back, batting and top, then slide to the middle–baste across, slide a little baste another row-it is pretty easy to keep things smoothed if you do it in an orderly way–and no crawling on the floor.

    Reply

Trackbacks

  1. handmade savvy saturday | the handmade home says:
    August 31, 2013 at 9:41 am

    […] This may be the singlemost smartest thing I’ve ever seen. Ever. Via Lindsay @ Makely Home. Like, Duh. […]

    Reply
  2. How to Make Your Own DIY Shower Curtain - Makely School for Girls says:
    October 3, 2013 at 8:24 am

    […]  After the triangles were assembled, I used my double ironing board technique to press open the seams on the […]

    Reply
  3. 20 Ways to Use Your Steam Cleaner says:
    October 13, 2014 at 10:41 am

    […]  Curtains and Drapes – What a pain it is to iron curtains, even if you do use my self-declared genius solution of doubling up the ironing board.  With a handheld steaming unit, you can steam the wrinkles out once they are […]

    Reply

Leave a Reply Cancel reply

Your email address will not be published. Required fields are marked *

This site uses Akismet to reduce spam. Learn how your comment data is processed.

  • Email
  • Facebook
  • Instagram
  • Pinterest
  • Twitter

About Makely

Lindsay Ballard is a former college mascot turned political geek turned roller derby playing, DIY fanatic.

Lindsay chronicles her projects, design ideas, and lifestyle tips here at Makely, where she shares tutorials and inspiration. Her DIY designs are bold and graphic, while her spirit is fun and full of color.

Lindsay lives outside of Austin, Texas with her husband (Tom), children (Zack and Emma), and dogs (Duke and Jill). She plays roller derby for the Rockin' City Rollergirls out of Round Rock, Texas.


Archives

Categories

PRIVACY POLICY
Copyright © 2009-2019 Makely School for Girls | All Rights Reserved | Posts may contain advertising content or affiliate links