It should be no surprise to hear me say that I really love to decorate and do things around my home. I mean, I write this blog about decorating, DIY projects and taking care of the house. I get the biggest thrill from taking a builder’s beige room and turning it into my own special kind of awesome.
But after about 6 months with a new room, it starts to feel stale to me. And that feeling can only lead to two things – me redoing the entire thing (which is silly) and me figuring out out to refresh the room without spending a lot of time or money. I always go for the 2nd one.
Today, I’m going to show you how I’ve refreshed our playroom. This technique can work with any room – just apply it to anywhere you’ve styled, like coffee tables, dresser tops or your mantel. Even a small area will make it feel like your room has come alive again. Not in the zombie way, but in the, “Oh, I love that!” way.
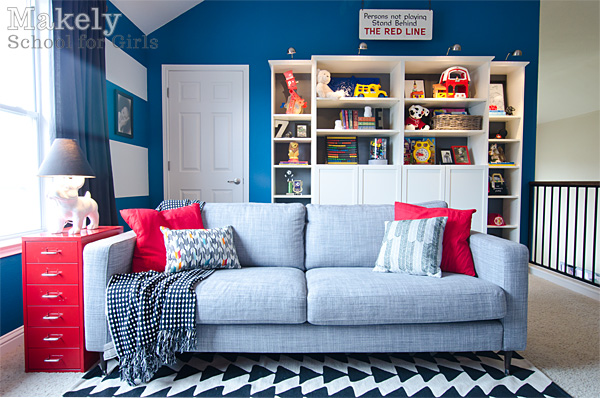
This is what the room looked like before. I loved it, but I wanted to have a little change so that it felt new again.
(Here’s how we built the bookcases for this space.)
I decided to focus on the bookcase styling. It was originally decorated with toys – both vintage toys and my kids’ toys. But since they ended up playing with the stuff and not putting it back, the bookcase never really looked as good. I don’t want you to think I’m faulting them – I’m not at all! The toys are there for them to play with. But, after spending a lot of time trying to get it back to how it was when I first styled it, I decided we needed a change. I also wanted to add some brown wood tones into the mix.
So, I took everything off the shelves and put it in the middle of the floor. I needed a total clean slate to work with.

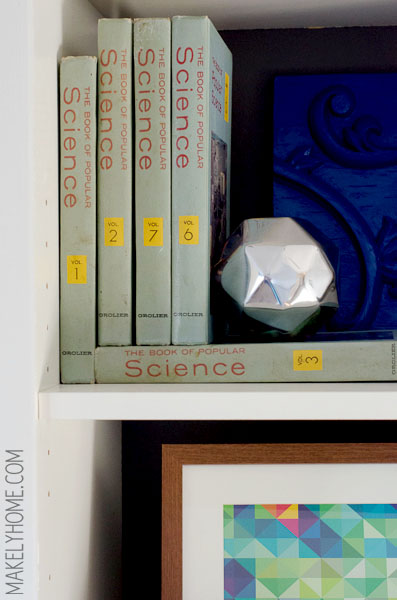
Then, I started placing things back on the shelves. I found a few things at the thrift store that I wanted to add, like a set of science books from the mid-1960s. I also grabbed a few little things from Ikea. But more than anything, I reused the stuff that was already there and added things that I had stuck in my decorating closet.
Here is the end result.
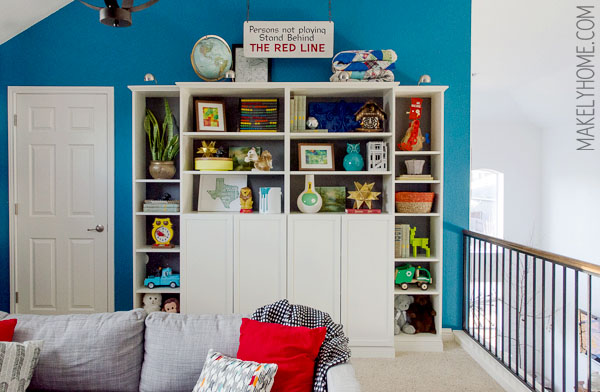
If you scroll between the before and after shots, you can see that the new bookcase has a different feel – more of a “collected over time” styling than a utilitarian toy storage styling. And you know what? That works for us.
You may notice that the bottom shelves do still have only toys and books, which is because those are the areas where my 3-year old, Emma, can reach herself. Their other toys are still stored behind the bookcase doors and in the closet to the left. They can reach everything that’s appropriate for their age – some of Zack’s (7) toys with a million pieces are higher in the closet so that Emma can’t get to them without help.
I also took the symmetry away from the shelf spacing on the outer edges of the bookcase, and I really like that right now, too.
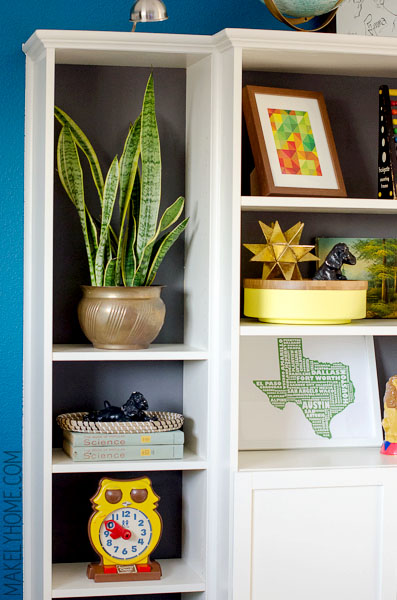
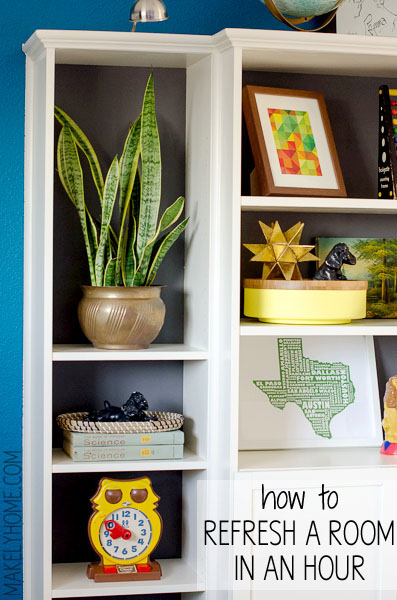
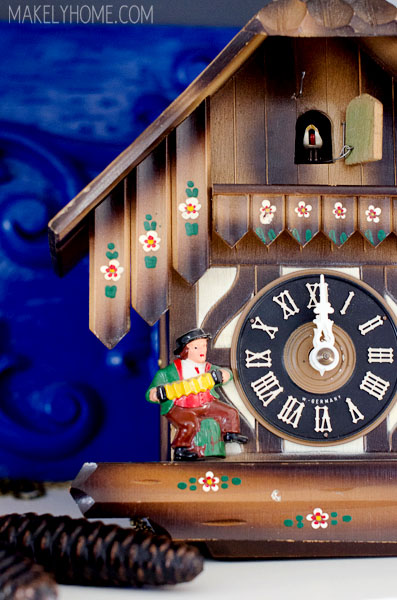
I added things I’ve been wanting to display but didn’t have a great place to put them. Like my vintage cuckoo clock.
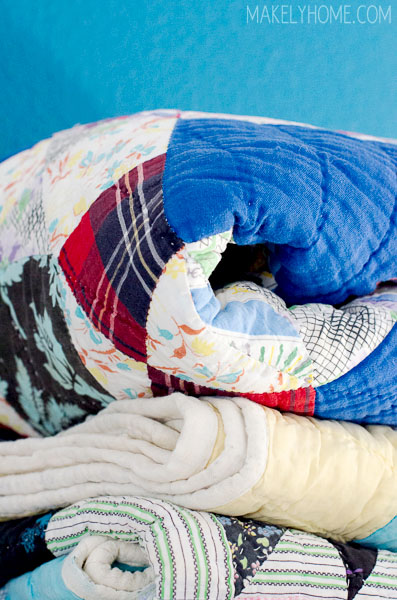
And my great, great grandmother’s quilts.
And my faceted silver ball.
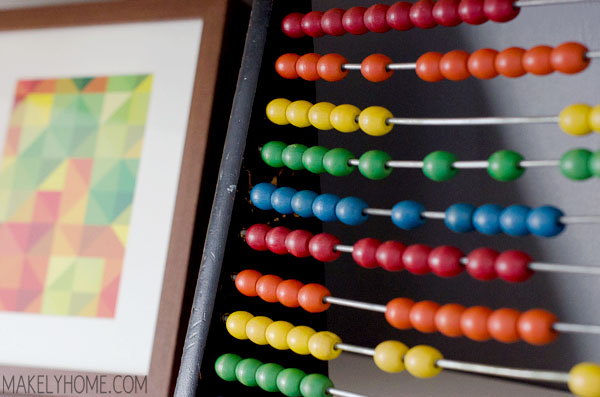
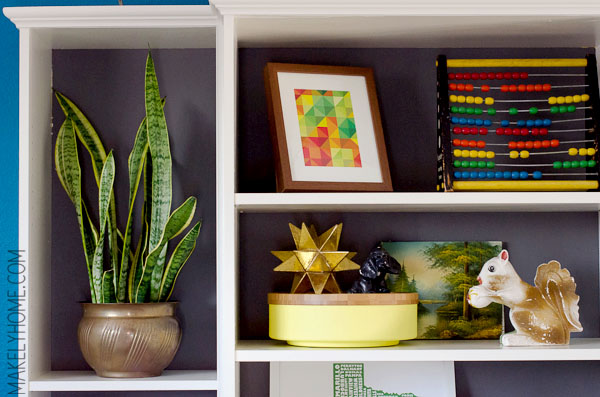
I added back things that used to be in the bookcase, but I gave them different styling. Like this vintage abacus toy paired with a pixel card print from Ikea.
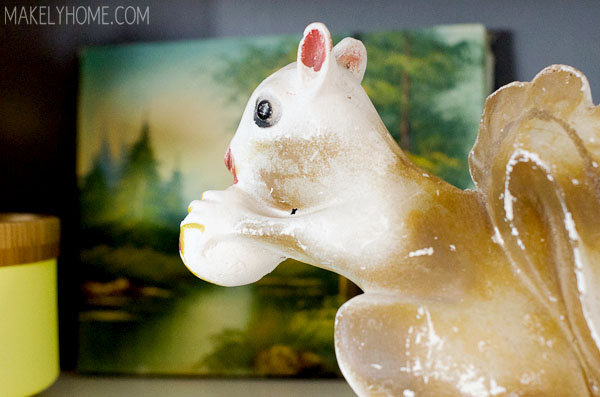
And my chalkware squirrel paired with a thrifted oil painting.
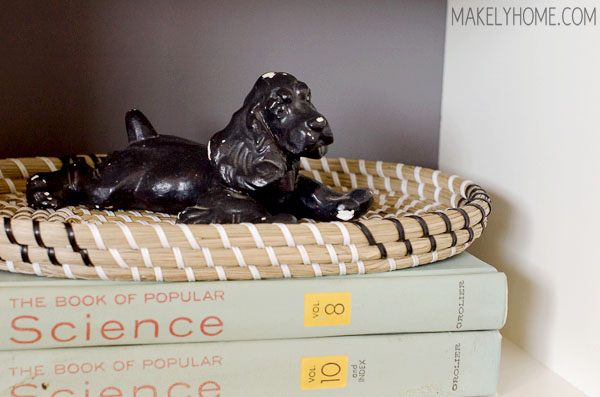
And this little dog with some of the vintage science books and a thrifted Nate Berkus tray.
In all honestly, the room probably doesn’t look that different to most people who see it. But to me, it’s entirely different, because there are new things for my eyes to land on. It took me less than an hour to restyle the bookcase, which will buy me 6 more months until I feel the need to move things around again.
So, if you have a room that’s feeling stale, remove all of the styling. Shop your house or take a quick visit to the thrift store to find other items you can add in. Rearrange your accessories in different pairings. And put your favorite things back in different locations. Instead of feeling stale, your room will have a new energy.
How often do you refresh a room by restyling it?
Looks good! I did the same thing recently, moving furniture around and pulling my Mexican blankets out of storage to display. Although I didn’t make any huge changes, the look is very different 🙂
I can definitely see the difference! I noticed more pops of color and adjusting some of the shelves made the whole thing look taller. You’ve just inspired me to tackle some bookcases of my own.
Love the styling! Even if you’re the only one who notices — it’s your house and you’re the one who has to (gets to!) look at it all the time. My idea of restyling is bringing in more stuff from the thrift shop that I’m going to redo or make into something *someday* and trying to find a place to put it where the humans/dogs won’t trip over it!
I love your tips for restyling! But I also love your green Texas print on the left below the dog and squirrel. I live in San Antonio and I think I need one in my house. 🙂 Where is it from? Thanks again for the awesome tutorial!
Unfortunately no one room of our house is completely styled, so things change as furniture comes in. But I enjoy the tipsand know tthey’ll help eventually!
Where did you get that Texas print?
Hi Cassie – That’s from MapMyState.com