Makely

Let's Make Life Awesome

  • Home
  • Decorating/DIY
    • Create Your Decor
    • Decorate Your Home
    • Paint Your Walls
    • Transform Your Furniture
  • Healthy Living
    • Essential Oils
    • Family Wellness
    • Household Care
  • Project Gallery
  • Contact
You are visiting: Home » Project Gallery » Page 64

How to Create a Real Drum Shade Pendant Light

by Lindsay Ballard on September 22, 2011 1,911 Comments

What do you think of when you hear the word ‘drum’?  I’d assume that most people think of their kids loudly playing a drum kit in the garage, high school football halftime shows, or their favorite rock and roll band.

But, most people aren’t us, are they?  We DIYers and home decor obsessed people probably have a drum shade spring to mind instead.  Or, at least I do.

I’ve been rolling around the idea in my head for the past few months on combining the best of both versions of drums.  I’m glad that I let my mind wander down that path – it’s a lot of fun when I can dream up something pretty farfetched that ends up becoming reality.
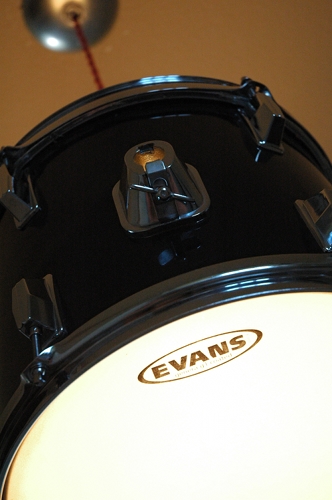
Creating this fixture was actually a pretty simple process once I figured out what to do.  I put together a tutorial so that you could do it, too.

DIY Drum Pendant Light

Materials Needed:

  • Used Tom drum
  • Short piece of scrap wood
  • 4 finishing nails
  • Drill
  • Jigsaw
  • Pendant light kit (I HIGHLY recommend the cloth cord kits from Shanell’s)
  • Scissors or X-Acto knife, if needed
  • Canopy

1.  I bought a used Tom drum off of Ebay for under $30 shipped. I’m sure I could have found a better deal at a thrift store or pawn shop around town, but I knew what I wanted and was willing to pay a little extra so that I didn’t have to drag the kids all over town. This Tom is 12 inches tall and 10 inches wide.  Any size will likely do – you’ll just want to make sure it will fit in your space.

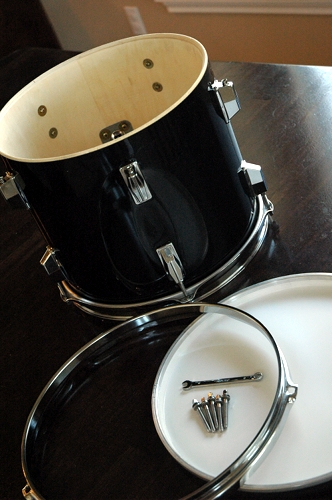
2.  I removed the top and bottom of the drum by unscrewing the screws that hold it together.  I was able to unscrew it with my fingers, but you may need a really small socket or “drum key.”  Please note, I know not one single thing about drums, and I’m sure the top, bottom and little screws have a name.  I’m going to just call them my own terms so that other non-musician DIYers, such as myself, can more easily understand the instructions. The top and bottom will separate from the chrome ring.
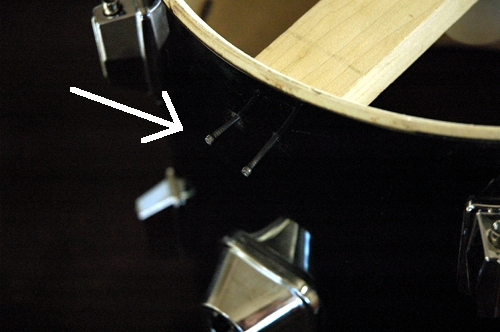
3.  I cut a piece of scrap wood so that it would fit tightly inside the drum without distorting its shape.  I didn’t curve the edges; I just cut it straight across.  On either side, I hammered in 2 finishing nails to hold it in place (drill small holes first to make it easier).  In the below photo, I hadn’t hammered them in all the way so that you could see them more easily in the photo.  Obviously, hammer them all the way in.  I colored the nail heads black with a Sharpie marker since my drum is black, but they are pretty well hidden by the chrome rings once you put the drum back together, so you might not have to worry about that.
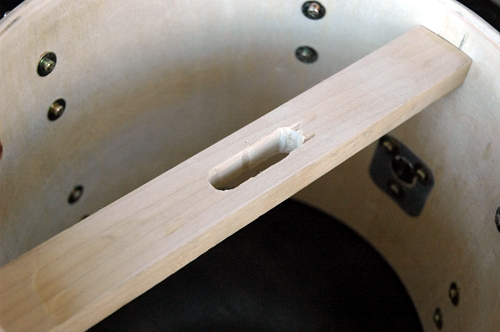
4.  Once the strip of wood was in place, I needed to create a slot for my light fixture to thread through.  I drilled three holes that were roughly the diameter of the the piece I needed to thread.

I used my jigsaw to connect all three holes into one long slot.  The reason you need to do this is to be able to balance the drum.  There is a clamp on the side of a Tom that attaches it to a drum kit, and it creates more weight on one side of the drum.  The drum doesn’t hang straight from the center, so a slot gives you the ability to slide the fixture around to figure out its balance point.
5.  Thread your fixture through the slot.  You can pick up a light kit at a home improvement store, which you will hang by a wire and chain.  OR, you can do what I did and use one of the Pendant Light Kits from Shandell’s.  Instead of having the ugly chain, these kits are made from cloth cord.  They come in several colors – red, gold, brown and putty – and in either nickel or brass finishes.  These kits are $29 each and I couldn’t speak more highly of them.  They definitely give a much more finished and vintage look to a fixture.
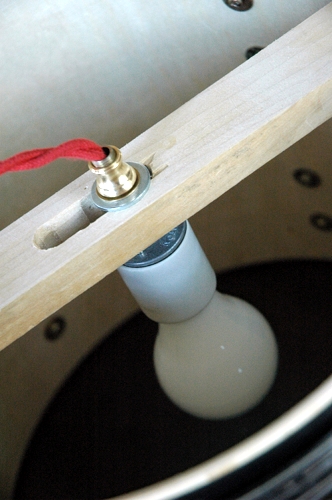
I have a 60-watt blub in the fixture, but that could vary by project.  You will need to test it on your own drum, but mine does not get warm to the touch at all, even when left on for many hours.

6.  Replace only the chrome rim on the top of your drum (where the light fixture is).  You may find that you need to cut (with scissors or an X-Acto knife) the little silver ring off of the what was then the bottom head (they part you don’t play) and put that under the chrome rim.  You’ll see what I mean when you start to put it back together – you want the top to be open, but you may need that silver ring as a spacer in between the drum and the rim.

Flip your drum over and attach the head (the part you actually drum) and rim to what is now the bottom of the drum.  You can just screw the screws back in with your fingers.

7.  Hardwire your new fixture to the ceiling.  You’ll want to buy a light canopy  to hide the wires.  I got mine at Home Depot and spray painted it chrome.

I hung my new drum pendant light in a small area of our entry way.  I could not possibly be more in love with its quirkiness and originality.  I bet you will be the only one in your neighborhood with this light fixture!
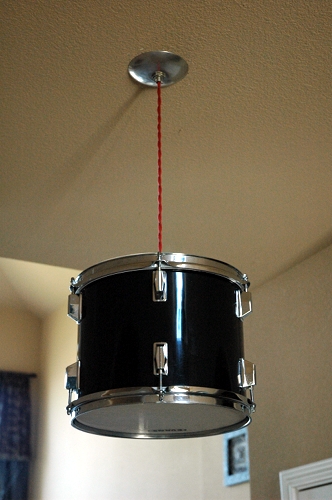
My favorite part about it is the amazing light it throws off at night.  There is an almost ethereal glow that comes through the drum head, and the light that shines on the ceiling really highlights the fixture.
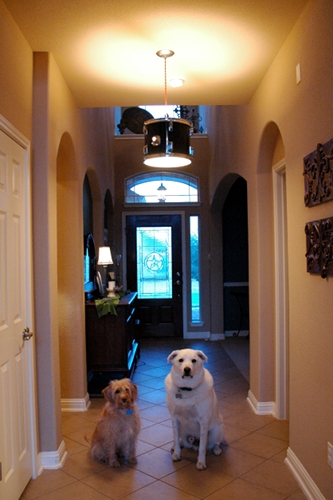
And yes, I totally bribed my dog boys with treats to sit right there.  I sure love those crazy mutts, even if their constant barking makes my head feel like I’m actually living in a drum!

So, what do you think?  Does the term drum shade have a whole new meaning for you now?
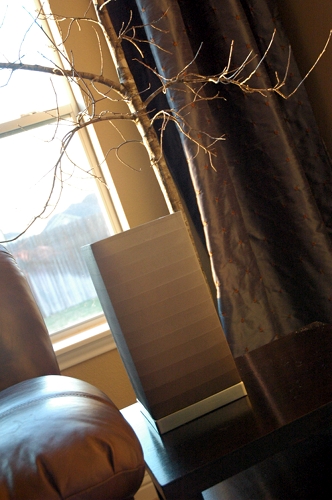
DIY Ombre Striped Lamp Shade {ScotchBlue Painting Party}

by Lindsay Ballard on August 31, 2011 1,044 Comments

Today I’m joining a group of fantastic DIY bloggers in showcasing easy projects we’ve put together using ScotchBlue Painters Tape with Edge Lock Protector.  If you are a long time reader of this blog, you know that my husband and I use ScotchBlue Painters Tape for just about every DIY project – painting perfectly crisp lines on textured walls, caulking, holding together small components that we don’t want to get lost.  Just Monday, I saw that my UPS man was using it to hold one of the small side windows onto his delivery truck.  I’m sure that’s not an intended use, but whatever works, right?

This ScotchBlue Painting Party is actually a blog hop, so click around to the other bloggers to see what everyone created.  Other than myself, participants include Kristen F. Davis Designs, Maison Decor, House Bella, and Craptastic.

DIY Ombre Striped Lamp Shade

Supplies

  • Lamp shade – it’s best to have one that’s rectangular or cylindrical (same diameter across the top and bottom). You can do this project with a shade that’s more conical in shape, but it is difficult to tape.
  • Acrylic craft paint – choose a base color and a bright white.
  • Paint brush – I used a 1″ all-purpose artist’s brush found in the acrylic paint aisle, and it worked great.
  • ScotchBlue Painters Tape with Edge Lock Protector – I used 1.5″ width so I could be sloppy, but any width should work.
  • Ruler
  • Pencil
  • Disposable plastic lidded bowl
  • Teaspoon
  • Straw or something disposable you could use to stir

Directions

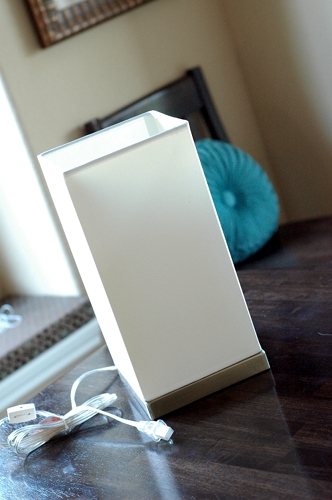
1.  I began with this little desk lamp I picked up at Target for around $15.  I loved its shape and size, but it screamed trying-too-hard-to-make-my-college-dorm-look-cool to me.  It needed a little update.

If you are going to complete this project, I definitely recommend using a shade that the top and bottom are the same widths.  It will make you life much easier when trying to tape off your stripes.

2.  Remove the shade from the base and mark little hash marks 1″ from the bottom of the shade.  Use the painters tape to tape off a 1″ width stripe.  Squeeze an entire bottle (generally 2 oz) of your base color into the plastic bowl and paint the stripe your base color with the paint brush.  I used Vanilla Bean from Martha Stewart’s new line of craft paints at Michaels because I wanted to try it, but any brand will work just fine.  You may also want to choose a lighter base color than I selected, since the light barely comes through the bottom of my completed shade (which could be fine with you, as it is for me).

Remove the tape while the paint is still wet.

Let that stripe dry completely.  It will take about 30 minutes indoors or 10 minutes if you stick the shade out in the sun.

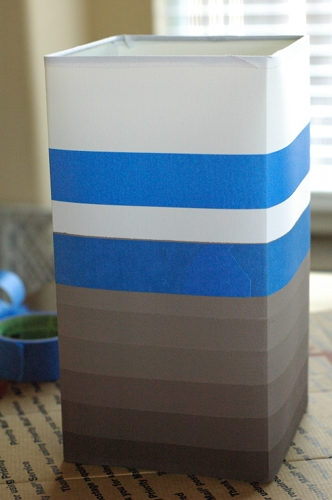
3.  Next, use your pencil and ruler to draw little hash marks 2″ from the bottom of your shade.  Use the painters tape to tape off that line, just like you did the first.  Add a second line of tape ever so slightly above your first painted stripe.  You want a little of your previous color to show under the tape so you don’t risk having any unpainted portions of the shade (see below photo).  Use your thumb to make sure the edges of both tape lines are pressed down well.

4.  Add 1 teaspoon of white craft paint (I used Martha Stewart’s Wedding Cake) to the bowl containing your base color and stir until it is completely mixed.  Use that mix to paint the second stripe on your shade and remove the tape while still wet.

Let that paint dry, as above.

Your lines will not be absolutely perfect if you are painting on a fabric shade (like mine), since the fibers cause the paint to wick a tiny bit.  It’s totally okay, though, because it gives it a bit of a fading effect.  The ScotchBlue Painters Tape with Edge Lock Protector rocks on hard surfaces, but it’s too much to ask for it to completely block fabric fibers.  🙂

5.  Continue the process of marking and taping lines and adding 1 tsp of white paint to your bowl for each stripe.  You will quickly see the ombre effect created by adding the same amount of white paint to each stripe.

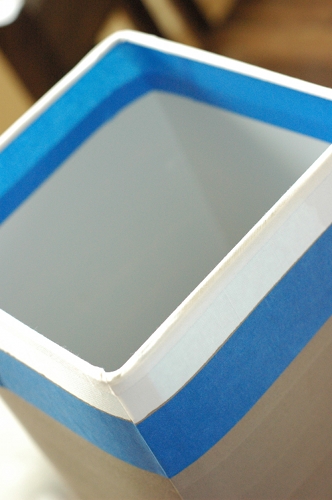
6.  Once you reach the top of your shade, tape off the last stripe as you have been doing.  You may want to also tape right under the bias tape trim on the inside of the shade.  That will keep that trim looking nice when you look into the shade.

7.  Once the last stripe is dry, you are ready to add the shade back to the base.  Your lampshade is now a piece of custom art!

Would you like to win some ScotchBlue Painters Tape with Edge Lock Protector to try this project or any other project you can dream up?  Three readers will win a sample from ScotchBlue!  You have three ways to enter (and please leave a comment for each way you enter):

  • Leave a comment on this post telling me how you would use your ScotchBlue Painters Tape;
  • Tweet @ScotchBlueBrand “I want #supersharppaintlines for my next project!”;
  • “Like” ScotchBlue on Facebook so you can see and/or participate in future painting parties.

Amy at Maison Decor is next on the ScotchBlue Blog Hop, so head over her way!

Disclosure: ScotchBlue Brand reached out to me to participate in the ScotchBlue Painting Party to celebrate the launch of their new ScotchBlue Painter’s Tape with Edge-Lock Paint Line Protector. My post represents my honest experience with ScotchBlue Painter’s Tape. I am not being paid for my answers, but I did receive ScotchBlue Painter’s Tape to assist in completion.

« Previous Page
Next Page »
  • Email
  • Facebook
  • Instagram
  • Pinterest
  • Twitter

About Makely

Lindsay Ballard is a former college mascot turned political geek turned roller derby playing, DIY fanatic.

Lindsay chronicles her projects, design ideas, and lifestyle tips here at Makely, where she shares tutorials and inspiration. Her DIY designs are bold and graphic, while her spirit is fun and full of color.


Archives

Categories

PRIVACY POLICY
Copyright © 2009-2019 Makely School for Girls | All Rights Reserved | Posts may contain advertising content or affiliate links