Makely

Let's Make Life Awesome

  • Home
  • Decorating/DIY
    • Create Your Decor
    • Decorate Your Home
    • Paint Your Walls
    • Transform Your Furniture
  • Healthy Living
    • Essential Oils
    • Family Wellness
    • Household Care
  • Project Gallery
  • Contact
You are visiting: Home » Project Gallery » Page 84

Create an Etched Glass Silhouette Mirror

by Lindsay Ballard on September 17, 2009 122 Comments

A few weeks ago, Kari of UCreate asked me to create a little project for her readers. Of course, I jumped at the chance. I mean, who wouldn’t?

With her permission, I’m sharing that project with you guys. I think (or hope!) you are going to like it, as it’s one of my favorite projects ever. EVER.

Enjoy! And be sure to visit UCreate for lots of great projects each day.

********************

Hi, Guys! It’s Lindsay from Living With Lindsay! Kari has allowed me to take over her blog today to show a little project I created just for you. I sure hope I don’t break anything while I’m here. ::looks around sheepishly::

Anyway, just minutes before it was time to put my 3 year old down for his nap a few weeks ago, I came up with the idea of an etched glass silhouette mirror. Believe it or not, the entire project was finished before he woke up. Folks, you can do this one very quickly!

I’m really obsessed with silhouettes right now. In fact, as I was working on my new project, I realized that Jill’s adorable silhouette pillow from right here at U create may be the original source for my new obsession. I’m totally blaming her. No one’s profile is safe in my home – my dogs and cat have even sat for their profile photo session. I kid you not, but that’s a blog post for another time.

Etched Glass Silhouette Mirror

Supplies:
Mirror
Waxed paper
Contact paper (sticky shelf liner)
Etching cream and foam brush
Tape
Pencil

1. I began with a cheap framed mirror I found at a local thrift store. I was originally going to use it for another project but had a change of direction, so this mirror was just sitting in my craft room screaming to be used.

2. I took a photo of my son’s profile. It must have taken me 50 pictures to get this one. Little, wiggly 3 year-old boys don’t sit still for very long.
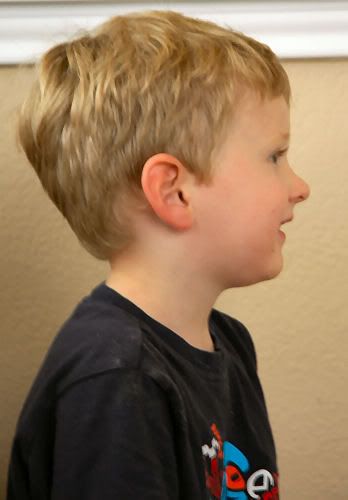
3. I printed out his photo so that it was the size I wanted on my mirror. It took a few attempts to make sure it was just the right size to fit in the mirror. Once printed, I taped it to a window and then taped a layer of waxed paper on top of it. Then, I traced the outline of his silhouette. I took the artistic liberty of smoothing over the cowlick on the back of his head so that it wouldn’t look like I didn’t comb his hair (Well, I didn’t comb it, or change his dirty shirt, but still).
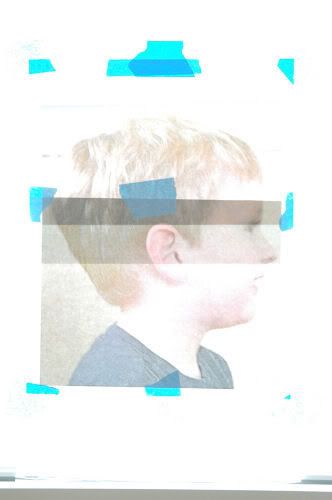
4. I cut the shape out of the waxed paper and traced it onto the contact paper. Then, I cut out the negative of the image.

5. After removing the mirror’s frame, I applied the contact paper directly to the mirror, placing the cut out exactly where I wanted it to be etched, and smoothed the bubbles from the paper. I transferred some etching creme into a plastic bowl and used it to paint the cut out area with the foam brush.
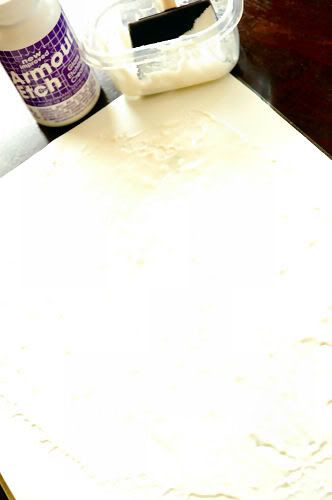
Make sure to apply the cream thickly and evenly. Allow it to sit for five minutes and then rinse the mirror off under running water. It’s hard not to think of the etched glass as painted glass, but don’t worry, it won’t run or smear. You can dry it with a towel and even use glass cleaner.

6. I spray painted the frame an antique white and put the mirror back in the frame.
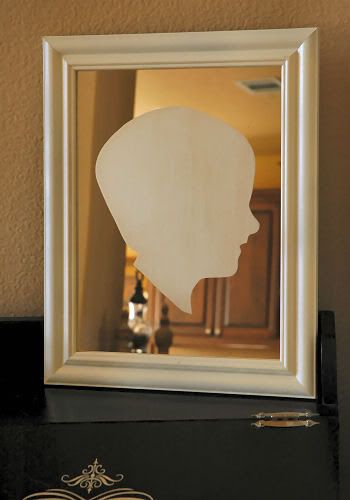
Ta Da! Now, it’s just ready to find a new home. That’s always the hardest part for me!

P.S. I’m adding this to the “Get Your Craft On” party over at Today’s Creative Blog. Stop by and visit!

Easing into Fall Decorating

by Lindsay Ballard on September 7, 2009 84 Comments

Do you want to learn to create this wreath?  Find the tutorial here! 

In Austin, the official start to Fall is the moment our beloved Texas Longhorns take the football field. After 69 days of 100+ degrees this summer ( a new record! Go Austin!), I’m certainly ready for some cooler temps.

In order to usher in the new season, even when it is still in the upper 90s, I’ve decided to take on my Fall decorating baby step by baby step. I’m not too big into decorating for holidays (other than Christmas) and the seasons, but I’ve decided to at least try to give the vibe that it isn’t so hot here all the time. I haven’t done any Fall decorating on the inside, but that will be coming soon.

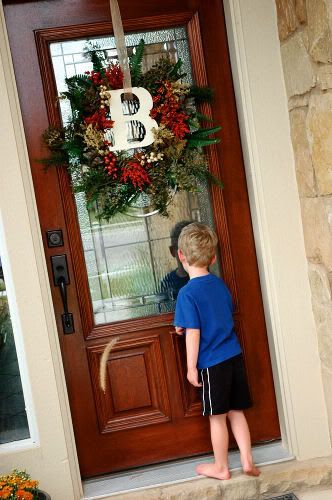
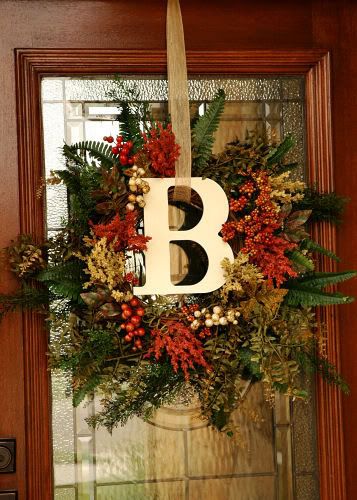
Inspired by the Nester’s new wreath, I created a Fall wreath for our front door by just sticking the wired elements into a grapevine wreath and using no hot glue at all. I know – it was hard to ignore my precious glue gun, but I like the idea of being able to easily change out the pieces when I want to freshen my wreath.

I bought the wreaths (I wired a 14 inch wreath and an 18 inch wreath together), the floral/greenery stems, and large ‘B’ at Hobby Lobby. Everything was 1/2 off and I’ll be able to reuse it all again.

The ‘B’ isn’t actually wood, but instead, it’s heavy pressed cardboard. For $1.99, I didn’t care that it wasn’t wood since our front door is shielded from the elements by our covered porch. I used a little craft paint to paint it a creamy white and I was good to go.

Oh, and ‘B’ is the first initial of my last name. I’m always surprised when people ask me why I have ‘B’ stuff since my name is Lindsay. I think the rest of my family would feel left out if I just put an ‘L’ on everything.

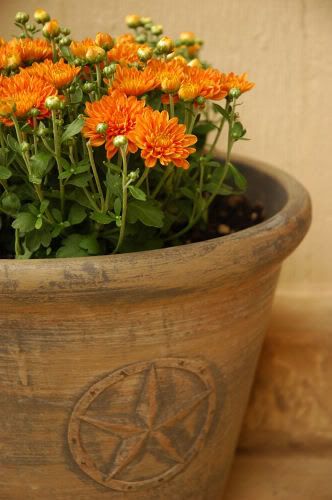
If you follow me on Twitter, you may have heard me say that I was running by Home Depot to pick up some of their $1.25 mums (I believe the sale runs through today, so get over there!). I added them to the planter at our front door.

Now, our front door now looks like it’s time to usher in the cooler Fall weather, even if we are still wearing shorts.

I’m adding this post to Melissa’s Fall Nesting Party over at the Inspired Room. Visit her to join in the fun!
Do you want to learn to create this wreath?  Find the tutorial here! 
« Previous Page
Next Page »
  • Email
  • Facebook
  • Instagram
  • Pinterest
  • Twitter

About Makely

Lindsay Ballard is a former college mascot turned political geek turned roller derby playing, DIY fanatic.

Lindsay chronicles her projects, design ideas, and lifestyle tips here at Makely, where she shares tutorials and inspiration. Her DIY designs are bold and graphic, while her spirit is fun and full of color.


Archives

Categories

PRIVACY POLICY
Copyright © 2009-2019 Makely School for Girls | All Rights Reserved | Posts may contain advertising content or affiliate links