Makely

Let's Make Life Awesome

  • Home
  • Decorating/DIY
    • Create Your Decor
    • Decorate Your Home
    • Paint Your Walls
    • Transform Your Furniture
  • Healthy Living
    • Essential Oils
    • Family Wellness
    • Household Care
  • Project Gallery
  • Contact
You are visiting: Home » Project Gallery » Page 85

The New Kid in Town

by Lindsay Ballard on August 12, 2009 129 Comments

By now, you probably know that I spent six days repainting my son’s room last week. Six days. You must think I’m a terrible, terrible painter for it to take me six days to repaint a bedroom. I would totally think that about me, too.

You have also probably figured out that I was here in my house alone for all that time. My husband took our son for a week up to his family’s lake cabin in Minnesota. I don’t do cabins, cold weather, or creatures, so I decided to stay behind and work on a huge surprise for Zack. I didn’t want to advertise it on the Internet, because, well, people are crazy and I didn’t need some freaky person trying to break in while I was painting, drinking wine, and listening to Top 40 radio.

When I was finished with the room (exactly one hour before I had to leave to go pick up my boys from the airport, I might add), I calculated the hours it took me to pull off this transformation. The answer? Forty-eight. It took me a total of 48 hours to repaint the room. And no, it wasn’t because of the wine.

Here is the before picture so you can see where I started.

It was because I have a bad habit of taking a simple task and turning it into an extreme.

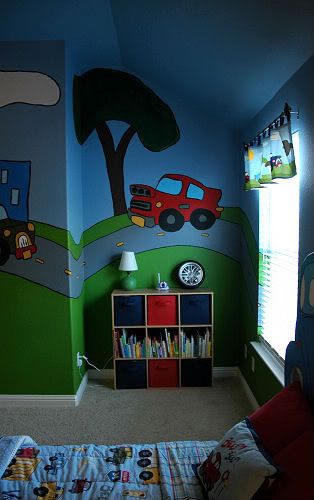
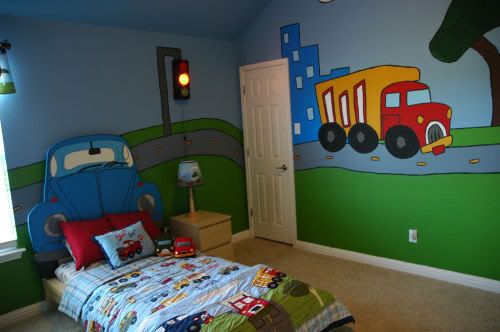
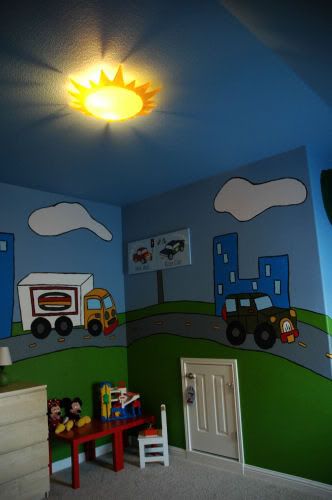
I decided to do something more dramatic than simply painting his four walls a color different than our builder’s beige. He’s a fun and highly energetic three year old, and his room needed to match his personality. I took the concept from his bedding collection (which is the Hit the Road collection found at Target) and just ran with it.
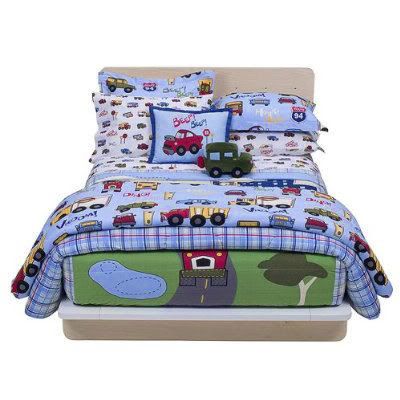

Target.com

Inspired by the lampshade in the collection, I transformed Zack’s room from builder’s brown to his very own town.

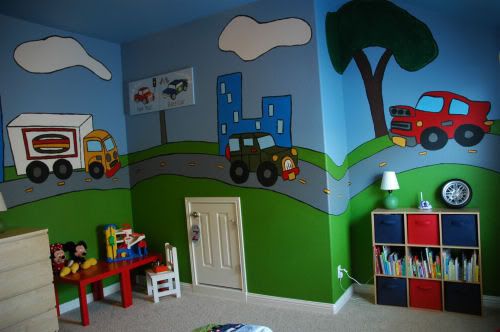
Zack is absolutely over the moon with his new room. He was so surprised when he walked in that all he could say was, “WOW” as his jaw hit the floor. He absolutely loves it, which makes all the hours and sore muscles totally worth it.

I probably spent about $150 total (well, and 48 hours of my life) on the transformation:

1. The paint is from Sherwin Williams (Resolute Blue, Gecko Green, and Storm Cloud) and went on the walls like a dream. I think I paid about $80 or so for paint (I bought the Duration line when it was on sale). It was my first time using Sherwin Williams paint, and I will definitely use it again.

2. I bought two LACK end tables ($7 each) from Ikea and turned them into a little table in the corner of his room.

3. The sunshine ceiling lamp ($20) replaced the builder’s mushroom light that was in his room; I cannot get over the terrific “rays” of light it casts on the ceiling. I just love it.

4. The flashing stoplight was about $18 at Walmart and is the perfect touch to complete his little town.

5. I was even able to find a spot for the two ugly $3 lamps I bought on clearance at Walmart a while back. I bought them for their shades, and I’m so glad to have found a place to put them. The green bases are an exact match to the green paint. I did have to buy two new shades ($4 each at Ikea) to replace the ones I “stole” from them originally!

There are still a few things I want to do in there — new window treatment, add a rug, and put knobs on his dresser and nightstand drawers — but I’m so pleased with the transformation! What do you think?

P.S. A huge THANK YOU goes out to my friend Kristi who kept me company this weekend and painted with me for a few hours. Kristi, as always, you rock! I appreciate you keeping me from carrying on the one-way conversations with my dogs. I was starting to get irritated with them for not talking back.

P.P.S. I’m also adding this to Kimba’s DIY Day Linky party over at A Soft Place to Land. This was a DIY challenge like none that I have ever experienced!


DIY: Create Your Own Custom Headboard

by Lindsay Ballard on July 29, 2009 4,003 Comments

After tackling our living room, kitchen, dining room, master bedroom and sewing/craft room, my son Zack was feeling a little left out. “When are we going to do a craft for me, Mama?” he asked.

Who could resist that question?

I’ve been wanting to work on Zack’s room for a while. It’s very boring with the highly-functional-but-blah blonde furniture and builder’s beige walls.

Zack’s bedroom is going to undergo a big change next week while he is vacationing with his grandparents. I can’t wait to surprise him with his new digs when he returns! Until then, he’ll have to settle for a smaller change that makes a huge statement.

How to Create Your Own Custom Themed Headboard

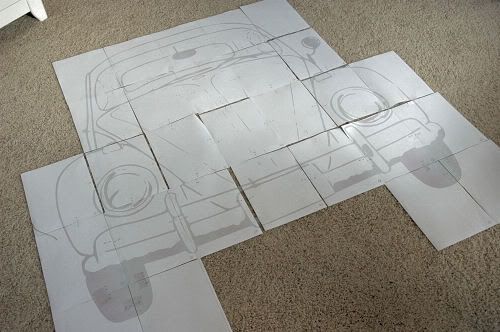
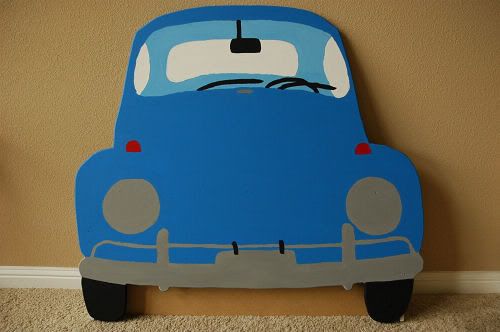
1. I wanted to make a vintage Volkswagen Beetle themed headboard for Zack’s bed, so I found an image online that had the look I was after. Why a Beetle and not one of the cars that’s actually on his bedding? I don’t know. I just wanted to.

On the computer, my husband enlarged it to the size I wanted (the widest part of the car slightly larger than the width of Zack’s existing headboard), but it probably would have been easier to rent an overhead projector from the library and enlarge it that way. It printed out over several (like 30!) pages, so I taped them all together so that I would have one very large image.

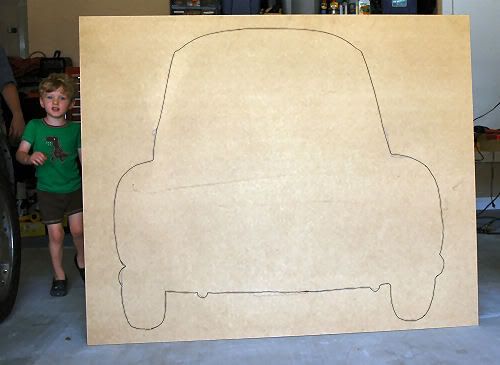
2. I cut out the image and traced it onto a 4×4 sheet of MDF. We chose MDF because it’s easy to cut and and has a very smooth finish. We had to buy a 4×8 sheet (for around $20 at Home Depot), but they cut it ifor us so that we could get it home easily.


Yes, Zack is already excited about his car, although at this point he had no clue about what was going on.

3. Using the jigsaw, we cut out the outline so we would have a perfect car shape. Visit my guest post over at the Blah Blah Blahger to learn all about how to use a jigsaw. It’s so easy!

After cutting out the shape, my husband used his router to slightly round the edges of the car so that there wouldn’t be any sharp corners. This step is completely unnecessary, although it did give it a nice finished look. I think he just wanted an excuse to use his router.

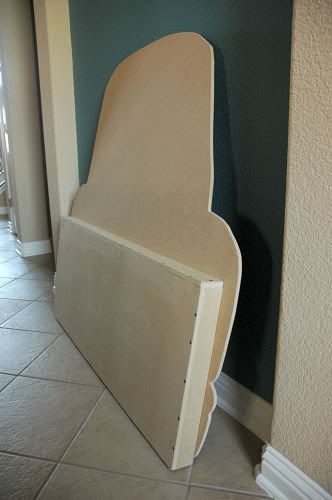
4. Tom created a “slipcover” of sorts so that the new headboard would just fit on top of the existing headboard. He took the measurements of the boring headboard and basically made a slightly larger little box out of MDF and screwed it to the back of the car. This will allow us to add the new headboard without damaging the old headboard.

If you don’t already have a headboard, you can just screw the new headboard to your wall once it is finished.

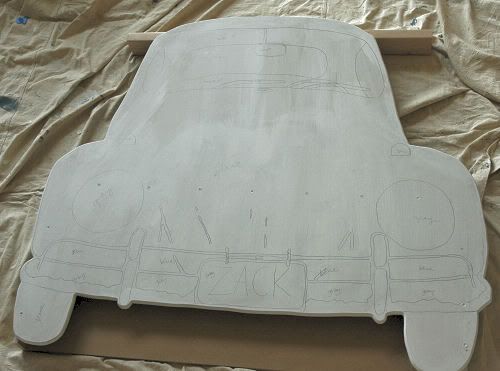
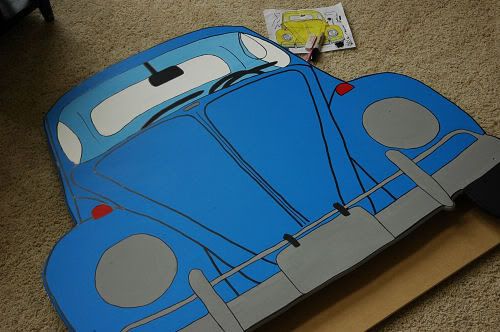
5. Next, I primed the car and drew in the details, such as the headlights, bumper, windshield, etc. I was originally going to get very detailed with the, um, details, but when I realied how long that was going to take, I decided to take it simple. I used my super fantastic newspaper tracing trick and it took no time at all.

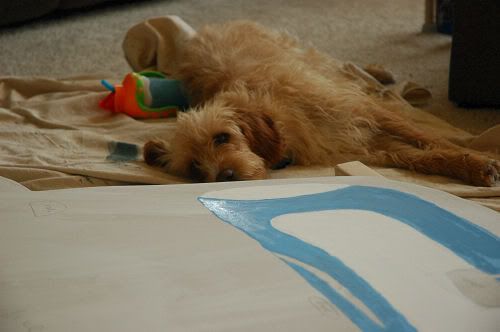
6. Using the basic acrylic paint that sells for under a dollar a bottle at the craft store, I painted the car with foam brushes and small bristled artist brushes. I was able to do the entire thing with four bottles of paint – bright blue, white, black, and red. I mixed the colors in little disposable plastic bowls to form the different shades I wanted to use.

I also had the most adorable dog in the world assist me. Look how mistreated he is. He just wanted to play ball, but mean ‘ole Mama was busy painting. Everyone say ‘Hi’ to Duke!

When painting, I started with the lightest color and worked out to the darkest color. That way, I wasn’t so worried about having one color bleed through another if they overlapped a bit (I am so bad at painting inside the lines). I did two coats of each color before I moved on to the next color.

The double coat fully covered the pencil markings left over from tracing out the detailing.

7. The next part is where I got REALLY nervous. I outlined each of the details I painted with a black permanent marker, which was pretty simple. But then, I had to freehand all of the other details, such as the lines on the hood. I drew them with a pencil before I used the marker, and I learned that I could use a white eraser to erase any stray pencil lines without messing up the paint. Score!

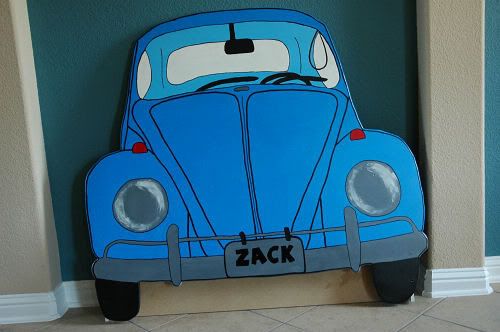
8. I touched up the paint on the areas where the black marker outline didn’t cover up stray paint marks, added some highlighting to the headlights, and again used my newspaper tracing method to add Zack’s name to the license plate.

9. Next, I used wipe-on poly to protect the car from my three-year-old. I was worried the marker would smear when I wiped the poly on it, so I tested it on the back. Yep, I was right. So, I sprayed a clear acrylic sealer I had on hand and let it dry first before I used the poly. It made all the difference. I used two coats of poly and let it dry for about 36 hours before we brought it inside.

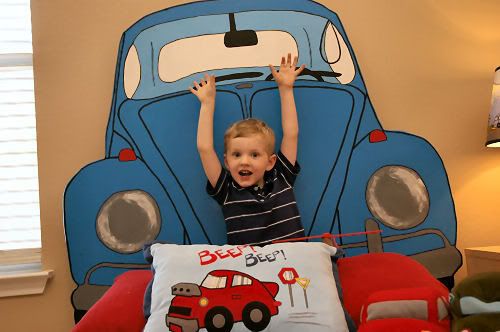
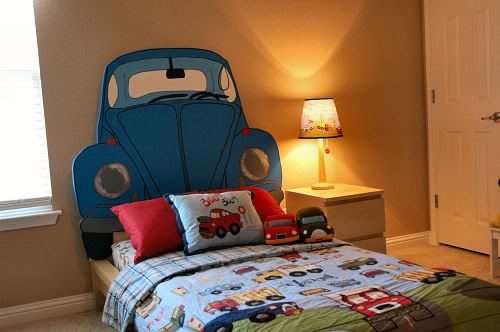
10. Now, all that was left to do was to just slide it on Zack’s existing headboard!

Remember the before?

Well, here’s the after!

I love that you can’t see his license plate until we take off the pillows and he climbs into bed. He always says, “Look, Mom! It’s my Z-A-C-K!”

What do you think? Do you think your little one would like a bed like this? I think mine does.

Brainstorm about all of the adorable shapes you could use to make your own custom headboard – butterfly, princess tiara, soccer ball, baseball cap…the ideas are endless. This is such a simple project, but it creates so much fun in a little one’s room.

Do you think you’ll try this at home?

I’ve added this post to Kimba’s DIY Day over at A Soft Place to Land. Head on over to her site to see some wonderful DIY projects!

« Previous Page
Next Page »
  • Email
  • Facebook
  • Instagram
  • Pinterest
  • Twitter

About Makely

Lindsay Ballard is a former college mascot turned political geek turned roller derby playing, DIY fanatic.

Lindsay chronicles her projects, design ideas, and lifestyle tips here at Makely, where she shares tutorials and inspiration. Her DIY designs are bold and graphic, while her spirit is fun and full of color.


Archives

Categories

PRIVACY POLICY
Copyright © 2009-2019 Makely School for Girls | All Rights Reserved | Posts may contain advertising content or affiliate links