Makely

Let's Make Life Awesome

  • Home
  • Decorating/DIY
    • Create Your Decor
    • Decorate Your Home
    • Paint Your Walls
    • Transform Your Furniture
  • Healthy Living
    • Essential Oils
    • Family Wellness
    • Household Care
  • Project Gallery
  • Contact
You are visiting: Home » Project Gallery » Page 86

Old Cabinet Door Turned Serving Tray

by Lindsay Ballard on July 20, 2009 78 Comments

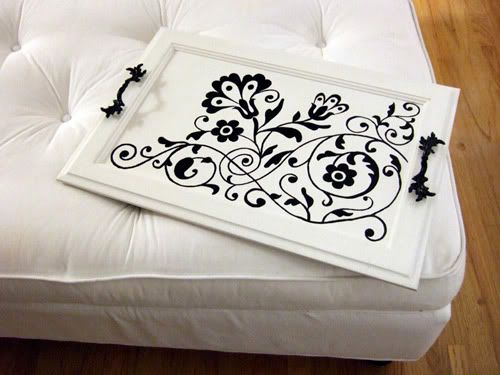
A few months back, I ran across a tutorial on CraftyNest to turn a salvaged cabinet door into a serving tray. I immediately knew I had to attempt to create my own tray, although I knew that mine would be no where as wonderful as the one she created.
People, she drew that design freehand and then painted it with a paintbrush. I am usually totally delusional about my artistic abilities, but you and I both know there is no way I could do that.
So, I decided to do it how we non-artists would do it – spray paint!
Reclaimed Cabinet Door Serving Tray
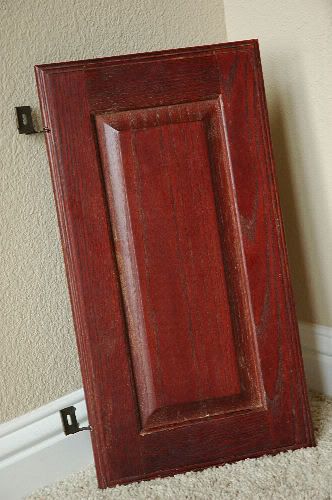
1. I found this old cabinet door at the ReStore for $1. I was more concerned with the shape and size than the color of the door. I also wanted one that was solid wood. I knew I was going to use this mostly for decorative purposes, so the size of the inset wasn’t that important to me. If you were going to use this to actually serve drinks and such, you’d want a larger inset (see the original inspiration picture).

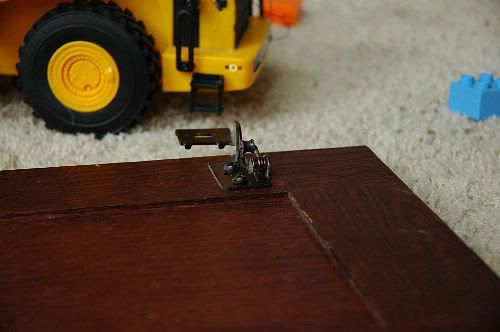
2. I removed the existing hardware with a screwdriver (and the help of a “diggie” and some Legos) and sanded the entire door with 220-grit sandpaper. It’s a fairly small door, so I just sanded it by hand.

3. Then, I primed the entire door – front, back and sides. And yes, I did it right there inside my house because it was literally 108 degrees outside.

(Oh, and the photos start to get really speckled or something starting here. I’m not sure what happened, so I just apologize in advance.)
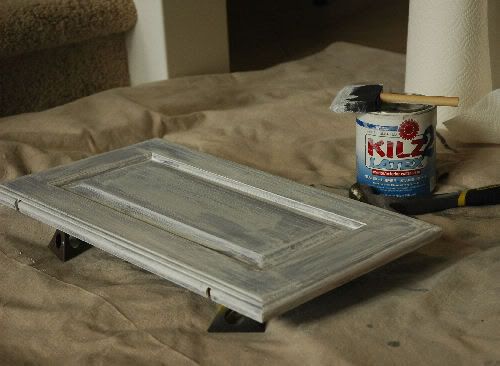
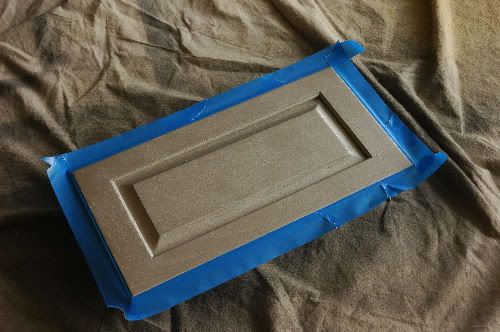
4. Next, I sprayed the entire door with Krylon’s Satin Brushed Nickel paint. Don’t worry, this is just the undercoat. After the paint dried, I taped off the border with painter’s tape.
5. I bought a super cheap yard of lace at Walmart and laid it on top of the door. I taped the lace to the ground so it wouldn’t blow around, but you don’t have to do that if it’s not windy where you live.
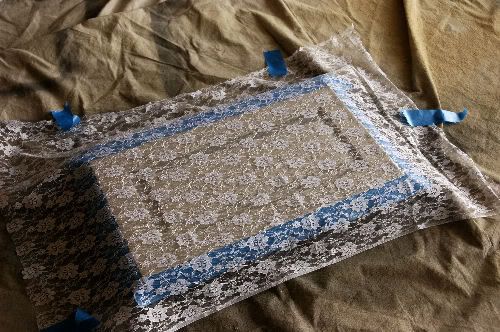
6. Then, I simply sprayed a light coat of white paint on top of the lace. I sprayed one pass from side to side and then one pass up and down. After I sprayed it, I immediately removed the lace to reveal the new design underneath.
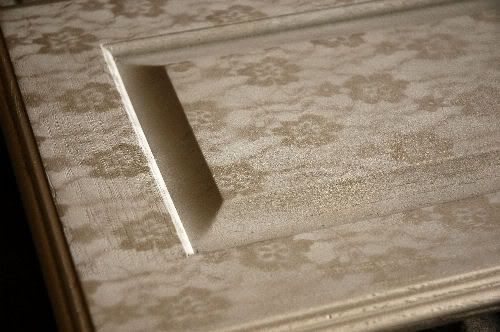
Pretty cool technique, huh? Again, sorry about the weirdly speckled photos.

7. After the paint was dry, I applied two coats of wipe-on poly so that it would be protected. I also installed two cabinet drawer pulls on either side of the drawer to use as handles. You may also want to add the little felt pads to the underside corners of the door so that it doesn’t scratch any surfaces.

For now, I’m displaying my tray in the vignette on top of a dresser in my bedroom. The dresser is getting ready for a huge re-do, and I think I’m going to like the tray on top of it.

I love this project because it was very easy and yields a pretty interesting result. There are so many creative things you could do to embellish the tray other than the lace design – add stencils, chipboard designs, or even one of the awesome vinyl designs you can find in the back40life Etsy store. Don’t forget to enter the giveaway to win one of her designs!
I’ve added this post to Kimba’s DIY Day over at A Soft Place to Land. Head on over there and check out some other great DIY ideas!

Easiest Design Transfer Method You’ll Ever Find

by Lindsay Ballard on July 15, 2009 4,274 Comments

Easiest Way to Transfer a Design onto Wood via MakelyHome.com

In the middle of a new project that I was working on, I realized that I had a problem. I needed to transfer a very large design (think 4 feet by 4 feet!) than I want to paint onto a primed piece of wood, and I couldn’t figure out how to do it.

I laid the printed design out on the wood and thought I could just trace the design on the paper with firm pressure and a little impression line would be left on the wood that I could just go back and trace. Um, nope.

Then, I tried a ballpoint pen. Nada. How about the tip of a butter knife? Nah. A bamboo skewer? No way.

I was getting pretty desperate at this point. I knew I could run out to the store to buy transfer paper, but my son was napping and that’s prime crafting time as any of you other moms know. I had to use something I had on hand.

Then a light bulb went off in my head: Newsprint! It always rubs off on my hands, so maybe it would rub off on the primed wood. Egads! I was right!

This technique will be especially helpful if you have a very intricate design, a very large design, or you just don’t want to take the time to cut out your design and trace like a stencil. I think this is going to be my go-to tracing technique from now on. It is so easy.

The Easiest Way to Transfer a Design Onto Wood

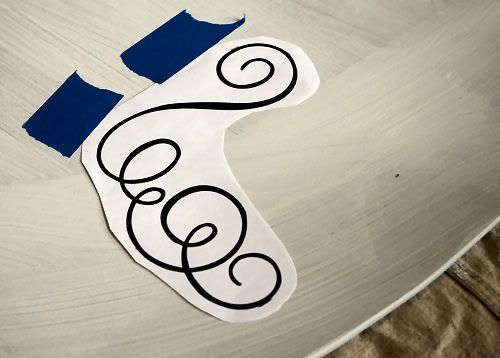
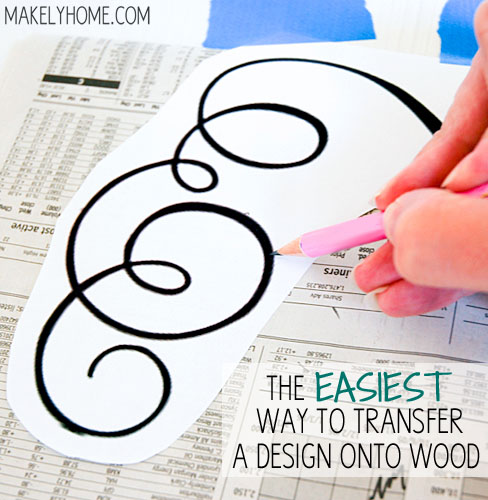
1. Print out your design and cut away the excess white space. Tape the top of your design to the painted or primed wood in the location you want to transfer the design.

2. Lift up the design and slide a page of newsprint underneath it. The classified pages and stock market pages work best, as there is a lot of small newsprint all over the page. Make sure that the entire design is underneath the newsprint.

3. With a pen or pencil (preferably a pink one with your name on it like you are 6 years old) , trace the outline of your design directly onto the paper. Press firmly, but you don’t have to go overboard with the pressure.


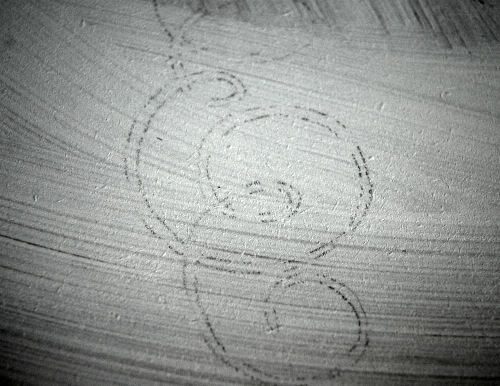
4. Remove the taped design and newsprint to reveal a light transfer underneath! I have turned up the contrast on this photo so that you will be able to see the transfer.

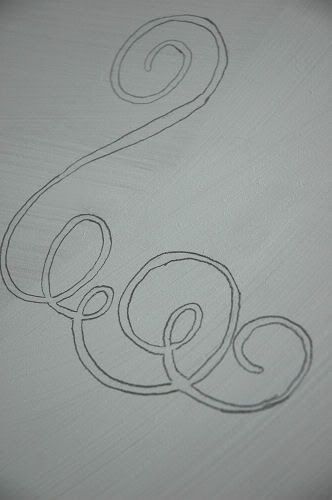
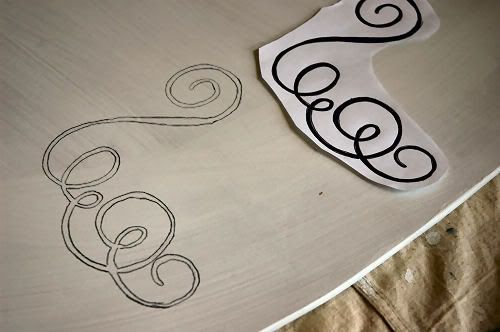
5. With your pencil (or with a paintbrush if you are way more talented than me), trace the transfer directly onto the wood.

6. Admire the beauty of your transfer, and then get busy painting!

Try this technique the next time you want to transfer a pattern or stencil a word onto a piece of wood. I’m pretty sure this would work on your walls, too. You’ll be amazed at how quickly and easily you can transfer that design. I’d love to know how it works out for you!

« Previous Page
Next Page »
  • Email
  • Facebook
  • Instagram
  • Pinterest
  • Twitter

About Makely

Lindsay Ballard is a former college mascot turned political geek turned roller derby playing, DIY fanatic.

Lindsay chronicles her projects, design ideas, and lifestyle tips here at Makely, where she shares tutorials and inspiration. Her DIY designs are bold and graphic, while her spirit is fun and full of color.


Archives

Categories

PRIVACY POLICY
Copyright © 2009-2019 Makely School for Girls | All Rights Reserved | Posts may contain advertising content or affiliate links