My favorite DIY projects are always the ones that involve painting. More specifically, I love the ones that allow me to update a vintage piece of furniture with brightly colored paint.
To date, I have only used three types of paint on furniture – latex paint, acrylic paint and spray paint. There is a world of different types of paint available on the market, but I have never wanted to rock the boat. I know how these paints are going to react on my surfaces, and 9 times out of 10 I reach for plain ‘ole latex paint.
I’ve been itching to try something new (I still haven’t tried Annie Sloan Chalk Paint, y’all). When I saw the gorgeous finishes that my friend Marian was achieving with her new Miss Mustard Seed’s Milk Paint, I decided that I wanted to try my hand at milk paint. She was sweet enough to send me a few colors to try out, and I couldn’t wait to get started.
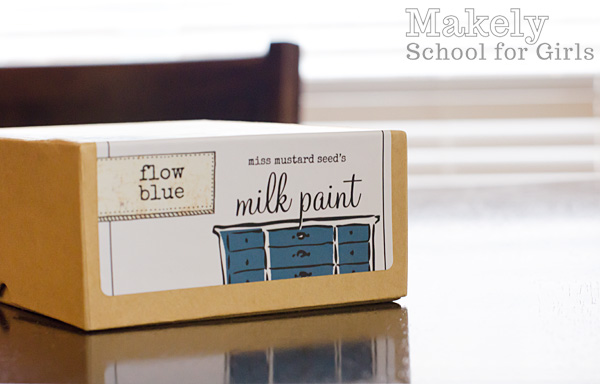
Until I saw that the paint came to me like this.
Yep, it’s a little cardboard box of paint. A beautiful little box, but still a box of paint. I almost froze in sheer panic – particularly when I opened that little box.
Crap! It was a bag of powdered paint. It reminded me of every failed attempt I’ve had with boxed cake and muffin batter in that I can never get all of the lumps out. Ack! I shut the box and stuck it in my office for a few weeks.
As fate would have it, I found the perfect desk for my office redo (if you follow me on Facebook, you should be happy to know that I have quit obsessing about it), and it screamed for me to use the gorgeous Flow Blue color that Miss Mustard Seed sent my way. I had to be a big girl and just deal with the powdered paint.
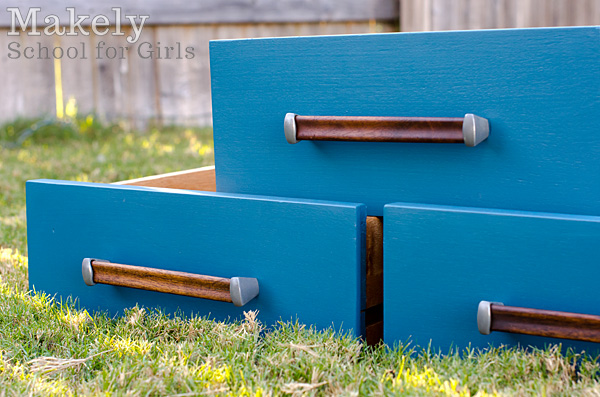
After a few problems along the way, I ended up with a beautiful finish on the desk. When it was all said and done, it was actually really easy to use! The cool thing is that you only mix what you need, so you don’t have 1/2 of an unused can of paint when you are finished with your project. It leveled beautifully (no brush marks) and in an hour I put the hardware back on my drawers. I could have never done that with latex.
I know I can’t possibly be the only one who’s nervous to try a new type of paint, so I put together some tips to help ease your nerves. There are several types of milk paint on the market, but I’m talking specifically about Miss Mustard Seed’s Milk Paint since it’s the only one I’ve used.
Five Beginner’s Tips for Working With Milk Paint
Tip #1: Watch the Instructional Videos
Marian has put together a series of videos that give brief tutorials on everything milk paint. She shows you how to mix it, how to apply it, and how to get a no-chip finish if you aren’t going for the chippy look.
Each video is only about 2 minutes long and can be found here. I highly advise watching them all before you begin, even if you don’t think you necessarily need to. It will be 10 minutes well spent.
Tip #2: Stir, Stir, Stir
To mix your paint, you add 1 part paint to 1 1/4 parts hot water. What? Yeah, I hate ratios like that, too. I ended up doing 12 tbsp of powder to 15 tbsp of water in an empty paint can, but you can use a plastic cup if that’s more readily available to you. That ended up being the perfect amount for what I needed for my project of painting the fronts of six desk drawers (the rest of the desk will be another color).
In one of her video tutorials, Marian says that you need to stir for about five minutes. Trust her on that! Stir, stir, stir with a paint stick. I didn’t stir long enough and the paint was too lumpy…which leads me to my next tip.
Tip #3: Test the Paint on a Scrap Piece of Wood
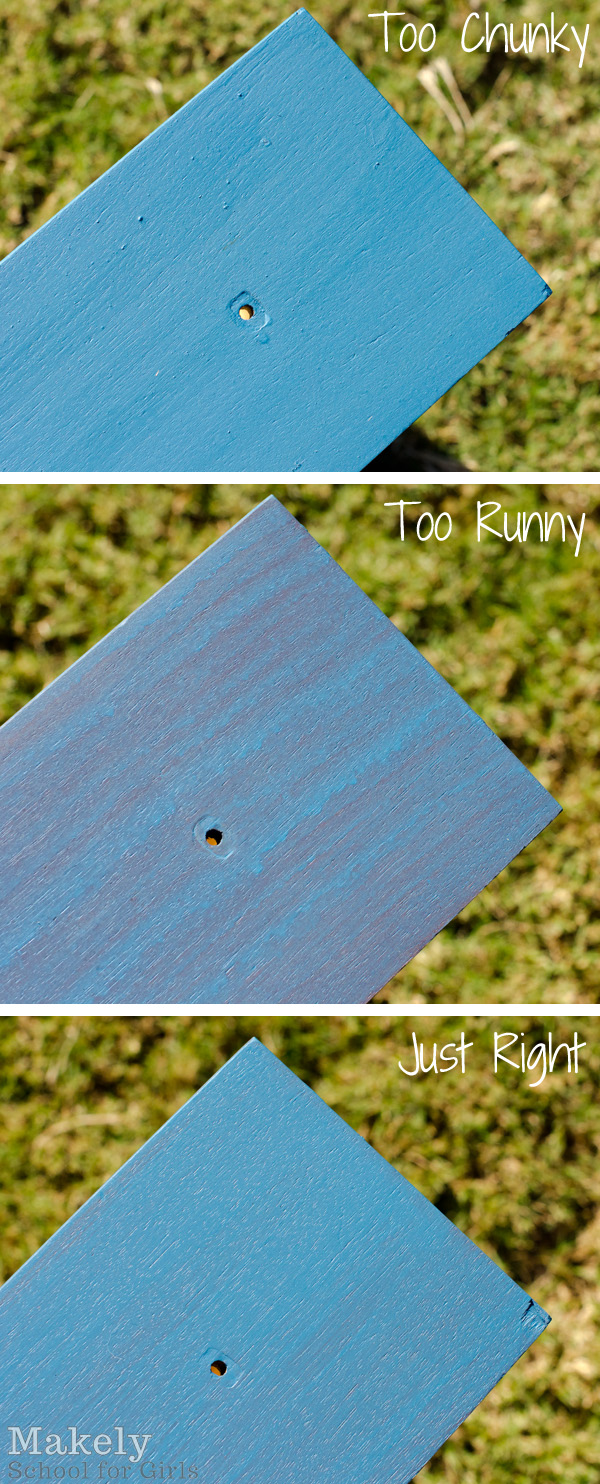
Even if you have painted eleventy million pieces of furniture, test the consistency of your milk paint the first time you use it on a piece of scrap wood. It is supposed to be thinner (i.e. more watery) than typical latex paint. If it’s not stirred well enough (see Tip #2), it’s pretty lumpy and chunky. If you think that it needs more water (instead of just stirring it more), it will be really runny.
Because I didn’t test my paint on a scrap, here’s what my drawer fronts looked like after the first coat.
I’ve painted long enough to know that I can just sand down whatever is not working, so after the first drawer dried I quickly sanded down the lumpy areas. Once I applied the 2nd “just right” coat to the “too chunky” and “too runny” drawer fronts, they looked great. If I would have tested on a scrap, I wouldn’t have had the panicked feeling I felt when I saw my first and second consistency attempts.
Marian suggests using 1-2 coats of her milk paint, but I went ahead and used 3. I’m a rule breaker. I wanted complete opacity since the primitive/farmhouse/chippy look, though beautiful, is not my personal style.
Why, yes. I propped my drawers up with Solo cups. Necessity (and laziness) is the mother of invention.
Tip #4: Protect Anything You Don’t Want Painted
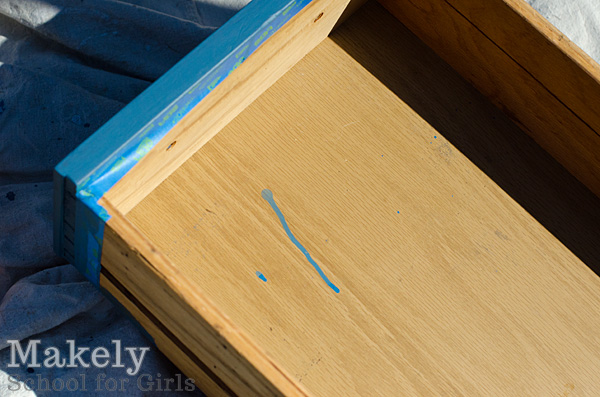
I learned the hard way that since milk paint is much thiner than latex, it is much runnier and dripper, too. Before I knew it, a few drops had slung off my paint brush and into my drawers.
In the grand scheme of things, the drips were not a big deal to me. I’ll either leave them alone since I’ll never see them when they are covered in my desk junk or I’ll use some Krud Kutter to try to remove them. But, if the drips had gotten on an important surface, I would have been very irritated with myself. So, mask off anything you don’t want painted, just in case.
Tip #5: Don’t Panic
When it was all said and done, I found that my original panic about milk paint was unfounded. Once I got the consistency right, it was really easy to use. It dried quickly, which is a huge plus when you want to transform a project in a short amount of time.
Like with all paint, if you don’t like it you can lightly sand it off. I had to do that with the “too chunky” drawer shown above and it now looks no different than the others.
I can’t yet speak to the durability of the paint, but I trust Miss Mustard Seed’s judgement. I applied one coat of her furniture wax and plan on doing a second coat for added protection. This was also the first time I had used furniture wax, and I was pleasantly surprised in how easy it was to apply and buff off.
All in all, I loved Miss Mustard Seed’s Milk Paint and will definitely be using it for future projects if it is available in the color I want. There’s no need to prime or sand (you add in some liquid bonding agent if you have a glossy surface or if you don’t want to end up with a chippy finish) and the finish is very nice. I appreciate that her color palette includes some paint colors that can easily be used in more modern spaces.
There’s nowhere for me to purchase it locally yet, but I can order it from one of her retailers who sell it online.
I can’t wait to show you the finished desk! Hopefully, I’ll be able to show you that by the end of this week.
Have you used milk paint before? Have you been scared to try it? Let me know your thoughts!
I was provided with some Miss Mustard Seed Milk Paint products for the purposes of review. All opinions and mistakes are my own.


What is the advantage of milk paint over regular paint?
Good question!
Okay, so here’s my take on it. With milk paint, you mix just the amount you need, so you don’t have a lot of half-empty paint cans sitting around (and you can mix as needed, so the powder lasts a really long time). You can paint it on without sanding, priming or really even cleaning a piece. If you mix in a little of the liquid bonding agent, it can be applied directly to surfaces that are already polyed and it won’t chip. If you want it to chip, it chips in pieces instead of in strips like latex. It also dries very quickly. It’s supposed to be really durable, but I can’t speak to that yet.
The downside is that it’s only available in particular colors instead of indefinite colors like latex paint.
I hope that helps!
Can it be bought in regular stores like Lowe’s or Home Depot?
I know that the Miss Mustard Seed’s Milk Paint can only be bought at her retailers and online – http://www.missmustardseedsmilkpaint.com/retailers/ I know there are other brands of milk paint, but I don’t know the availability of them at Lowe’s and Home Depot.
I was thinking the same thing as that question above. I just suddenly started seeing milk paint on DYI blogs and had never heard of it before.
Thanks for this! I just bought some MMS Milk Paint for the first time this weekend. I purchased sample sizes of the paint instead of a box since I’m a bit nervous about it. Can’t wait to try it out!
Mary Ellen
The Working Home Keeper
Oh, fun! What colors did you pick up?
Just Shutter Grey this time. Can’t wait to try the other colors!
Mary Ellen
The Working Home Keeper
Nice!
I love the color! I bet your desk is gonna look awesome!
Thanks, Cindy! You’ll have to come over and see it!
I was totally confused at first as I’ve never heard of milk paint…but it looks like you got a gorgeous color with gorgeous coverage!
Thanks, JJ! It’s one of those old things that’s new again. 😀
Thanks for the tips! I am still new to this paint as most of us but really love the effect I get with it! I am hosting a milk paint and more party next week too! You should come over and link up and show off your milk paint or other projects! Thanks for the tips too! xoxo -Kennesha
Thanks, Kennesha!
I bought some MMS Milk Paint online a couple of weeks ago so I could paint a built-in hutch, but haven’t had the time to do it yet… however, today is the day I have set aside to do it, and I am very grateful for this post. I have not worked with milk paint before. Thanks for the tips!
Yay! How did it go?
I work for the Redposie Resale store who stock the Miss Mustard Seed Milk Paint. I just want to add that if you are going to use milk paint on furniture that has been painted or stain before make sure you clean the piece real good. I use TSP, you can pick it up at your local hardware store. Don’t forget when purchase your milk paint get the bonding agent believe me you will need it to get the milk paint to adhere to the furniture.
Hi: I have been following MMS for a few years — so, I had read her posts during the process of developing to point of sale for her Milk Paint. She was pretty nervous the Very first time she tried her paint, but by the time it was packaged for sale she was Giddy with Excitement.
I purchased a box of Shutter Gray & a box of MMS Mustard Seed Gold to use on some Christmas Gifts. I made sure to watch her tutorial one more time before mixing, & I was more than THRILLED with the results! The projects I painted weren’t flat – the pattern was a bas-relief; I used the gray on the entire first project & let it dry, then with less paint on my brush I lightly went over the “raised” surface again. It turned out Great. The 2nd project, being the same style, I painted with the Gold all over first; then just a touch of the gray over the raised portions. This one also turned out GREAT!
The best part, as you mentioned, is that there is little to no waste. Also, the clean up is a SNAP! I love the Flow Blue you used & the way it turned out. Can’t wait to see the completed project!!!
Thanks for the tips. I just tried the MMS paint yesterday and today after having it sit on a shelf for at least 6 months. I painted an old wooden tray without using the bonding agent. I didn’t stir it enough apparently because it was really lumpy. I didn’t like the result after the one coat but am starting to like it better now that I have two + coats on it. It’s still lumpy but I plan to sand it when I’m done. I didn’t like the rough feeling at all but it is perhaps due to the surface of the piece. The color I have is linen, which needs more than one coat. I didn’t realize or remember that it need a topcoat like wax. There are no retailers near me so what should I use? I am going to buy a frother or stick blender because I do not have the patience to stir for five minutes. Did the surface feel chalky before you waxed it? Thanks again oft the tips
You can buy paste wax at your local Home Depot, Lowes or online from Amazon.
Do you know, Is milk paint something you can use to paint over laminate furniture?
Hi Katie,
Marian (Miss Mustard Seed) says that you should only use it on laminate IF you use a bonding primer first – like Glidden Gripper or Zinsser Cover Stain. It’s definitely not as simple of a painting technique on laminate. Sad face.
Hi Lindsay- great post on MMS paint. I’ve used it on a few pieces and have been very happy with the paint… the wax, not so much. I have not been able to find any posts that address my problem. After painting I applied two coats of MMS wax but get horrifying water spots IMMEDIATELY, even wiping it within seconds. I have even sanded lightly and then applied two more coats of wax but still the same issue. What am I doing wrong? At this point I’m ready to just cover it with poly but I do like the soft patina the wax provides. Any suggestions you have would be so appreciated! Thanks and Happy New Year to you.
Hi Anne!
I haven’t had that happen and have used the soft wax on 3 or 4 pieces so far. Let me talk to Miss Mustard Seed herself and see if she can offer any help.
From a Milk Paint retailer here I would give these tips an A+!
We were skeptical in the beginning too, since we were sold on ASCP and have used other Milk Paints, that I thought mixed a little better than MMSMP. Now we are deeply in love! The color pallet and the people behind this brand is what sold us on it. Such wonderful support and creative ideas inspire us to “move mountains in our home & business”