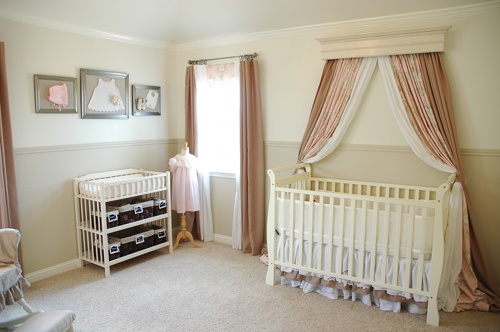
My very favorite part of Emma’s nursery is the beautiful bed crown above her crib. The curtains are soft and flowy underneath a vintage mantel piece.
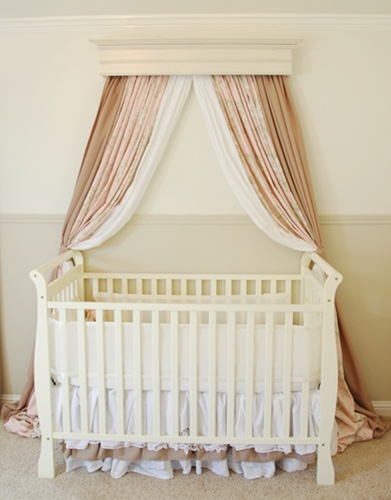
As luxurious as it looks, the bed crown as incredibly easy to put together. I’ll show you how to put one together yourself using a found item and wood scraps you probably have cluttering your garage. I’m sure there are many more ways to put a bed crown together, but we “over-engineered” this one since it will be hanging over the crib.
Materials needed:
- Found wooden item to use as the front of the bed crown – mine is a vintage mantel, but you can use any wooden piece or create your own using a 2×4 and molding from the home improvement store
- Scrap 2×4 wood – you’ll want 2 pieces as long as the bed crown front and four pieces as long as the distance you want it to project from the wall
- Dowel as long as the bed crown front
- Drill
- L-Brackets
- Screws
- Paint
Directions
I won’t be using measurements here since every project will be different depending on what you use for your front and how far you want your crown to project from the wall.
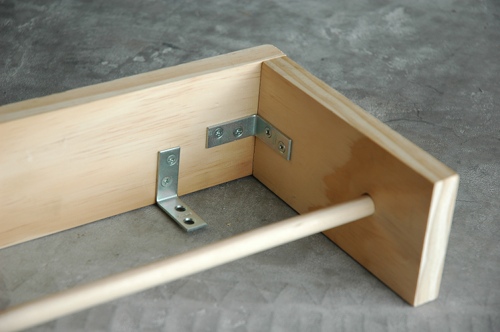
1. Using the L-Brackets, screw two of the short pieces of wood to one of the longer pieces of wood, making a ‘U’ shape. Attach several more L-Brackets along the top of the longer piece. Drill a hole on each of the small pieces just large enough for your dowel to slip through.

Close-up of one corner:
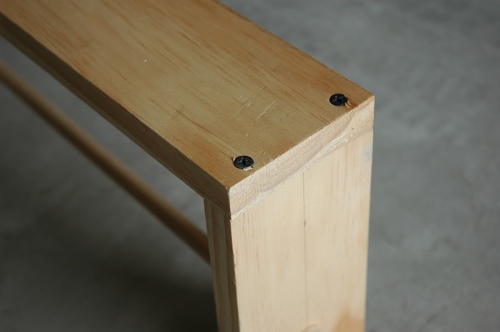
2. To better secure the sides holding the dowel, put a few screws through the back of the long piece into the short pieces.
3. If necessary, paint the bed crown front piece and the extra pieces of short wood in the color of your choice. My mantel was already an antique white, so I just spray painted the short pieces in a similar color.
4. Remove the dowel for now. Using the L-shaped brackets that you installed on the top of the long piece of wood, screw the ‘U’-shaped piece onto the back of your bed crown front.
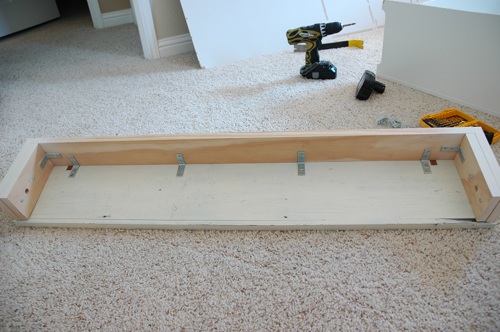
5. Screw the two short pieces you still have left over the two short pieces of the ‘U’-shaped piece. This will serve as a plate that keeps the dowel from sliding around. When you want to remove or add curtains to your dowel, you just unscrew these pieces and the dowel slides right out.

6. Screw your last piece of long wood (that should be slightly smaller than the length of the bed crown) onto your wall where you would like to hang your bed crown. PLEASE, make sure you are screwing through the studs. Let me repeat – screw this through the studs. Do not just use drywall anchors, okay?
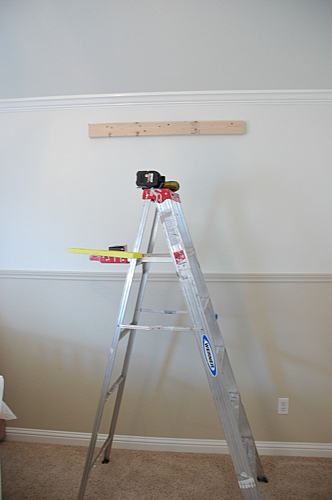
7. Now, slide your bed crown over the piece of wood on your wall like a slipcover. Get up on the top of your ladder (not the top-top, but you know what I’m saying), and screw the top of the ‘U’-shaped piece to the piece of wood on the wall. Put in *at least* 4 screws so that it’s nice and anchored.
8. All you have to do now is add your curtains! I made simple rod-pocket panels out of the fabric I selected for the nursery, but you could just as easily use store-bought panels or sheers. Unscrew the plates, slide the dowel into the holes, put your curtains on the rod and screw the plates back onto the bedcrown.
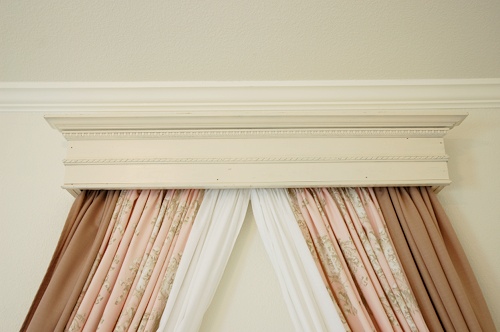
That’s it! This project makes such a tremendous impact for the time spent putting it together – my kind of project!
********************
Time’s running out! There are only 3 more days to order from my online Stella & Dot trunk show. With a $50 purchase, you are entered to win a Soiree bracelet of your choice (a $29 value). Right now, you have a really great chance of being that winner since we don’t have a ton of orders over $50 yet. Go ahead and start thinking about birthdays and holidays, shop the sale page, and win something gorgeous for yourself! They even have a darling selection of Mommy & Me jewelry.
To order and be entered to win, please visit Abby’s Stella & Dot website and place your order, entering my name (Lindsay Ballard) as your hostess. Let me know if you have any questions!