Makely

Let's Make Life Awesome

  • Home
  • Decorating/DIY
    • Create Your Decor
    • Decorate Your Home
    • Paint Your Walls
    • Transform Your Furniture
  • Healthy Living
    • Essential Oils
    • Family Wellness
    • Household Care
  • Project Gallery
  • Contact

The Nursery: Your Questions Answered

by Lindsay Ballard on June 16, 2010 2,058 Comments

Thank you for such the wonderful response to Emma’s nursery! It’s truly my favorite room in the house, and I’ve been known to go sit in there with the door shut just to be in the calm surroundings. I hope they help her stay calm, too!

There were a bunch of questions left in on that post, so I will answer the most frequently asked ones here. If you have a question that I don’t answer, leave it in the comments below and I’ll answer it there!

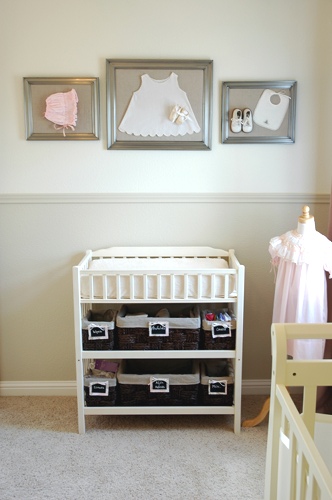
How did you frame the family heirlooms?

This is actually such an easy project!  I bought some frames on mega sale at Michael’s that would fit the dimensions of each little vignette I put together.  I took the class out of the frames and covered the glass in a layer of batting and then fabric (for mine I used linen).  I pulled the fabric tight and secured it to the back of the frame with my glue gun (of course).

Once I positioned each baby item where I wanted it in the frame, I used t-pins to just pin it onto the fabric and batting.  If you work with it, you’ll be able to figure out a way to pin it so that the pins won’t show.  For example, I pinned the dress from the inside.
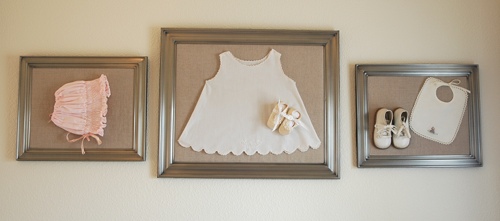
If you have any pieces that flop over when you hold the frame up, you can use a little bit of double-stick tape or scrapbooking adhesive squares.  For my heavy toddler shoes, I actually glued them to the fabric on the soles.  Of course, I wouldn’t do that with something worth millions of dollars, but I didn’t mind doing it with these things.

If you want your items behind glass, shadow boxes are going to be your best option unless your items are extremely thin.  I considered this route but it was going to be a) a lot more expensive to buy large shadow boxes and b) I worried about the frames sticking out from the wall so much that I’d bump my head when I was changing the baby on the table.

Where did you hang the bird chandelier?

Well, I still haven’t hung the bird chandelier.  My original thought was to hang it in the corner near the rocking chair and lamp.  Now that I see the room completed, I don’t think that’s where I want it.
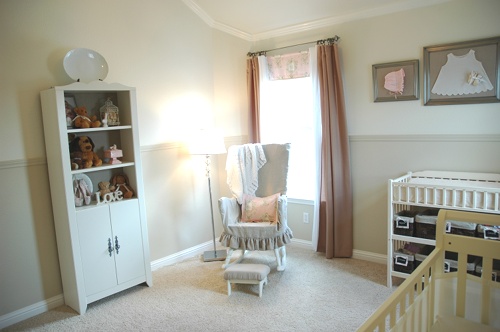
I’m going to live with the room for a few weeks to see if a spot presents itself.  If not, then it won’t be going up.  I’m one of those people who’s always on the borderline of overdoing it (ha!), so I’m trying to edit myself.

In the meantime, the chandelier is hanging on the closet rod is Zack’s huge walk-in closet.  He actually loves it there and comments on how beautiful his closet is every morning when he’s getting dressed.  The part of me that’s having a hard time knowing that he only has a few more weeks as an only child doesn’t want to take something away from him to give to the baby (Please tell me that the Mommy Guilt gets easier!).

We’ll see how it all shakes out.

What paint colors did you use?

I literally painted something like 10 samples on the walls before I found the perfect colors.  In the end, I chose two Sherwin Williams colors – the top white/cream is Dover White and the bottom beige/brown is Wool Skein.
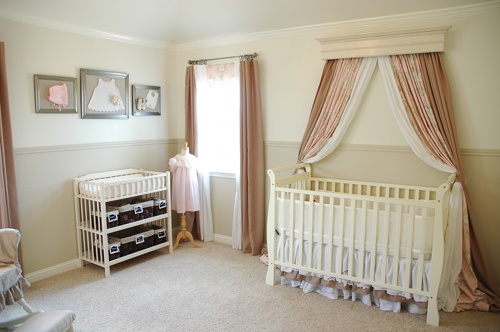
The changing table, which used to be a natural wood, and peg shelf are spray painted with Valspar Porcelain.  The rocking chair is hand-painted Dover White.

It just so happened that the new crib, the Ikea bookcase, and the antique mantle turned bedcrown were the perfect shades of antique white to fit into the room.  When you are doing a room with soft colors like mine, just remember that every paint and fabric color doesn’t have to be an exact match.  The subtle color differences add a lot of depth to what could be a very boring room.

Let me know below if you have any other questions!

********************

Now, it’s time to announce the winner of the Cutting Edge Stencils giveaway!  Congrats to commenter #27…

…Jen at With Grace & Lace!  Congrats!  I’ll email you shortly so that you can get the details worked out with Cutting Edge Stencils.  Thanks to everyone who entered!

Our Serene Nursery

by Lindsay Ballard on June 14, 2010 1,959 Comments

Miss Emma is going to be one lucky girl.  She has a big brother who cannot wait to share his life with her, a daddy who would hang the moon and stars for her, and a mama who cannot wait to welcome her into our family.  As I’m sure every mother would attest, words can simply not describe the way I already love our 2nd (and last) child.

After 3 months of planning, work, and stringing you along, I’m finally ready to reveal her serene nursery to you.  It was truly a labor of love – and we honestly saw blood (Tom’s), sweat (Tom’s), and tears (mine) throughout the process.  The room has turned out so perfectly, though, that we wouldn’t have had it any other way.  Be warned that this post is very picture heavy, but I knew that’s what you’d want. 😉

You may remember the inspiration photo that triggered my entire vision.  I still don’t know who is responsible for this photo, but I’d like to kiss their ring!

I absolutely fell in love with the beige and whites in this photo.  Since I was having my one and only girl, though, I wanted to add a touch of pink into the room.  I found this sweet, powder pink Angel Toile fabric, and the vision of my room was set into motion.  I sketched out my plan for the room months ago, and I’m overjoyed to say that the final room turned out so much like my original vision!

I’ve never claimed to be an artist, but at least it got me headed in the right direction!

Introducing, Emma’s nursery:

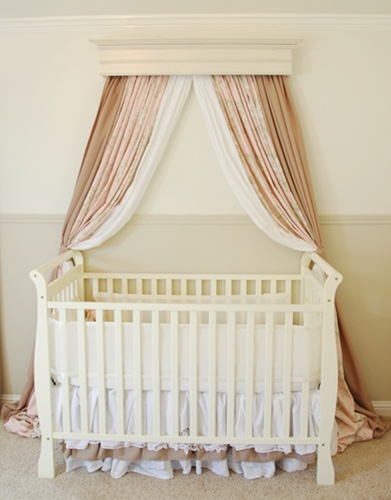
The view when you walk into her bedroom.

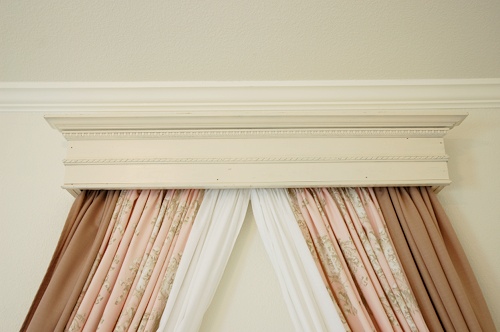
The Piece de Resistance – a bed crown made from an antique fireplace mantle.

I found this mantle at a local antique shop.  It was already painted this shade of cream, which is a perfect match to the rest of the room.

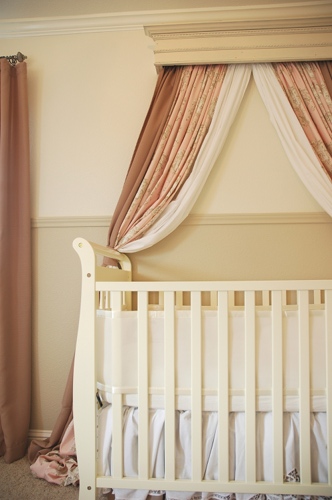
Another view of the crib.  Tom, who lovingly over-engineers everything, did a fantastic job securing the crown to the wall.  He said she could do gymnastics on it and it wouldn’t come down.  I’m going to put together a tutorial on how to turn a vintage wood piece into a bed crown.  It’s a lot easier than it looks!

Have no fear, the curtains are tied back to the walls, so Emma won’t be able to pull them into the crib.

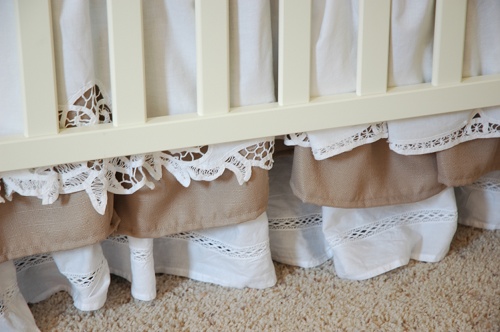
The three tiered, ruffled cribskirt was made from vintage bed linens.  It was really easy to put together.  I’ll do a tutorial for this, too.

Close-up of the crib skirt.

The changing table, with my chalkboard fabric labels, sits on the wall to the left of the crib.

I framed some family heirlooms, and they hang above the changing table.  From left to right, my old Easter bonnet, my mother’s baby dress and newborn shoes, my old toddler shoes, and Tom’s baby bib.

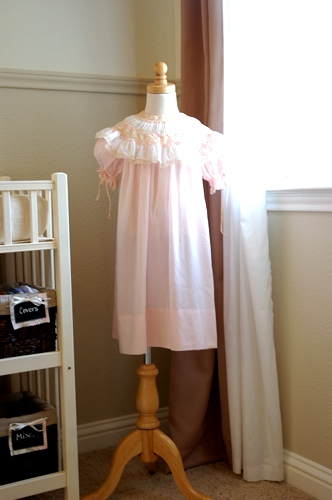
My Easter dress, from when I was 5 years old, adorns my child-sized dress form.

Continuing to the left, you’ll find my slipcovered rocking chair.  Won’t this be a lovely place to rock a new baby?

You can also see part of the angled wall/ceiling we were dealing with when putting up the crown molding.  It was a difficult task, but Tom mastered it and it came out beautifully.   He did such a great job!

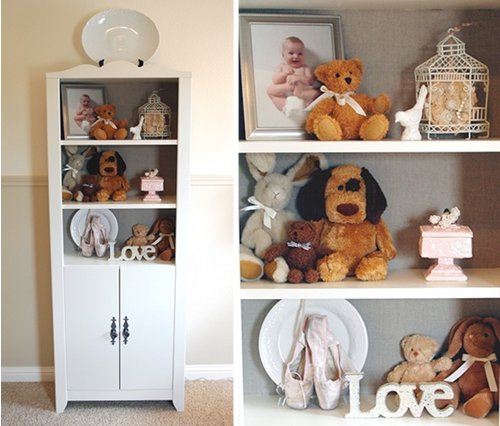
On the next wall is an Ikea cabinet that used to be in my sewing/craft room.

The shelves are filled with a mix of old and new – some of my stuffed animals, some of Zack’s stuffed animals, my favorite baby picture of Zack, my first Pointe shoes.

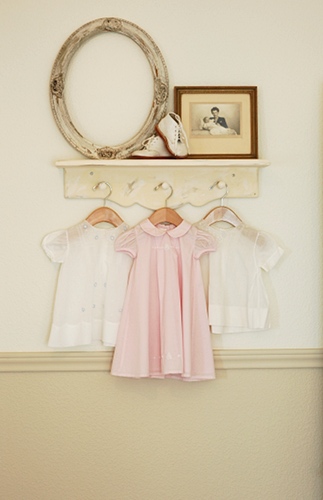
On the wall between the bedroom door and closet, I hung this shelf I picked up at Goodwill.  On the top, you’ll see an antique oval frame (which will soon be filled with something very special), my sister’s toddler shoes, and a photo of Tom’s grandmother (who we recently lost) and his father as a baby.  On the hooks, the white dresses were my mother’s baby dresses.  The pink dress will be what Emma will wear home from the hospital, and will then she’ll be able to pass it on to her own daughter.

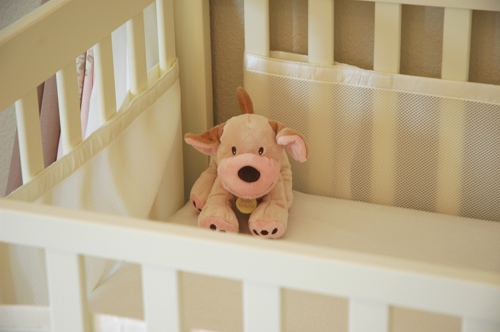
I couldn’t forget to picture this little doggie.  We let Zack pick out the first thing we ever bought for Emma, and he picked this dog the day he found out he was having a sister.  The little dog’s tag says, “Best Friends.”  I hope that they are.

Thank you so much for joining me in this little nursery tour.  It’s been so hard keeping this all a secret from my readers for so many months, but I wanted to reveal it all at one time, instead of in little, unfinished pieces.  I hope you think it was worth the wait.  I do!

Okay, let’s look at it one more time.

Yay!  Just 10 more weeks and the room will have it’s finishing touch – it’s very own princess.

« Previous Page
Next Page »
  • Email
  • Facebook
  • Instagram
  • Pinterest
  • Twitter

About Makely

Lindsay Ballard is a former college mascot turned political geek turned roller derby playing, DIY fanatic.

Lindsay chronicles her projects, design ideas, and lifestyle tips here at Makely, where she shares tutorials and inspiration. Her DIY designs are bold and graphic, while her spirit is fun and full of color.


Archives

Categories

PRIVACY POLICY
Copyright © 2009-2019 Makely School for Girls | All Rights Reserved | Posts may contain advertising content or affiliate links