Over the past six years (OMG, six?) years of writing this blog, it’s been no secret that I’m a a slow worker with tons of big plans. I have a huge list of things that I want to – and need to – do around the house, but sometimes that list itself just gets overwhelming. And when I’m overwhelmed, I tune out and ignore.
Speaking of ignoring, please meet Emma’s closet.
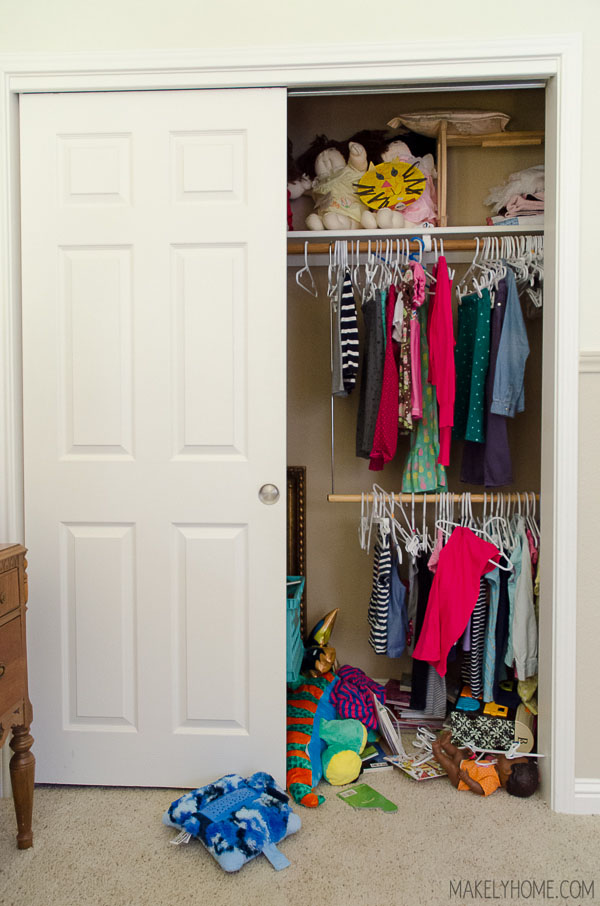

I will admit that most of this closet situation is my fault. It’s hard to tell from the above images, but she only has one little side of her closet to put her clothes and toys. And…that’s because the other side is filled with my crap that has been there since long before she was born.
Yep, yep, yep.
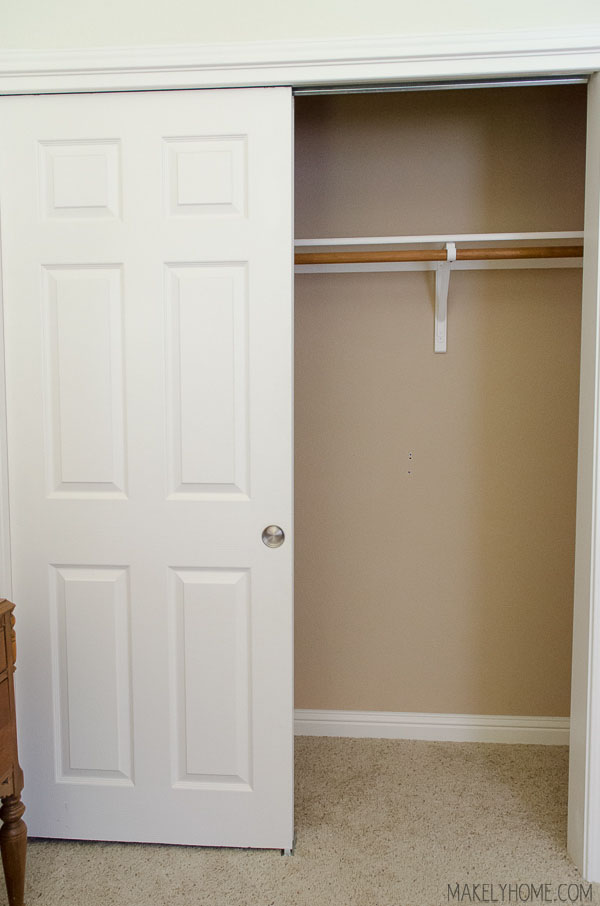
So, I really have been meaning to makeover Emma’s closet. The older she gets, the more space that she needs. The builder’s grade closet only has one shelf and one hanging bar, leaving tons of poorly used space. I have been planning on doing either a Container Store style closet or some sort of built in, but time and my own budget hasn’t allowed that to happen. Closet, consider yourself ignored.
Well, BLACK+DECKER contacted me with a challenge to finish a project that I had been putting off as part of their Your Big Finish campaign. Through this campaign, BLACK+DECKER is encouraging homeowners and renters to finish neglected projects around their homes for a chance to win $10,000 and other prize packages. I never turn down a challenge.
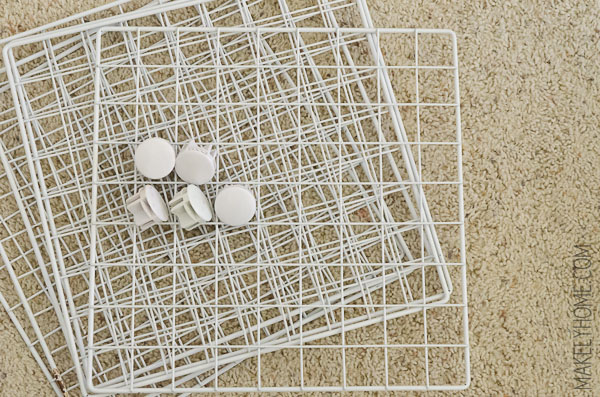
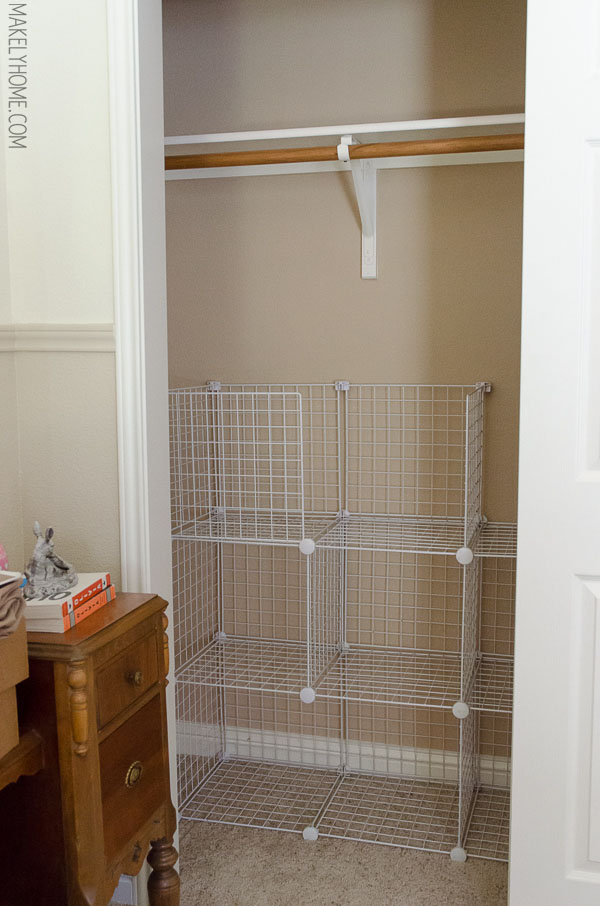
I decided that my best route to a quick and inexpensive closet makeover would be to remove all of my junk and add shelving in the bottom on the closet. But, I still didn’t have a lot of money. I put out a call on my neighborhood Facebook group to see if anyone had any stand alone shelving that they would be willing to part with for cheap. Within a few hours, I got a few different responses and ended up getting several boxes full of modular wire cubes for $30. This ended up being a steal, because these cubes usually cost about $30 for just six cubes – I had enough to make about 18 cubes.
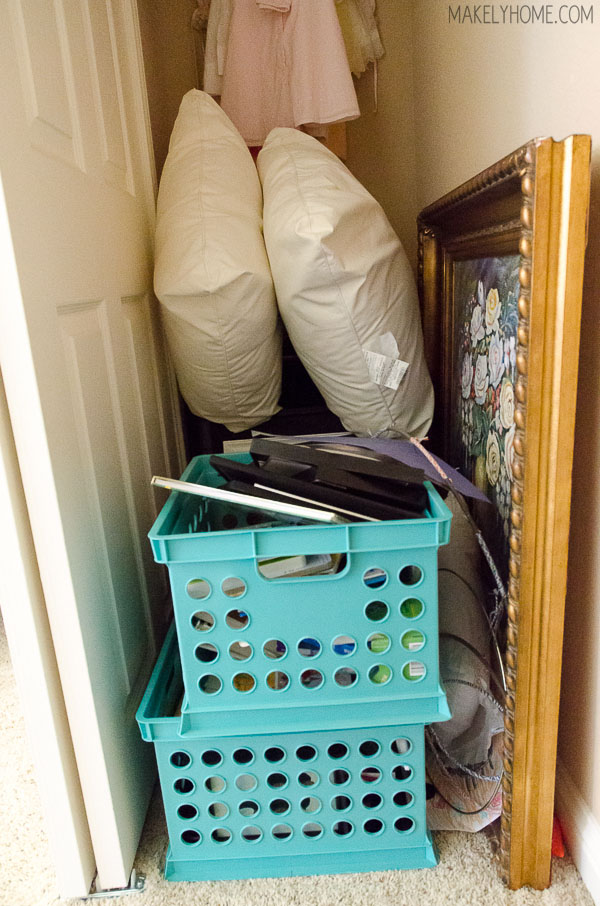
I started by clearing everything out of her closet and sorting it into keep and donate piles. There was a ton of clothes that she had outgrown (or will outgrow by next spring/summer) and I had tons of picture frames and other assorted decor pieces that I haven’t used in about 4 years.
Then, I just started building the modular wire shelves. I didn’t really have a game plan here. I just started putting them together until I thought I had a good amount of storage space. I’m not going to lie – they weren’t super easy to put together. But, once I got them together, they feel pretty sturdy.

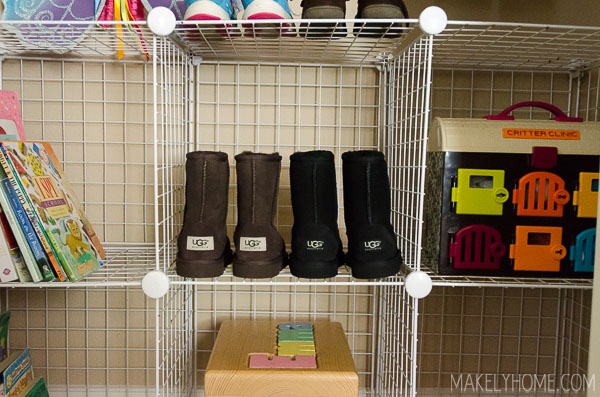
After the shelves were assembled, I slowly added Emma’s toys, books, clothes and shoes back into the closet. Lo and behold, there is room to put everything – with space to spare!
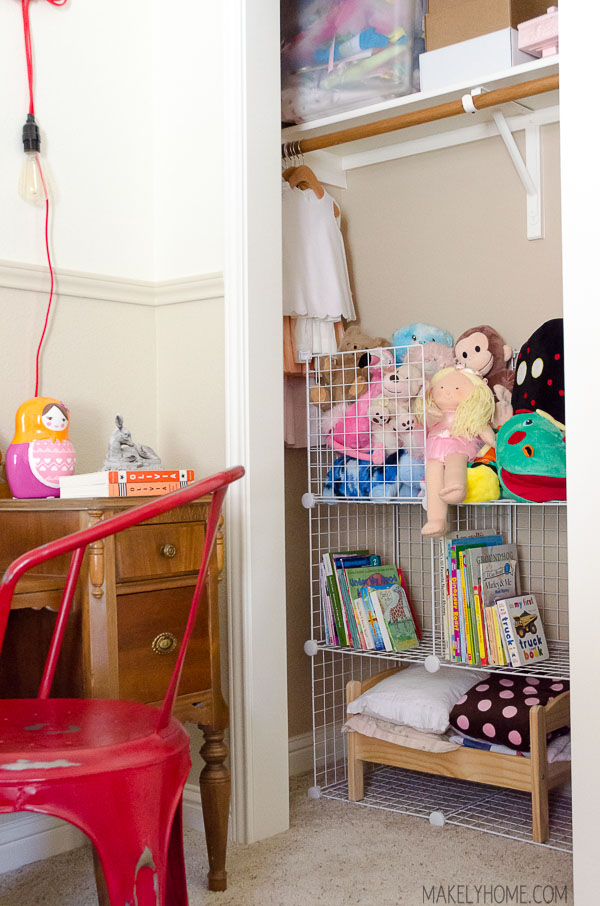
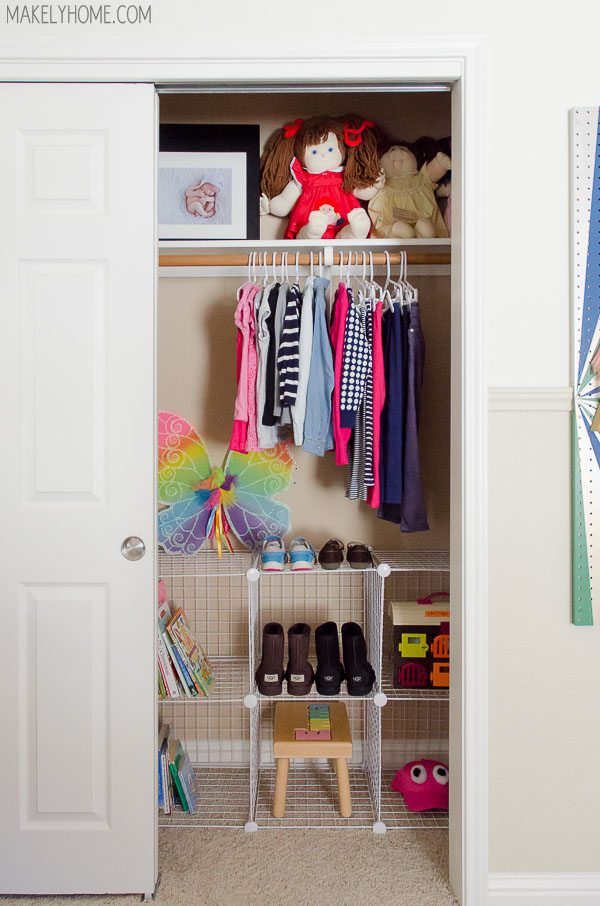
Yes, she has more clothes than this. I need to do laundry. One thing at a time, y’all!
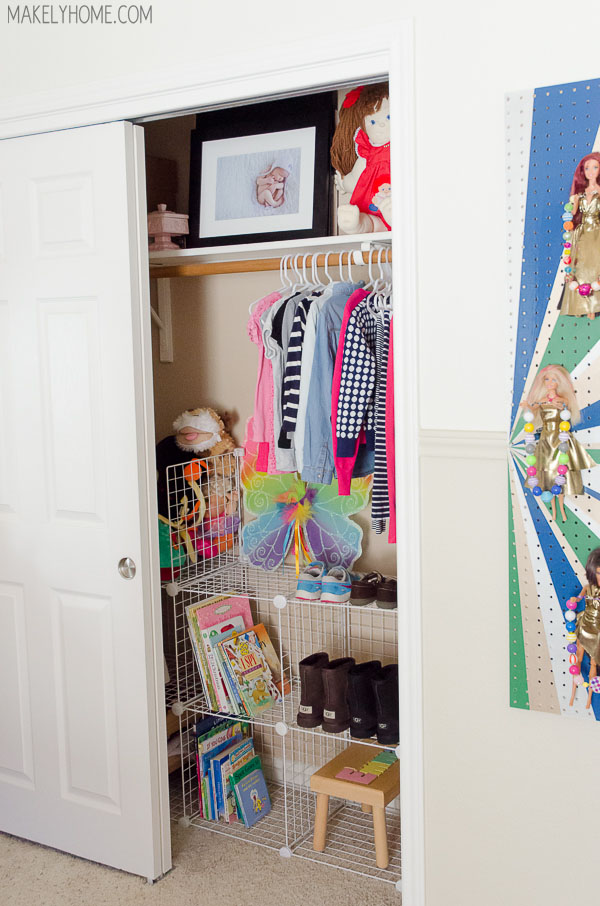
Emma and I are so thrilled with her new closet set-up. She’s doing a great job (for a 4 year old) keeping it organized, too. And for $30 and a few hours? I think it’s perfect!
So, what will your big finish be? Join BLACK+DECKER for the opportunity to win $10,000 in cash and products. Your submission can be anything from finishing out your basement to changing out the knobs on a dresser. Any project big or small can be entered to win! Plus, they might put you and your finished project on a billboard right in the middle of Times Square. So while your family may never notice that you finished hanging the crown molding, millions of others will!
For this campaign, there are Weekly Prizes, at approximately $439.91 per prize, and one Grand Prize of $10,000. The Weekly Prizes include one of each of the following:
BLACK+DECKER prize package comprised of one (1) of each of the following:
• BDCDE120C 20V MAX* Lithium Drill/Driver with AutoSense™
• BDEMS600 Mouse Sander
• BDCS40BI 4V MAX* Lithium Pivot Screwdriver
• BDCDCMT120 Matrix 20V MAX* Lithium Drill/Driver
• LCS1020 20V MAX* Chainsaw
• BDCMTRS Matrix Reciprocating Saw Attachment
• BDCMTI Matrix Impact Driver Attachment
To enter, visit the Your Big Finish page, and enter your First Name, Last Initial, Email, City, State, Phone and upload a photo of yourself and your completed project! Please note, the contest ends December 28th, 2014.
What are you inspired to enter? Tell me in the comments!

Thank you to BLACK+DECKER for sponsoring this post and inspiring me to FINALLY finish this project!
Love the makeover. I had these shelves in my boys closet. They worked great until one of them climbed it and after that it wasn’t so sturdy. My husband took zip ties to each side of the cube and then I clipped off the extra. Now they’re super sturdy and you can’t even tell. Now they’ve migrated to the garage and hold our summer pool stuff, kites, toys, all that stuff. I love them.
What a great idea! Our daughter’s walk in closet looks like a clown car crashed into a library mobile and exploded in there. We need to get it in shape. These cubes look like they’d do the trick.
So much better, Lindsay! This is one of those projects that I put off, too. Come do mine, please? 😉
This is so simple!!! I have been trying to figure out the best way to organize our few closets in our new house that would also work well for later when we have kids. I have been coming up with all of these designs that would involve removing all of the builder grade pieces and putting in woodworked shelves and multiple bars, but this just seems so much simpler. Way to go me for way overthinking as usual.
Love it…….what is the Barbie pegboard thing next to,it????
Hi Michelle- it’s a jewelry holder I made to hang my daughter’s necklaces. http://makelyhome.com/barbie-jewelry-holder/ People either love it or hate it! I’m happy that she loves it. 🙂
I originally bought those shelves for my college dorm. I’ve long since graduated, and now they’re perfect for in my kids’ playroom closet shelving. I also added some bins to corral more junk.
Now, everything is just clean and organised, so this is really great! The spaces are designated too, so locating and getting things will become faster and easier. Great job with this project, more so because it’s with a low budget!