Makely

Let's Make Life Awesome

  • Home
  • Decorating/DIY
    • Create Your Decor
    • Decorate Your Home
    • Paint Your Walls
    • Transform Your Furniture
  • Healthy Living
    • Essential Oils
    • Family Wellness
    • Household Care
  • Project Gallery
  • Contact
You are visiting: Home » Decorating/DIY » Create Your Decor » Page 131

The Five Dollar Challenge

by Lindsay Ballard on March 29, 2009 41 Comments

It seems like $5 won’t buy very much any more. A couple of gallons of gas at Exxon. A foot long sandwich at Subway. A Venti latte at Starbucks. That five dollars certainly doesn’t stretch very far.

About three and a half weeks ago, I issued a little challenge to the readers of this blog: the Five Dollar Challenge. I wanted to prove that we could in fact stretch $5 further than we thought, that we could put it to good use to create something beautiful for our homes.

For the challenge, I didn’t want you to run out to your nearest thrift store and buy a new vase or a picture frame and be done with it. I wanted you to create something with their own two hands using only products found at the dollar store combined with items you already had around your homes.

I have been so excited for the big Challenge day to arrive. I’ve heard from so many of you that you were working on your projects, that you didn’t think $5 was enough money, that you REALLY wanted to win the Grand Prize. Well, today’s the day you get to show off! After all of the entries have been submitted, one winner will be chosen at random to receive the Grand Prize.

You’ve read the rules. You’ve prepared your post according to the instructions. You are ready to link up. Get ready….get set….

Oh, wait. You have to see what I made first!

I found three white frames at the Dollar Tree – one 5×7 frame and two 4×6 frames.

I decided that I wanted to make something to display in the bookcase/cabinet that I have in my sewing/craft room. I recently lined the back of the shelves with some sweet yellow and white striped paper to coordinate with some new fabric I purchased for a window treatment, so I needed some accessories to tie that color into my room.

I found this tutorial to make some oh-so darling paper roses, and I knew that I had to use them in my room. This tutorial is wonderful with detailed photos, so check it out.

I cut some of the left over striped paper to be the same size as the cardboard backing in the frames and used double-sided tape to secure the paper to the cardboard. I then put the frame back together, but put the glass BEHIND the cardboard so I could make a three dimensional design within my frame.

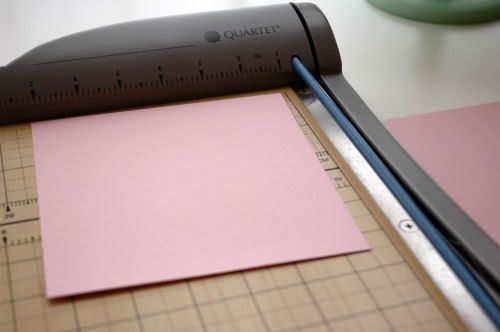
Next, I used the tutorial to make the flowers. I made them in different sizes (8×8, 6×6, 4×4), but here I cut a sheet of scrapbook cardstock paper to 6 inches x 6 inches.
Following the tutorial, I drew a swirl on my paper and kept drawing until it ran off the edge of one side of the paper.
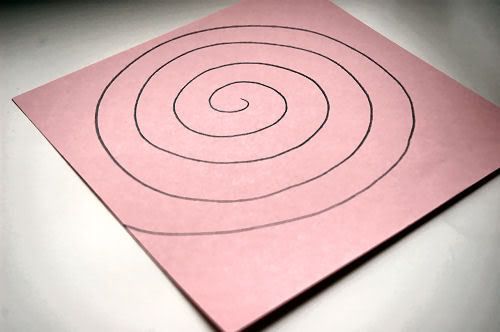
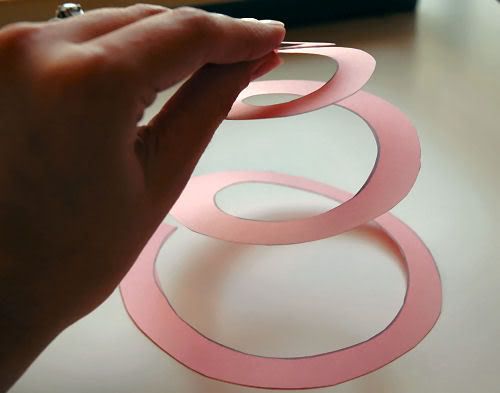
Then, I simply cut on the line I drew until I had a little springy spiral. You will have to cut off the corners of the paper, but that’s pretty self-explanatory once you have the cut spiral in front of you.

Starting with the large end of the spiral, I just rolled the paper opposite as I would roll a cinnamon roll (outside –> in instead of inside –> out). When I finished rolling, I had a sweet little flower.

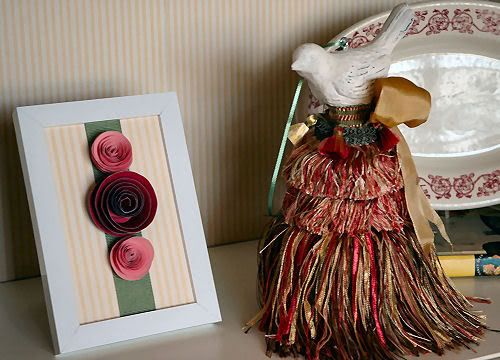
Using my glue gun, I glued three flowers and a little twist of grosgrain ribbon I found in my ribbon stash into the larger of the three frames. I love the little bouquet it created.
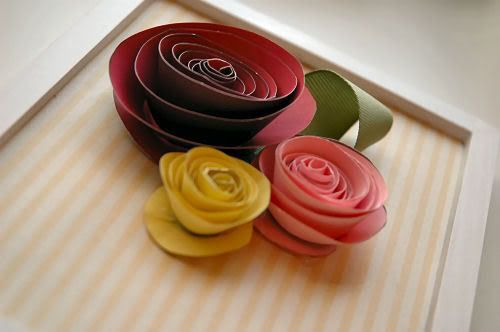
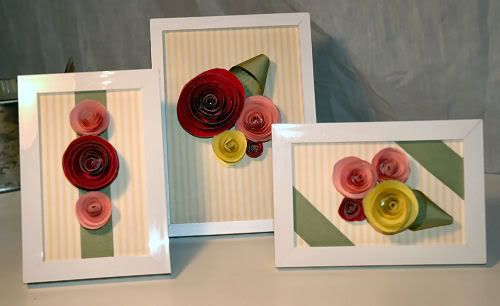
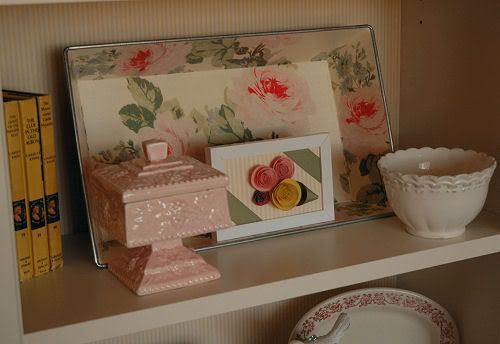
I used the same process in the other two frames, changing up the flowers and ribbons to create three pieces of different but complementary “artwork.”

Here are my new pretties in my cabinet:
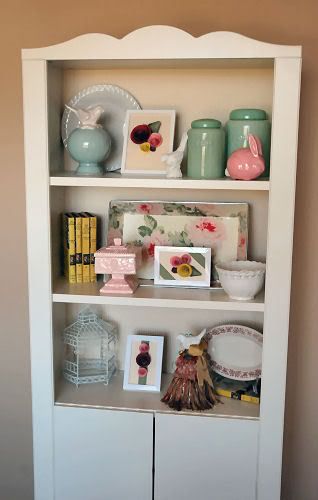
And some individual shots:
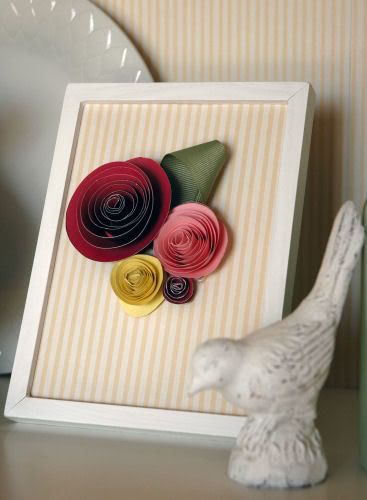
Pretty cute for three dollars and some extra paper and ribbon I had lying around the house, huh?

Okay…it’s finally your turn! If you were up for Challenge, show us your creation. Please just remember to:

  1. Insert the link to your specific blog post with your Five Dollar Challenge entry below, not the link to your general blog address.
  2. Include a link in your Five Dollar Challenge post that directs your readers back here to www.MakelyHome.com.
  3. Visit as many other challenge entries as you can and leave comments. I know you want to see everyone else’s entries as much as you want to show yours off!

To be fair, I’ll have to delete any links to the entries that don’t follow these rules. I’ll try to contact you if I need to delete your link, but if I can’t reach you and you find your link has been deleted, please try again!

Let the festivities begin!
DIY Boutique Tassels

by Lindsay Ballard on March 22, 2009 2,023 Comments

I’m one of those “teach myself” people – I taught myself to sew, I taught myself how to make a faux tailored bedskirt, and I even taught myself how to be a college mascot (I was the mascot at the University of Texas while I was in school, because I thought it was something I could do…I auditioned and it turns out that I was right!).

After seeing all of the beautiful tassels hanging out around the Internet, I decided that I had to teach myself how to make them, too. I have tons of trims just taking up space in my sewing room, and I thought a tassel would be a beautiful way to use some of my stash. Last week, you told me that you wanted to learn to make them, too, so I put together a little tutorial while I was assembling one of my new friends.

**Before I get to the tutorial, I want to ask that this tutorial not be used to make tassels to sell. There are some incredibly talented women out there that are already making these lovelies for public consumption, and I do not want to be a party to the over-saturation of the tassel market. I just wouldn’t feel right about that and would lose a ton of sleep…and you don’t want to see Lindsay on little sleep. Certainly, no one has asked me to make to make such a request, but it’s just what I feel is the right thing to do. I definitely hope you understand where I’m coming from.**

Okay, ready to get started making a little beauty for yourself? Let’s do it!

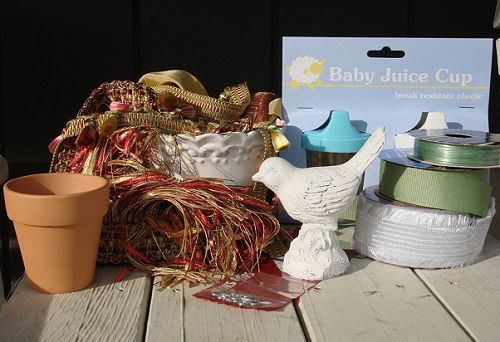
It’s time to assemble the cast of characters. Most of what you need may already be found around your home.

You will need:

A selection of trims and ribbons in various lengths in complementary colors
Ornament or small decorative item to use as topper
Small eyelet screw (and maybe a drill) and a width of ribbon that fits in the eyelet
Glue gun
Small cup or pot to use as a base

In trying to teach myself how to make a decorative tassel, I experimented with several types of bases. The two that worked best for me can both be found at the Dollar Tree.

I recommend using the baby juice cups. With the top removed, they are lightweight and the perfect size for the tassel. You can find the cups in the baby section, and they cost $1 for 2 cups.

I have also used the mini flower pots that can be found in the floral section. They are quite a bit heavier than the juice cups, but they are $1 for 3 pots, so you can get more bang for your buck.

You may have something around the house that could work instead of the juice cup or flower pot, but it should be roughly the same height and shape as these items.

To get started, you need to sort your trims by lengths. You can use any type of trim you have on hand from previous projects, such as tassel trims, eyelash trims, fringe, etc. If you need to go out and purchase trims, try to pick the best quality you can find (without breaking the bank!). I actually received an email this morning that Hobby Lobby’s trims will be 30% off this week, so if you have a HobLob around, this is a good time to check out the home decor trims.

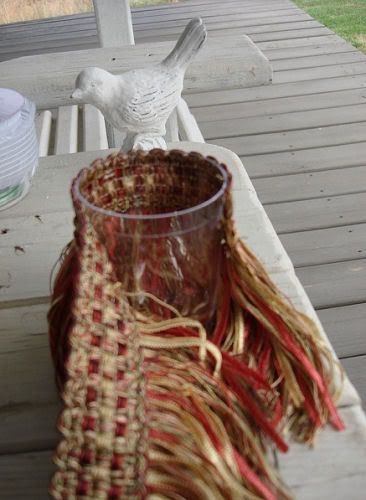
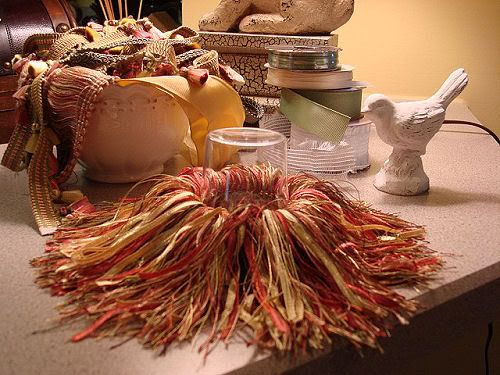
You’ll want to use your longest trims on the lip of the cup. You have a few different options for applying your trims. The first option, and the one that you will most commonly use, is gluing your trim directly to the cup. For this example, I wrapped the trim around the cup twice so it would be fuller.

Or, as I ultimately decided to do for my tassel, I glued the trim upside down. My fringe, although beautiful, isn’t very fluffy, so I wanted to do something to puff it up a bit. As you can see, I glued the trim on in the opposite direction as my previous example, with my trim hanging down the cup instead of away from it. If you are using tassel trim or a fuller fringe, you won’t need to do it upside down like this.

I wrapped my trim around the lip of the cup twice here, too. Then, I lost my light outside, so I had to move the tassel-making operation inside. 🙂

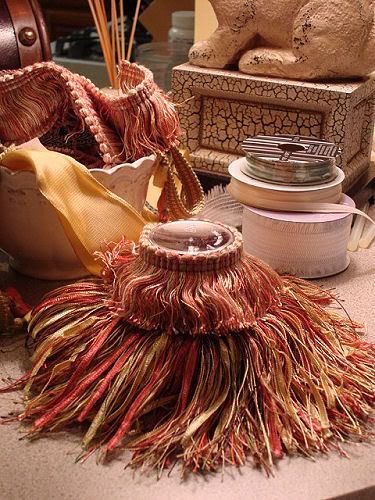
Because I glued my trim on upside down, I flipped my cup over so that the base (the flat part of the cup) is at the top. See how the fringe puffed up a bit when I flipped it over? Thank you, gravity!

This next part is when you get to be really creative. Take your different trims and hold them around the cup to see what looks good to you. If you like the way it looks, just glue it on! Here, I used a fluffy fringe.

Keep adding fringe until you get to the top of your cup. You can layer them on top of each other if you want to “build up” your trims, or you can space them out like I did. All you really need to remember is to make sure none of the cup shows through the trim.

Next, take your decorative ornament and see if you can screw your little eyelet screw into the top of it. If your piece is made from wood, you will probably be able to. If it’s made from plastic or plaster, you will probably need to drill a tiny hole in the top, which is what I had to do. My eyelet screw is 1/2″ long from end to end and a package of 10 or so of them costs under $1 at a hardware store.

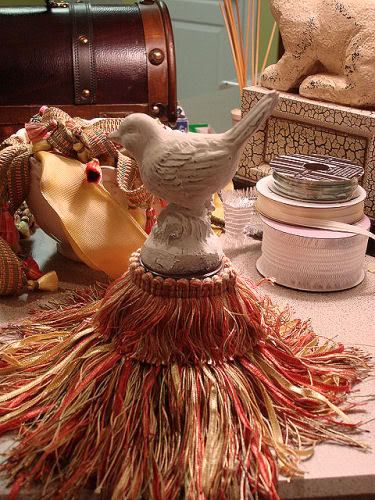
Add a generous amount of glue to the bottom of your ornament, and glue it directly to the flat top of the cup. Push the two pieces together while the glue dries so that the glue bond will be nice and tight.

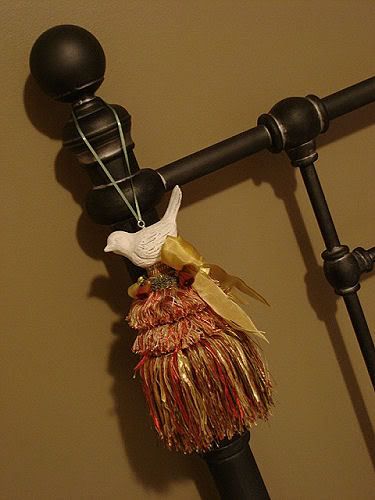
My little bird, in case you were wondering, came from a great store called Old Time Pottery and cost $1.99. We don’t have an Old Time Pottery in my city, and I’m SO JEALOUS of those of you who do! I bought a few of them to add to different vignettes around my home. I just couldn’t pass them up!

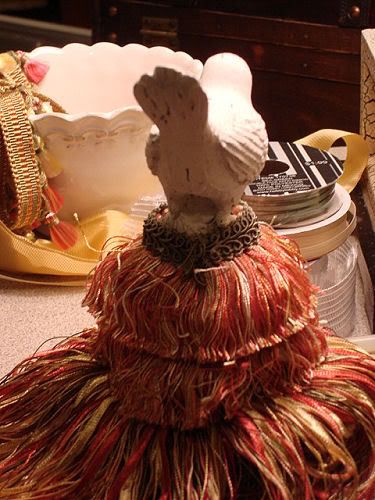
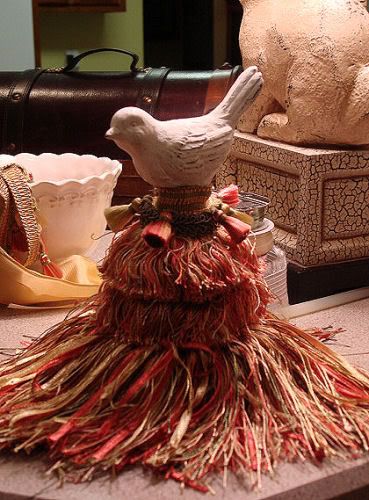
Once the ornament is in place, it’s time to add the last of your trims. I added more fringe around the base of my bird. Other types of trim that look really great here are eyelash trims or loopy trims. They really make it look like your ornament is sitting on a nest of trim.

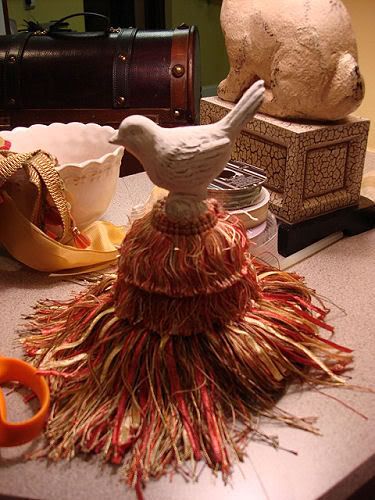
Keeping adding trims until you feel like you are finished. I added some gimp around the top of the fringe.

Then, I added some little tassel trim on top of the gimp.

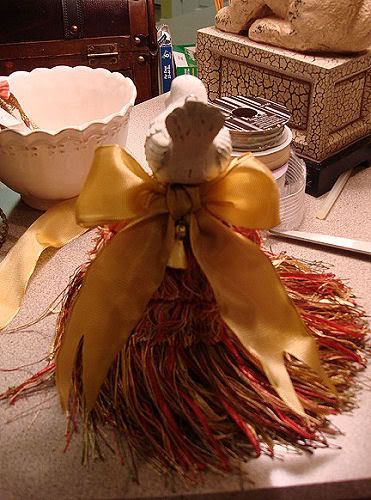
For a finishing touch, I added a little
bow to the back of my tassel.

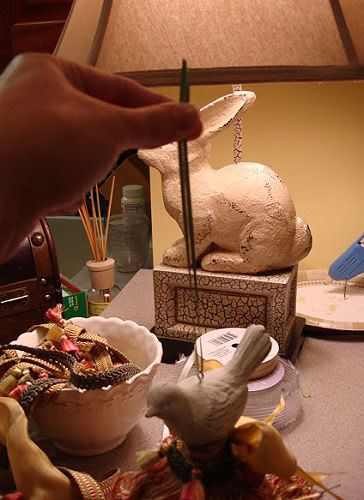
Once you are satisfied with your tassel, it’s time to add the eyelet and ribbon hanger. Screw the little eyelet into your drilled hole, slide a length of ribbon through, and tie a little knot at the top of the ribbon to make a loop.

Now, it’s time to hang your tassel somewhere beautiful and admire your work!

On my last post on tassels, several people commented that they didn’t quite know where to hang these type of decorations. The answer is to hang them anywhere you want! They look great on dresser knobs, headboard posts, lamps, or simply sitting in a dish. The sky’s the limit, so get creative.

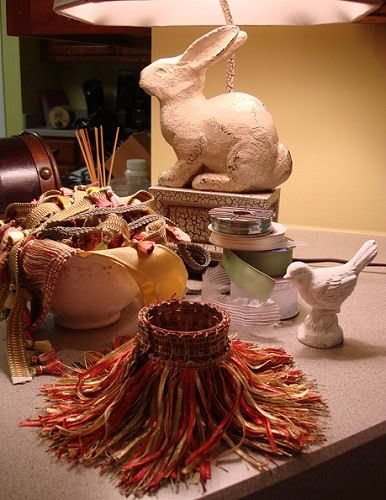
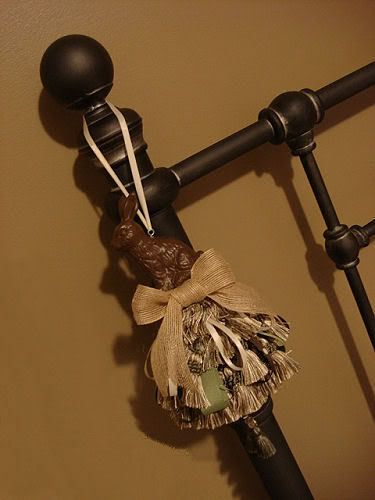
The first tassel I created was one with a bunny that looks like a chocolate rabbit. I purchased him at Big Lots in the Easter section for $1.50, and he looks so cute sitting on this tassel!

My mother loved this one so much that she told me to just go ahead and leave him at her house. 😉 He now hangs on a built-in china cabinet in her kitchen.

For the rabbit tassel, I used a mini flower pot as the base and used a lot of tassel trim and loops of ribbon. I even bought a pre-made small tassel for a few dollars at Walmart and strung it on a ribbon, which I glued to the inside bottom of the pot, creating the little dangling tassels you see. There are so many different ways you can make these tassels, so use your creativity and see what you can come up with.

I’ve enjoy making these tassels so much that I thought I’d make one more…for the Grand Prize winner of the Five Dollar Challenge!

The prize is shaping up pretty well so far, with monogrammed hand towels, a swatch organizer, and now a custom made tassel already announced. Get to work, because there’s more prizes to come!

Please let me know if you need any more tassel pointers or if there is a step that isn’t clear. Happy creating!

P.S. I’m adding this post to the Works for Me Wednesday linky carnival over at We Are That Family!

« Previous Page
Next Page »
  • Email
  • Facebook
  • Instagram
  • Pinterest
  • Twitter

About Makely

Lindsay Ballard is a former college mascot turned political geek turned roller derby playing, DIY fanatic.

Lindsay chronicles her projects, design ideas, and lifestyle tips here at Makely, where she shares tutorials and inspiration. Her DIY designs are bold and graphic, while her spirit is fun and full of color.


Archives

Categories

PRIVACY POLICY
Copyright © 2009-2019 Makely School for Girls | All Rights Reserved | Posts may contain advertising content or affiliate links