Makely

Let's Make Life Awesome

  • Home
  • Decorating/DIY
    • Create Your Decor
    • Decorate Your Home
    • Paint Your Walls
    • Transform Your Furniture
  • Healthy Living
    • Essential Oils
    • Family Wellness
    • Household Care
  • Project Gallery
  • Contact
You are visiting: Home » Decorating/DIY » Create Your Decor » Page 132

Tackling My Tassel Obsession

by Lindsay Ballard on March 19, 2009 70 Comments

The cutest tassels in the whole entire world have been hanging around the Internet. Have you spotted them?

We must first pay homage to the pioneer of the most luxurious tassely tassels on the entire planet. You know who I’m talking about. I really don’t even have to say her name.
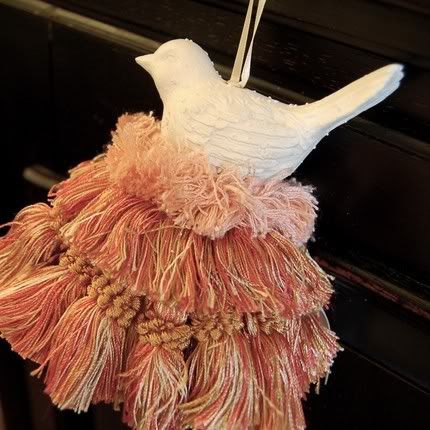
The Nester is pretty much my hero, and her gorgeous tassels leave absolutely nothing to be desired. They look so soft and warm…I just want to rub them on my cheek like one of those psychos that you’d see in a movie. You can own your own tassely goodness directly from the Nester (insert squeal like a 31 12 year old seeing New Kids on the Block) by visiting her Etsy store.

I nearly fell off of the couch when I this adorable bird house tassel on a blog I happened upon.
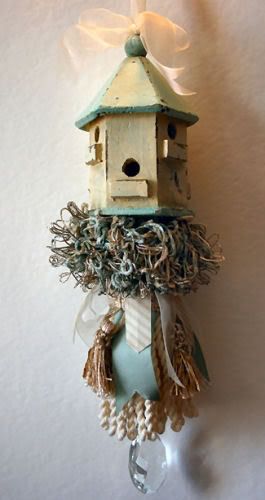
Selia at Down The Rabbit Hole made this lovely. It doesn’t appear from her blog that she sells her tassels, but I think she should…especially after seeing this one she made:
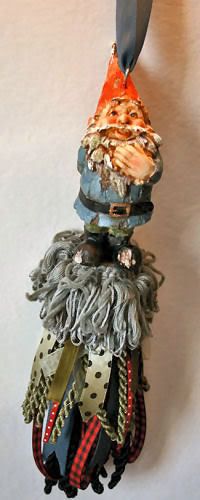
A gnome tassel! I can’t get enough of this little guy. The colors are fantastic. Wouldn’t this be adorable in a playroom or on a back porch overlooking a lovely garden? I can actually picture exactly where it would be hung in my house.

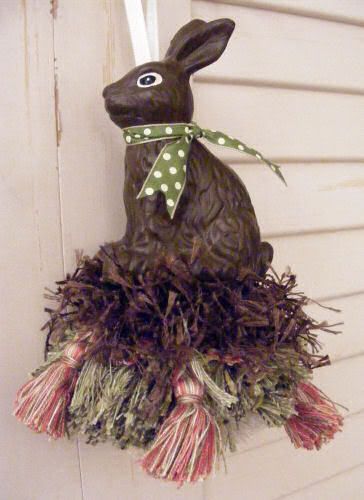
Just in time for Easter, Megity has listed this darling tassel in her Etsy Store. I know bunnies are a plenty this time of year, but I am of the mindset that rabbits can be displayed in the home all year long.
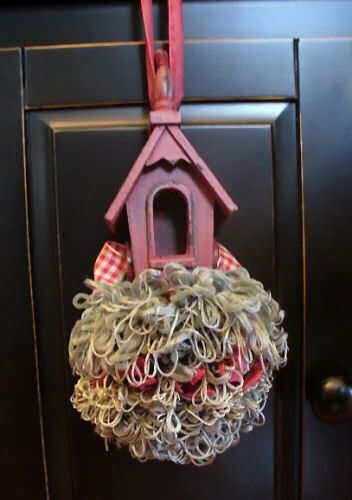
Last but not least is this sweet little red house nested a top neutral fluff. You can find this one in the Etsy store of The Tassel House. It just screams country warmth, doesn’t it?

I totally just made up that “country warmth” thing, but I think I’m going to start using it. It sounds good, doesn’t it?

I’m in love with tassels. I want to hang them all over my house, pretty much on anything that will stand still. My husband may even find one hanging on his ear if he continues to spend so much time vegging on the couch! In order to do so, I must first teach myself how to make them just as beautifully as these others are crafted.

I’m off to teach myself the fine art of tasseling…and I just may pass along some tips to you when I figure it out. I know you are totally freaking out over the thought of a tassel tutorial, huh? 😉

In the meantime, visit the shops listed above and support these wonderful Etsy artisans! And visit Julia at Hooked on Houses to see what others are hooked on this week.

Glue and Pin Your Way to a New Window Treatment

by Lindsay Ballard on March 17, 2009 1,986 Comments

The year I went off to college, my parents left our home state of Texas and retired to the Florida Keys. They were too young to be officially retired, but thought of their new relaxing life as retirement nonetheless. Then life changed, as life tends to do, and they decided to move to Tennessee to be closer to my mother’s aging parents.

Going ‘home’ for me as an adult isn’t really going ‘home.’ My parents live in a gorgeous house, but it is in a teeny little town with little more than a McDonald’s and a Walmart. Their little Tennessee town seems like it’s on a different planet than my hometown of Austin, Texas. Things here are just so…strange.

I never feel comfortable out and about in their town, but I feel more comfortable than ever inside their home. Although the furnishings (other than the antique grandfather clock and armoire I lust after) are totally different than the ones I grew up with, they are warm and welcoming, just like Mom and Dad.

Every time I walk into their home, I am drawn to the custom window treatments that cover the breakfast room windows. They are simple, yet classy and unique.

Photobucket

Sorry for the lousy photos throughout this post. I used a point and shoot camera for these instead of my normal DSLR.

Photobucket

Photobucket

I check the window treatments out during each visit, trying to figure out how best to replicate them in my own home. During this trip, I finally figured out that all I needed was a glue gun and a safety pin. Seriously, it’s that easy folks. Let me show you how!

SUPPLIES:
Home Dec width (54″) fabric – you’ll need 2 1/2 times your window width
Scissors
Iron
Glue gun or fabric glue
Safety Pin

Cut a 7″ width strip off the length of the short edge of your fabric and set that aside. You’ll be using that piece in a bit.

With your large piece of fabric, fold in half so that the raw edges with the printed fabric information (not the edges cut at the fabric store) are together at the top. This is likely how your fabric came off the bolt, so just make sure that the upper edges are even. Press the fold so that it creates a nice straight line.

Next, open your fabric and press in every side by 1/2″. You’ll do this on the top and the sides.

Photobucket

Fold your fabric back in half lengthwise at the first crease mark you made. All of your raw edges should be folded inside the piece of fabric.

Using your glue gun or fabric glue, seam the short sides of the fabric together. This will essentially create a long rectangle with an open top.

Photobucket

Here’s where you have a decision to make. You can make the fabric tabs like the ones in the curtains above or you can use drapery rings to hang the curtain from the rod. If you want to use drapery rings, you can skip down to where I put a *** in the post. If you want to use the tabs, continue with the directions as written.

Grab the 7″ wide strip you set aside earlier, and cut three 8″ long pieces out of it. You should end up with three small pieces that are 7″ wide and 8″ long.

Go back to your ironing board and turn in the long edges 1/2″ on each of the small pieces. Then fold the long edges together so that the width of each piece is 2 1/2.” The sides of each piece will slightly overlap on the back. You just need to play around with it a bit to get it to work.

Photobucket

Then, fold each small piece in half so the raw edges meet and press a crease. You’ll end up with three small pieces measuring about 2 1/2″ wide and 4″ long (when folded in half).

Go back to your large piece of fabric and find the center of the open side. With about 2 1/2″ of a short piece above the open side, glue the short piece in place.

Photobucket

Glue the other two short pieces in the same way, but space them so that these two tabs will hang on the outer edge of the curtain. Use your measuring tape or ruler. I just eye-balled the spacing for this tutorial, and you’ll notice later that I didn’t space them far enough apart.

(***Welcome back, drapery ring users!) Close the top seam with your glue gun or fabric glue.

Photobucket

Your curtain is now ready to hang! You can hang it as is and I think it looks perfectly delightful. Fuss with the folds a bit, fluff them out, and you are good to go.

Photobucket

Or, you can take it one step further, which you is what I would do. 😉 Visually divide your curtain into three horizontal sections. Pinch the top of the bottom third and bring it up to the top of the middle third.

Photobucket

Use your safety pin on the backside of the fabric to pin the little pinch into place. You could be totally fancy schmancy and use a needle and thread to tack it in place, but why would you go through that effort when you could just use a safety pin? Yep, that’s how I roll.

Photobucket

My mother always told me that 95% of window
treatments is the fluffing, and she is absolutely right about that. Pull and tuck and fold and fluff until you get them exactly how you want them.

I think mine turned out really great – especially for $3/yard fabric, a glue gun, and a safety pin. Dare I say they look better than the ones that were custom made?

Photobucket

Hanging next to my mother’s window treatment.

Photobucket

With using nothing but a glue gun and a safety pen, I think the Nester would be proud.

Does this window treatment work for you? It sure works for me! Visit Works for Me Wednesday over at We Are That Family to see more WFMW fun.

« Previous Page
Next Page »
  • Email
  • Facebook
  • Instagram
  • Pinterest
  • Twitter

About Makely

Lindsay Ballard is a former college mascot turned political geek turned roller derby playing, DIY fanatic.

Lindsay chronicles her projects, design ideas, and lifestyle tips here at Makely, where she shares tutorials and inspiration. Her DIY designs are bold and graphic, while her spirit is fun and full of color.


Archives

Categories

PRIVACY POLICY
Copyright © 2009-2019 Makely School for Girls | All Rights Reserved | Posts may contain advertising content or affiliate links