Makely

Let's Make Life Awesome

  • Home
  • Decorating/DIY
    • Create Your Decor
    • Decorate Your Home
    • Paint Your Walls
    • Transform Your Furniture
  • Healthy Living
    • Essential Oils
    • Family Wellness
    • Household Care
  • Project Gallery
  • Contact
You are visiting: Home » Decorating/DIY » Create Your Decor » Page 79

Easy $2 Striped Pumpkins

by Lindsay Ballard on October 10, 2012 3,145 Comments

I don’t traditionally go all out with fall decor.  I usually set a few fall-ish things out, but the earth tones associated with fall are not my bag, Baby.  I also always start to feel that my house looks cluttered with all that going on.

So this year, instead of doing the usual by setting out the things that are in my “fall” Rubbermaid bin from the attic, I’m doing something a little more fun.  I started by making the Urban Scarecrow Wreath.  And then last week, I sat down to paint a few pumpkins.

This is the point where you think to yourself, “Oh, no!  Another blogger posting another post about painted pumpkins!”  But, I promise mine are different for two reasons:  1)  They aren’t perfect and 2) They aren’t orange/black/silver.  Instead, they look like mini circus tents.
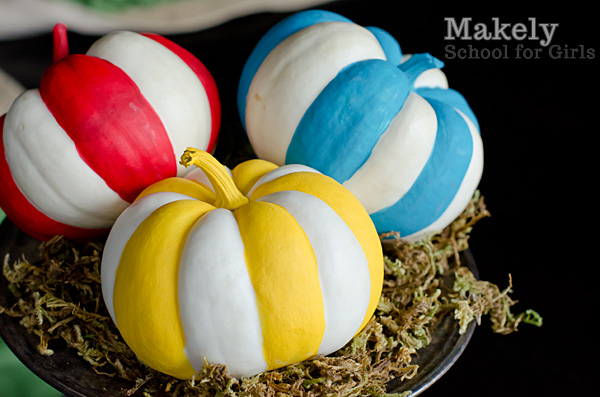
So, I’m here to lay it all out for you.  Fall decor doesn’t have to be time consuming.  It doesn’t have to take over your entire house.  And it certainly doesn’t have to be orange.

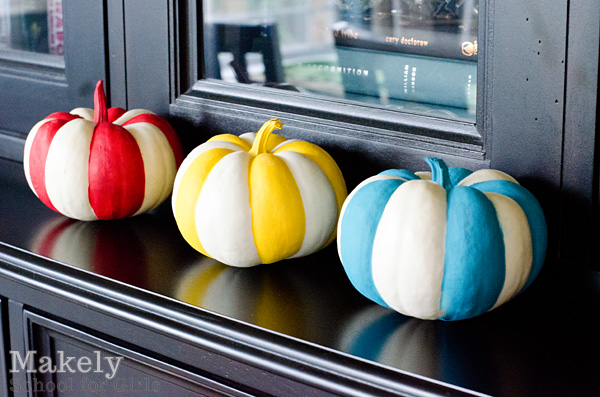
I picked up three mini white pumpkins at my grocery store for less than a buck a piece.  Last week, I sat down in front of the TV with three bottles of acrylic craft paint (yep, the $1 kind from the craft store) and a 1/4 inch paint brush (also from the craft store).  I didn’t mask off stripes with painter’s tape.  I didn’t use stencils and spray paint.  I just painted every other rib on the pumpkin with the craft paint.  They are definitely not perfect, but it’s not like they are going to hang around my house for longer than a month and a half anyway.
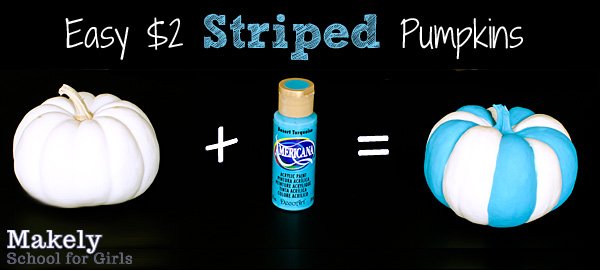
The pumpkins I used had thick ribs and deep crevices, which meant it was easy to get straight-ish lines. They also had an even number of ribs, so the alternating color pattern worked out perfectly.  It also led me to wonder if all pumpkins had an even number of ribs, but Mr. Google didn’t answer that question.  Does anyone know the answer ?

I painted one turquoise, one red and one yellow – one of my favorite color palettes – which means that they coordinate nicely with the rest of my decor.  Plus, they’re just kind of fun and unexpected, which IS my bag, Baby.
Have you thought about incorporating some non-traditional colors into your fall decor?  Tell me about it!
How to Create an Urban Scarecrow Fall Wreath

by Lindsay Ballard on October 4, 2012 1,640 Comments

Urban Scarecrow Fall Wreath | Makely School for Girls


Not all of us have the opportunity to need a real scarecrow.  Sure, I live a stone’s throw away from corn and cotton fields, but in my little manicured neighborhood, we don’t have to worry too much about crows.

Scarecrows are always one of those quintessential signs of the Fall season to me, though.  So, even though we don’t have trees that change colors or real pumpkin patches down here in Austin, I figured that I could at least have my own version of a scarecrow – an Urban Scarecrow Wreath.  I think it’s so fun, so I put together a tutorial so this fall wreath could be replicated.  It is really simple to put together.

For this tutorial, you only need a few items:

  • Foam wreath form
  • Old shirt
  • Straight pins
  • Raffia
  • Fake crow
  • Fake gourds
  • Hot glue gun and glue

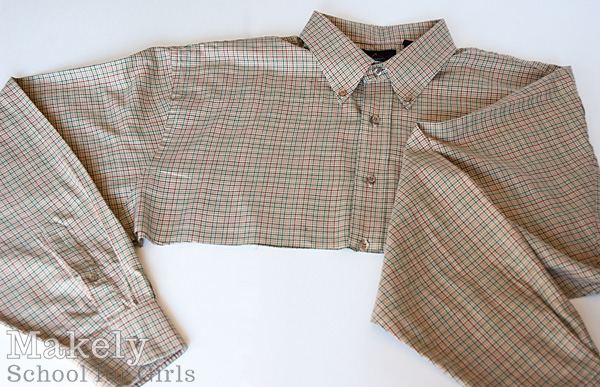
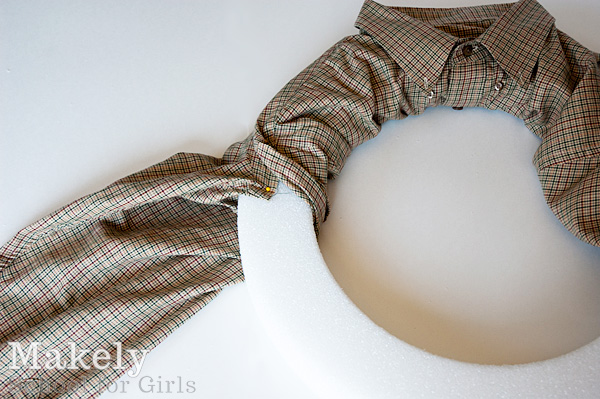
1.  Begin by cutting your old shirt across the body, underneath the arms.  Keep the extra fabric that you cut off.  I used an XL men’s shirt that I picked up at Goodwill.  I specifically wanted a plaid one in autumn colors, but any color or print would do.

Urban Scarecrow Fall Wreath | Makely School for Girls

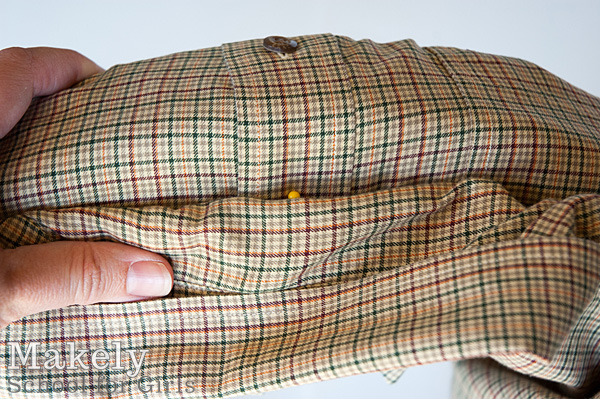
2.  Wrap the bottom center of your shirt (where the buttons are) around the back of your wreath. and put a few pins in the styrofoam wreath.

Urban Scarecrow Fall Wreath | Makely School for Girls

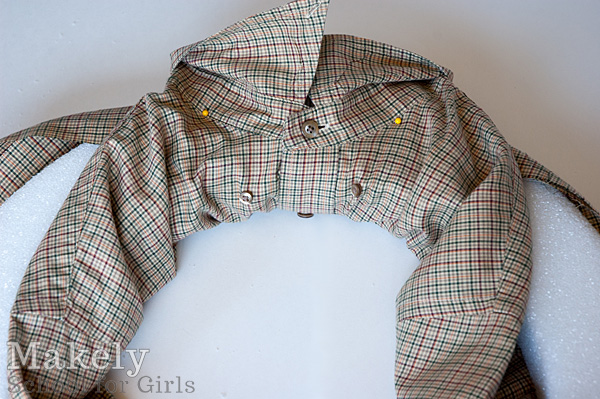
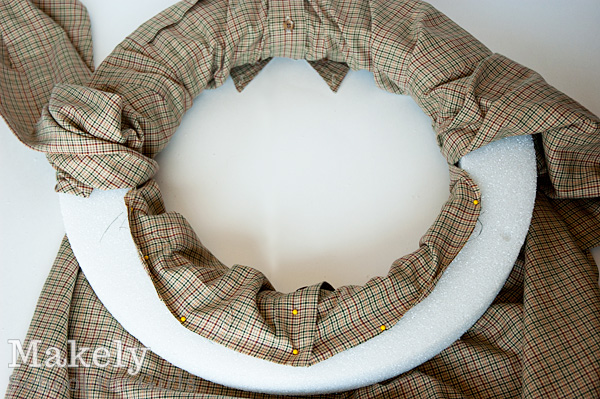
3.  Wrap the from part around the front of the wreath so that it covers the raw edge and pins of the bottom of the shirt.  Put a few straight pins under the collar so they are hidden when the collar is folded down.

Urban Scarecrow Fall Wreath | Makely School for Girls

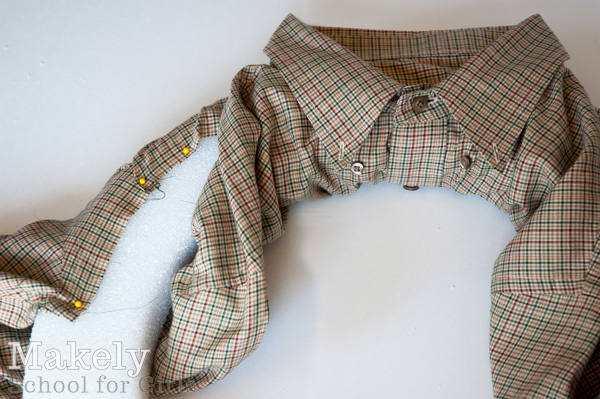
4.  Next, wrap the extra fabric up and over the back of the wreath, pull it tight and pin into place.  It should make sense when you do it, as you are trying to cover the wreath in the shirt fabric.

Urban Scarecrow Fall Wreath | Makely School for Girls

5.  Then, pull the front part of the shirt up and over where you just pinned, covering both the pins and the styrofoam.  Pin that into place with a pin right across from the sleeve.

Urban Scarecrow Fall Wreath | Makely School for Girls

6.  Repeat this process for the other side of the shirt.

7.  Now, take that extra shirt piece that you cut off and pin it to the bottom of the wreath.  Make sure that the buttons on the top of your wreath line up with the buttons on the bottom.  I wrapped the top of mine around the back and pinned it (shown below).  Then, I wrapped the bottom around the back, pulled it tight and pinned it.  Cut off the extra fabric once it’s pinned on the back.

Urban Scarecrow Fall Wreath | Makely School for Girls

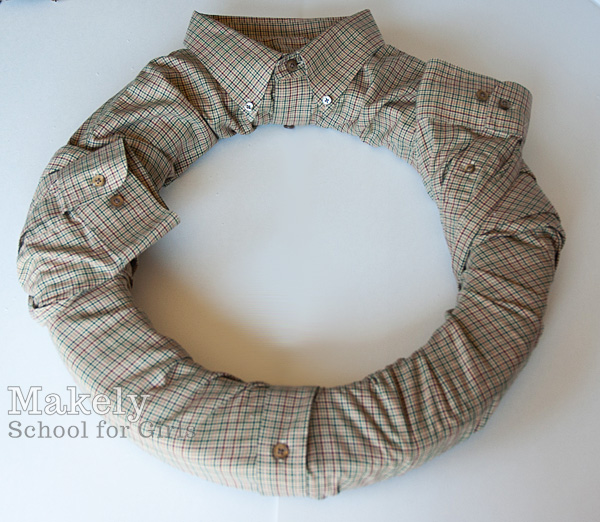
8.  Wrap the sleeves around and around the wreath so that all of the stryrofoam is now covered.  You can pin them on the back and inside the cuffs so that the pins won’t show.  On one side, I had to put a twist in the sleeve on the back of the wreath so that the cuff buttons would be facing out.

Urban Scarecrow Fall Wreath | Makely School for Girls

How cute would this be with a tie on the neck hanging down in the open part of the wreath for Father’s Day?  Adorable!

That’s the end of the detailed “steps.”  The next part is where you get to get creative!

Urban Scarecrow Fall Wreath | Makely School for Girls

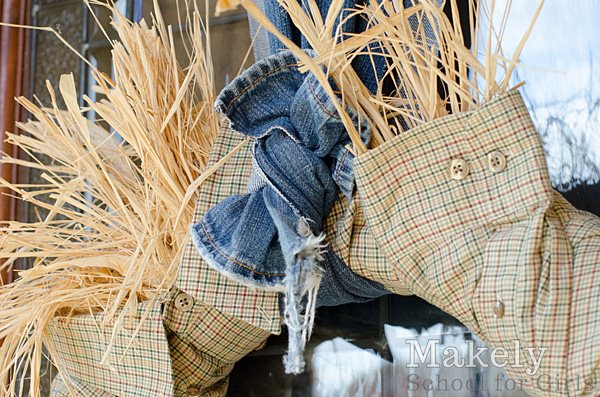
I took a pair of Tom’s old jeans and cut one of the legs off, right under the seat.  I cut that leg long ways so that I had 2 long pieces of denim.  I knotted them and then hung the long strip just like I hang wreaths with a long piece of ribbon.

I cut some handfulls of raffia and hot glued them inside the collar and cuffs.  Yes, you will likely burn your fingers a bit in the process – but it’s worth it.  The more haphazard your raffia “hay” is, the more awesome it will look.

Urban Scarecrow Fall Wreath | Makely School for Girls

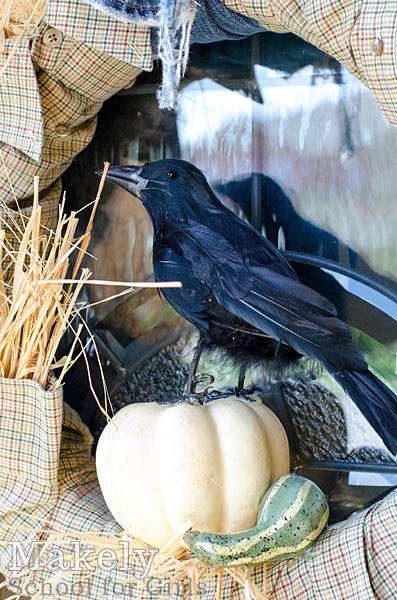
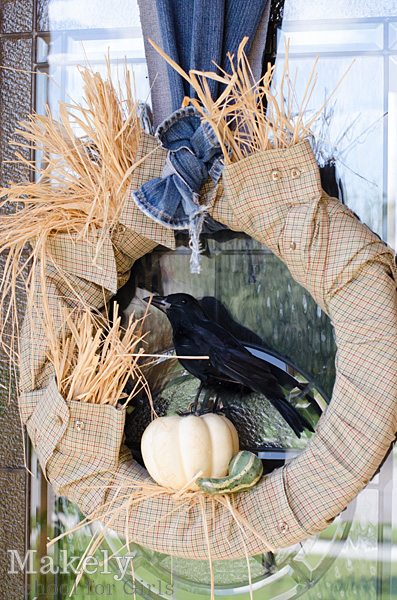
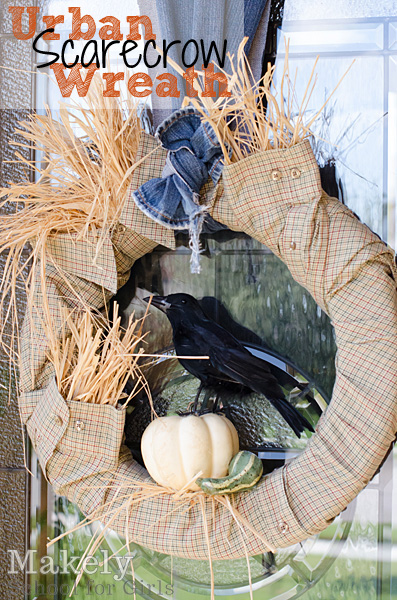
I hot glued a few more pieces of raffia on the bottom of the wreath and then glued a little fake pumpkin and a little gourd beside it.  Then, I hot glued this cute crow on top of the pumpkin.  I bought the crow and gourds at Michael’s.  The Dollar Tree also has crows, but all of the ones I found looked like they had mange.

Urban Scarecrow Fall Wreath | Makely School for Girls

The end result is my urban scarecrow – Plaid shirt + jeans + hay.  Way more fun and funky than old clothes draped across a broomstick, right?

« Previous Page
Next Page »
  • Email
  • Facebook
  • Instagram
  • Pinterest
  • Twitter

About Makely

Lindsay Ballard is a former college mascot turned political geek turned roller derby playing, DIY fanatic.

Lindsay chronicles her projects, design ideas, and lifestyle tips here at Makely, where she shares tutorials and inspiration. Her DIY designs are bold and graphic, while her spirit is fun and full of color.


Archives

Categories

PRIVACY POLICY
Copyright © 2009-2019 Makely School for Girls | All Rights Reserved | Posts may contain advertising content or affiliate links