Makely

Let's Make Life Awesome

  • Home
  • Decorating/DIY
    • Create Your Decor
    • Decorate Your Home
    • Paint Your Walls
    • Transform Your Furniture
  • Healthy Living
    • Essential Oils
    • Family Wellness
    • Household Care
  • Project Gallery
  • Contact
You are visiting: Home » Decorating/DIY » Decorate Your Home » Page 104

Let There Be Light

by Lindsay Ballard on May 27, 2009 40 Comments

As soon as the Nester announced her Lampapalooza Party, I knew I was game. For starters, I needed to update a few of my lamps and this was a good way for me to move them to the top of my growing To Do list. Also, I’m a sucker for anything ending in -palooza or -a-rama, so she totally knew how to draw me in.

For the -Palooza, I thought it would be fun to give you a little tour of my home by way of some of my lamps and lighting. I’m not very creative when it comes to lamps and refuse to spend much money on them at all. I’ve always really thought of lighting them more as a necessity than as a piece of decor, but I’ve recently started to rethink that attitude. You’ll see what I mean.

When you walk in my front door, you will see my dining room on the left.
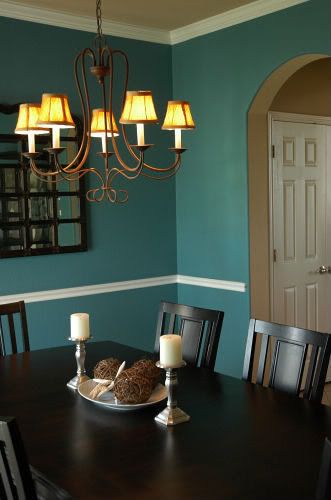
This chandelier was installed by the builder, but they left it with bare light bulbs. After the ugliness of it blinded me for about 6 months, my mother suggested that I buy the little lamp shades that just clip onto the bulbs. Always listen to your mothers, people. They know what they are talking about. Those little shades made a world of difference.

If you continue walking down my entry way, you will pass the kitchen on your left (where DH has finally agreed to let me replace some of the can lighting with a chandelier! SQUEAL!!) and walk into my living room. This room has an extraordinary amount of natural light, given the SIX windows (again, SQUEAL!!), so we only have two lamps. One of them used to be HIDEOUS, but I replaced the shade that made me want to gouge my eyes out with this drum shade a while back and it was a nice change.
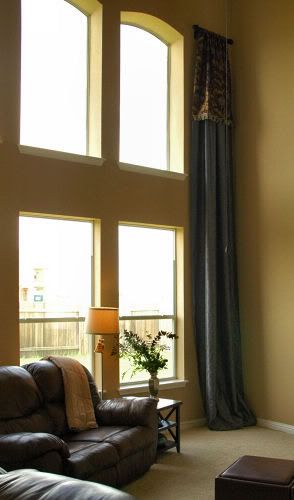
I added a chunky gold tassel to it and called it a day.

Then, the gal-who-can’t-leave-things-alone got the better of me and added some ribbon that coordinates with my window treatment.
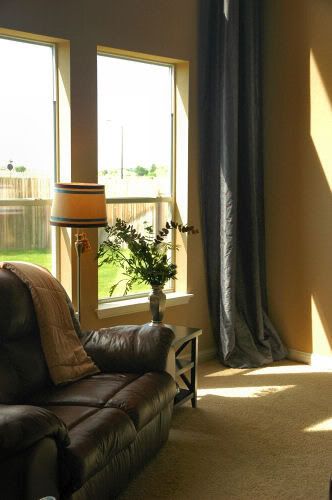
Love it? Hate it? I can’t decide. What do you think? I really does coordinate much better than it looks like it does in the photo. The ribbon is just hot glued on (duh, of course it is!), so I can remove it if the Internet decides that is is ugly. I won’t be offended if you hate it, because I might think it’s ugly myself.

Anyway, to the left of my living room is the breakfast room, where we have another Bald Bulb Builder’s Beauty enhanced by some $2 shades.
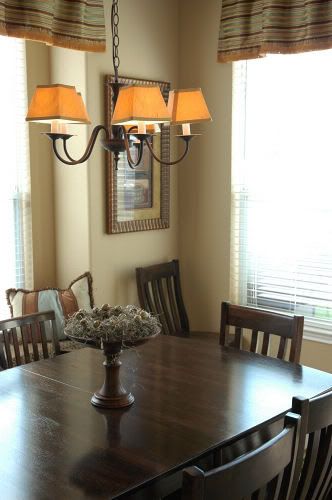
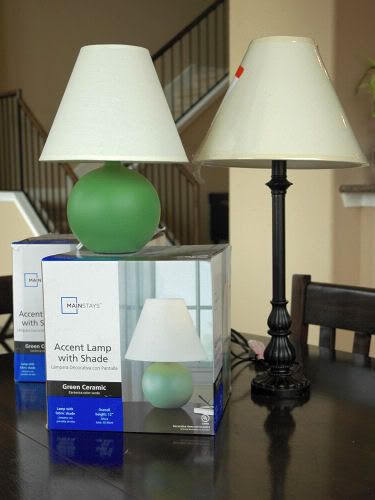
Side bar: I’m going to pause the tour real quick to show you the bargains I bought yesterday at Wal-Mart.

The ugly green lamps were $3 each (with shades!), marked down from $10. It was cheaper for me to buy the two lamps for their shades than it would have been to buy new shades for my bedroom lamps (that you will see next). Crazy, huh? The buffet lamp was only $5. I think it was originally part of a pair that had been separated (broken? stolen?), and the pair was supposed to be $25. I did pay $10 for the large shade, but you’ll see in a bit how I made it beautiful.
Okay, back to the tour. In the bedroom, we have a pair of lamps on our nightstands that have been through a series of transformations. They began as $7 brass thrift store lamps.
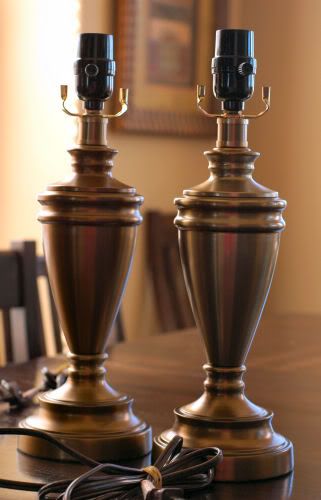
They were spray painted white and held shades that were much too large and didn’t quite fit the base, so they never sat straight.
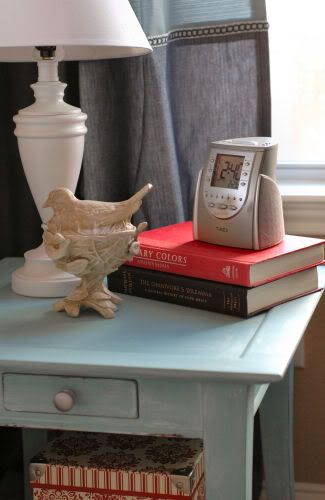
I tried to make them more interesting by covering them with the same toile fabric used on my headboard, but they were so awful that I couldn’t even finish adding the trim.
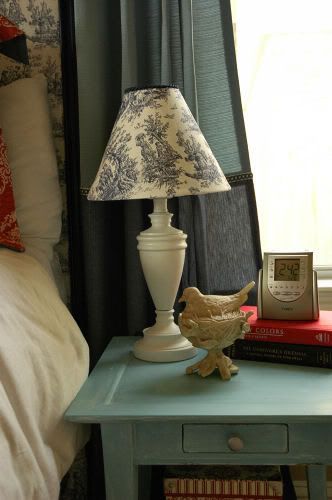
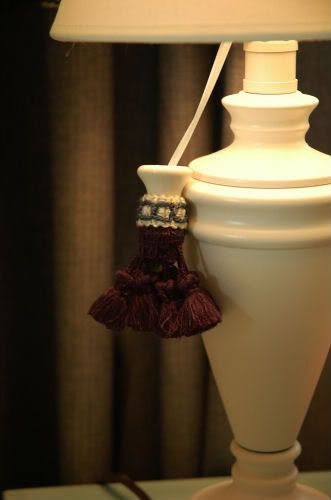
And now, they hold the white shades from the cheap Walmart lamps and sport little tassels I made from leftover window treatment trim and cabinet knobs. I think they finally found their look.

We even have a lamp in our master bath. I mean, wasn’t this odd little ledge between our vanities just screaming for a buffet lamp?

Now, it’s time to head upstairs. At the top of the stairs is my son’s playroom that I’ve talked about a million times here, here, and here. I added some trim to the cheap Wal-Mart buffet lamp and lamp shade, and I’m happy with the results. It totally reminds me of a grass skirt.
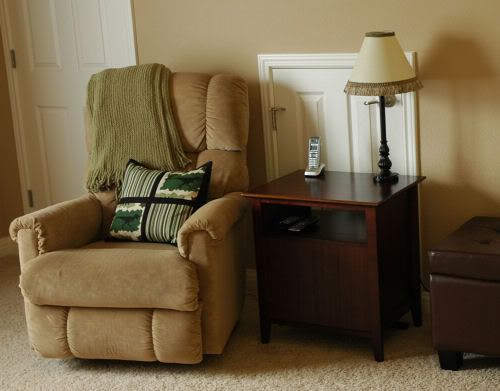
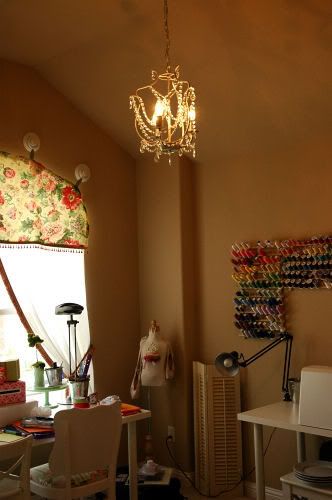
Our last stop in my little home tour is my sewing/crafting/everything room. It’s a bit messy, but I simply can’t be artistic in a perfectly clean space. Yeah, that’s it. That’s why it’s messy.

One of the first things we did when we closed on this house was to go to Ikea and get this chandelier to install in this room. Tom hung it up for me that night. 🙂 I love how the crystals catch the light.
And on my large crafting table, you will find my Pièce de résistance, my most favorite lamp of all – my vintage white hobnail milk glass lamp. I found at Goodwill for $5. L.O.V.E. I.T. You may think it’s ugly, but that would just mean that you are wrong.
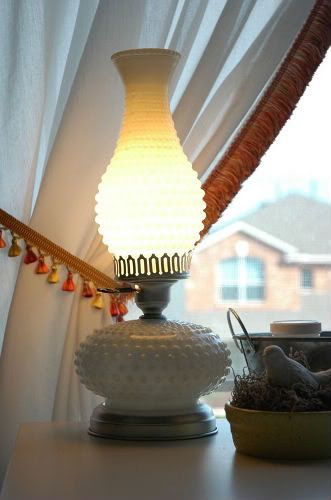
Step back! Don’t touch! ::smacks your hand:: No, you can’t have it. I will guard it with my life!

Thanks for joining me on my little lamp tour. Do you have tons of lamps? What do you look for when adding new lighting to your home? And don’t forget to let me know what you think about the ribbon on the shade in my living room. Something tells me I’ll be removing some ribbon tonight.

P.S. Love lamps and need a new beauty in your life? Visit Imparting Grace and enter her Lamp Giveaway! It’s a cutie!
The Dino-mite Playroom

by Lindsay Ballard on May 13, 2009 212 Comments

Two weeks ago, Melissa at The Inspired Room challenged us to stop procrastinating and start creating. Being as that I always have some sort of transformation in mind, I had several different options to choose from.

I weighed my possibilities and ultimately decided that I would transform my son’s playroom in three areas:

  1. Add a window treatment to a bare window;
  2. Paint the armoire that holds his television and set up the TV/DVD/Cable box system properly;
  3. Add adult seating to the room.

I’m pretty sure some of you thought I was absolutely insane to tackle all of that at once. You were right. However, as the Queen of Biting Off More Than I Can Chew, I made it all happen within the two week time period Melissa gave us to complete our projects.

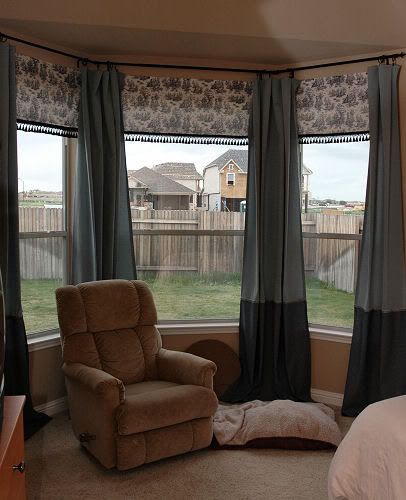
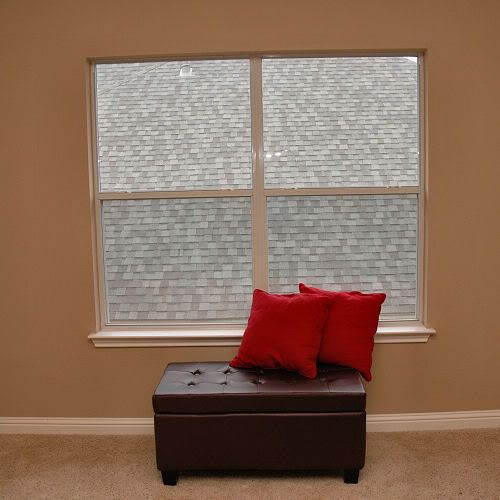
Let’s start by checking out the window. This is the before: Bare. Sterile. My neighbor’s roof.

After about 6 yards of fabric, 6 yards of trim and two pre-made curtain panels, I bring you this:

Love it.

If you can’t tell, the valence has a dinosaur silhouette print on camo color blocks (Ick! to camo, but this totally works). The stripe at the bottom of the panels is a coordinating fabric. This is a totally different direction than I originally wanted to take this room, as I’m not into themed rooms. However, Zack saw this fabric at the store and loved it. He’s apparently got a good eye, because this is playful yet still classic and grown-up.

This window treatment was a very easy one to put together, and I’m planning to write a tutorial on it to post in the next few weeks. I love how rich and layered it looks.

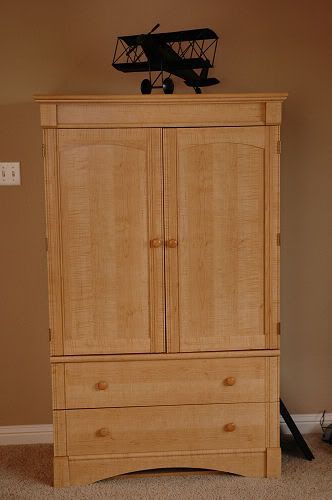
Next, let’s move on to the armoire. It is a substantial (read: very heavy) piece of laminate furniture that we bought for Zack before he was even born. I wanted to continue to use it because it’s very well made and has nice lines, but I’m just not into the light colored wood right now.

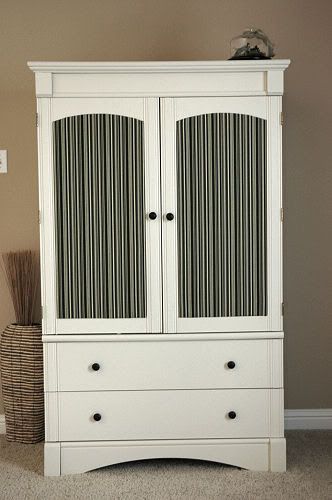
After searching and searching online for a tutorial on how to paint laminate furniture, I found nothing that thoroughly detailed the process. So, I just figured it out myself! Don’t worry, I’m going to share the steps with you next week because it is very easy – just time consuming. I added the striped fabric from the window treatments into the insets of the doors and installed new knobs. The paint color is Antique White from Behr and matches the dinosaur print perfectly.

Shhh…listen closely. Doesn’t it scream Pottery Barn to you now? Love it, love it. You can even see the dinosaur diorama on top of the armoire.

To create the insets, I laid a piece of butcher paper on top of the door and traced the shape of the insets. I cut out the tracing and used it as a template to cut a piece of foam board into the right shape. Then, I heated up my glue gun and glued the fabric onto the board (wrapping the edges around to the back) and glued the board to the door. Easy peasy.

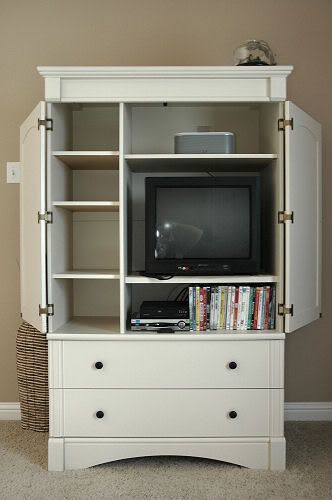
DH even helped me hook up the DVD player and the cable box to the TV. We moved all of Zack’s movies upstairs, so now he can turn his on his own movies during TV time.

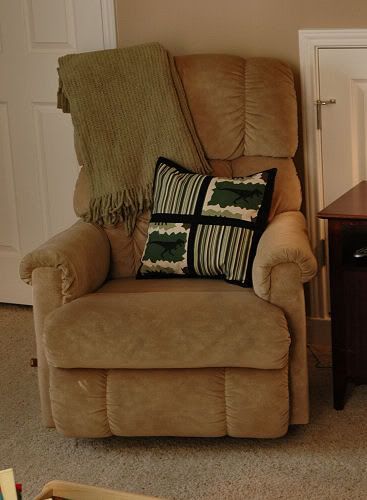
Lastly, we moved the ugly but comfy La-Z-Boy recliner out of the master bedroom…

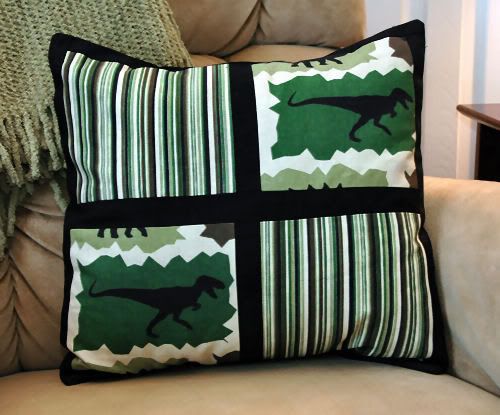
…and put it upstairs in the playroom to add some adult seating. Per some suggestions I received, I added a sage green throw blanket to the chair. I also made a pillow sham for the chair using the three fabrics I have used throughout the room. I’m planning a tutorial on that one, too.

This is such a nice spot to sit now. I have to fight Zack over this space. Love it, love it, love it.

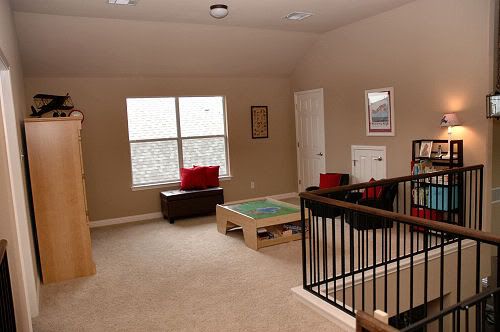
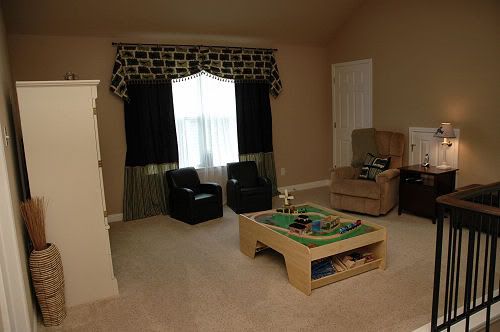
Let’s take a look at it all the whole room put together. Here’s the before:

And here’s the after (please remember I’ve added no accessories yet, so don’t look at my bare walls or the non-matching lamp):

Quite the transformation! As my DH pointed out, “Gosh, it looks, like, put together now.”

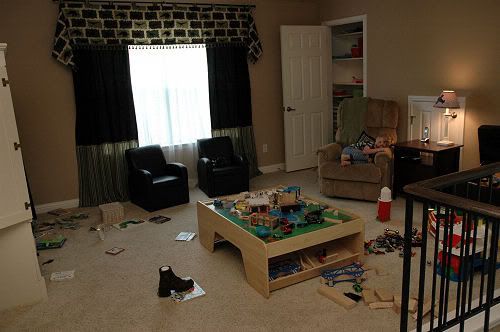
Just so you don’t think I’m always on top of everything, here’s a peak of what the room looked like just before I took pictures. See? Zack stole my chair!

Thanks so much, Melissa, for hosting this Procrastination Party! Otherwise, this room would still look bare and I would still be ignoring it. Now, we are enjoying it to the fullest!

« Previous Page
Next Page »
  • Email
  • Facebook
  • Instagram
  • Pinterest
  • Twitter

About Makely

Lindsay Ballard is a former college mascot turned political geek turned roller derby playing, DIY fanatic.

Lindsay chronicles her projects, design ideas, and lifestyle tips here at Makely, where she shares tutorials and inspiration. Her DIY designs are bold and graphic, while her spirit is fun and full of color.


Archives

Categories

PRIVACY POLICY
Copyright © 2009-2019 Makely School for Girls | All Rights Reserved | Posts may contain advertising content or affiliate links