Makely

Let's Make Life Awesome

  • Home
  • Decorating/DIY
    • Create Your Decor
    • Decorate Your Home
    • Paint Your Walls
    • Transform Your Furniture
  • Healthy Living
    • Essential Oils
    • Family Wellness
    • Household Care
  • Project Gallery
  • Contact
You are visiting: Home » Decorating/DIY » Create Your Decor » DIY Moss Balls

DIY Moss Balls

by Lindsay Ballard on March 2, 2009 32 Comments

The weather in my neck of the woods has already gotten quite warm. The temperature actually reached 87 degrees last week! March has only just arrived, but in Austin, Spring has already sprung.

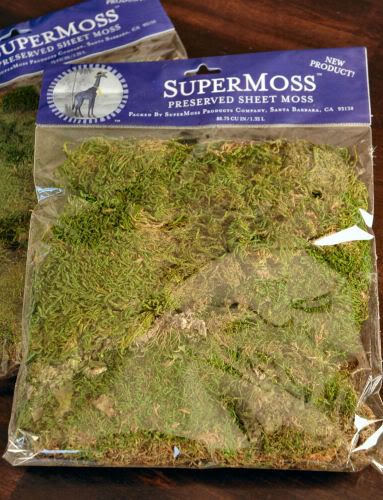
I wanted to bring some of that beautiful Spring green into my home after a dreary winter. I ran across some sheets of preserved sheet moss at Hobby Lobby and thought they would be a good choice for me, as I was not born with a green thumb. I can pretty much kill any live plant that comes into my house.

I’d never heard of preserved moss, but I thought it would make beautiful moss spheres like the ones that I’ve been seeing everywhere. The preserved moss is fresh looking real moss on a sheet of earth, as opposed to the fake or dried moss you can buy in bags. I think it cost me $3.99 a sheet, which is about the same price as the not-as-pretty dried stuff.

Photobucket
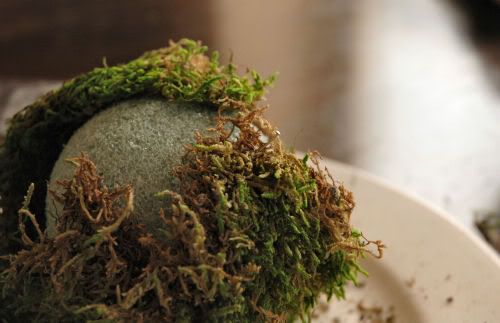
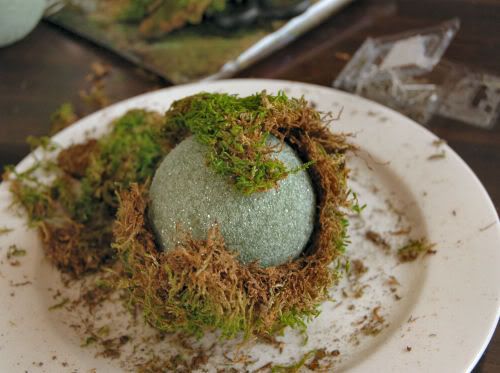
The moss does make a a pretty big mess, so you’ll probably want to work on a plate or a tray for easy clean up. It would probably also help you if you didn’t have a 3-year old to assist you, because they can make any mess even bigger.The original idea was that I was going to use spray adhesive on the ball and attach the sheet moss that way. Well, one sticky hand and a lot of frustration later, I opted for straight dress makers pins. I simply tore off a large piece of moss wrapped it around a Styrofoam ball, and secured it all around with the straight pins.

Photobucket

You can see a straight pin here if you look closely.

Photobucket

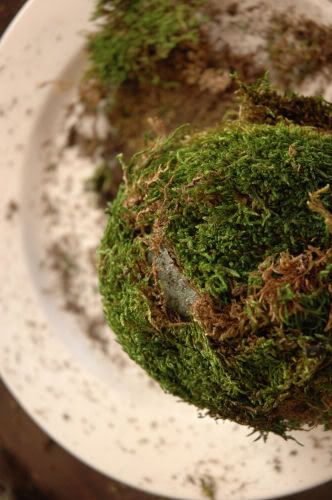
I just kept wrapping and piecing the moss together around the ball, securing with straight pins. There ended up being a lot of straight pins, but you can’t see them on the finished product.

Photobucket

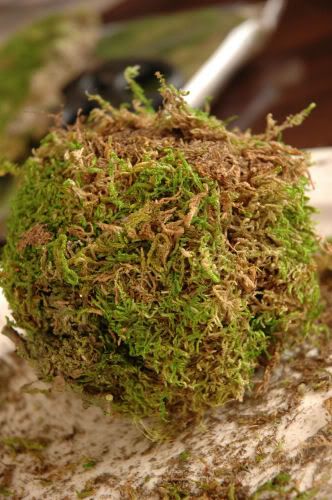
In the end, each ball looked like this. I love how you can see dirt, twigs, and moss on this ball…just like it came straight out of nature!

Photobucket

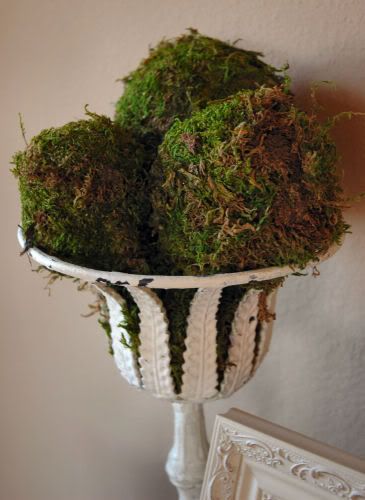
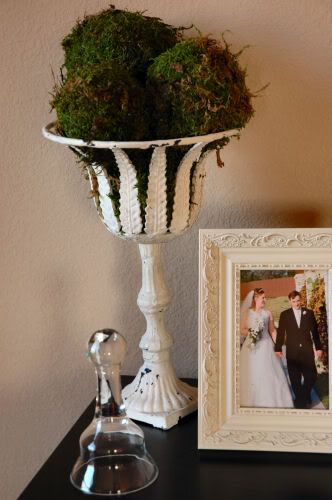
I purchased this really great chippy urn at Goodwill a few weeks ago and hadn’t found a use for it. I decided that the moss balls would look awesome in here. They do, don’t ya think?

Photobucket

Just an FYI – when determining the number of moss balls you want in your vessel, remember that the Styrofoam balls will be larger in diameter once the moss is attached. I originally thought I wanted to use 2 large balls and 2 medium balls, but after the moss was attached, I only had room for 1 large ball and 3 medium balls.

Photobucket

I am really pleased with the way this turned out. It adds a nice Spring-y touch to my dresser display.
Photobucket

Check out The Inspired Room for more ideas on decorating for Spring!

About Lindsay Ballard

Lindsay Ballard is a former college mascot turned political geek turned roller derby playing, DIY fanatic.

Lindsay chronicles her projects, design ideas, and lifestyle tips here at Makely, where she shares tutorials and inspiration. Her DIY designs are bold and graphic, while her spirit is fun and full of color.

Lindsay lives outside of Austin, Texas with her husband (Tom), children (Zack and Emma), and dogs (Duke and Jill). She plays roller derby for the Rockin' City Rollergirls out of Round Rock, Texas.

« In the Blink of an Eye
Are You Ready for a Challenge? »

Comments

  1. Teresa says

    March 2, 2009 at 7:03 am

    What a fabulous idea- love how in looks in your display-
    Thanks so much for sharing-
    Happy Day

    Reply
  2. southerninspiration says

    March 2, 2009 at 7:37 am

    Oh, pretty!! Looks like spring in the Houston area, too! Love it!

    Suzanne

    Reply
  3. the BLAH BLAH BLAHger says

    March 2, 2009 at 9:45 am

    So pretty! Love it!

    Reply
  4. Anonymous says

    March 2, 2009 at 10:24 am

    Love this! I think I might have to steal this idea for a centerpiece for my dining area table 🙂

    ~ Zoe

    Reply
  5. Amanda says

    March 2, 2009 at 7:40 am

    Love it, great job! I made a wreath for my front door out of this and the birds came and pulled it all off! LOL!

    Reply
  6. Pam says

    March 2, 2009 at 8:29 am

    What a great project! I’m going to keep that in mind. Your display looks beautiful, too!

    Reply
  7. Sarah says

    March 2, 2009 at 9:00 am

    Love this idea! It does look like Spring!

    Reply
  8. Liz@Violet Posy says

    March 2, 2009 at 9:32 am

    So pretty and easy! Happy Spring 🙂

    Reply
  9. Gina says

    March 2, 2009 at 9:38 am

    I love that idea! It looks great, I think I’ll have to hunt down some moss and try it!

    Reply
  10. Christina says

    March 2, 2009 at 4:02 pm

    Just the perfect spring touch. I’m going to have to look for some moss now.

    Reply
  11. Rhoda @ Southern Hospitality says

    March 2, 2009 at 6:47 pm

    That is really cute! I see lots of girls getting out the moss about now. We’re all ready for spring!

    Reply
  12. Kimm at Reinvented says

    March 2, 2009 at 7:30 pm

    That looks great, I love the moss balls, I’ll be following your directions!

    Reply
  13. Stacey says

    March 2, 2009 at 4:49 pm

    I love moss! That project is great.

    Reply
  14. Mrs. B. says

    March 2, 2009 at 5:43 pm

    i adore how those turned out. 🙂 i would love to make some…
    and that little birdie perched on your books is sweet too.

    Reply
  15. Sherri @ Design2Shine says

    March 2, 2009 at 6:04 pm

    What a great project. And YES it looks awesome in your GW urn. I just love a thrifty find and project too. Thanks for sharing and I want that birdie. LOL

    Reply
  16. kari and kijsa says

    March 2, 2009 at 8:42 pm

    This looks fabulous!! Great job- love that urn!
    blessings,
    kari & kijsa

    Reply
  17. Alisa says

    March 2, 2009 at 8:56 pm

    I bought that same urn at Michaels a couple years ago on clearance for $2 but could never figure out what to do with it. I just need some balls and moss. Thanks for the great idea and tutorial!

    Reply
  18. Debbie @ ribbonwoodcottage.blogspot.com says

    March 2, 2009 at 10:12 pm

    This looks great. I love the idea. Everything looks wonderful, really liked your post.
    Blessings,
    Debbie

    Reply
  19. DomesticDivasFancy says

    March 2, 2009 at 11:15 pm

    Wow! Who would have thought…that looks beautiful and seems really easy to make! It looks great how you have them in that vase. LOVE IT! Thanks for sharing the how to!

    Reply
  20. Alison says

    March 3, 2009 at 1:21 pm

    Love it! It looks so cottagey!

    Reply
  21. Melissa @ The Inspired Room says

    March 3, 2009 at 1:33 pm

    Ooo, fun project!!! Love it!

    Reply
  22. Kim @ Forever Wherever says

    March 3, 2009 at 4:24 pm

    That’s perfect for Spring! Love it!
    -Kim

    Reply
  23. leigh ann says

    March 4, 2009 at 11:11 am

    I will have to try this because it looks so great!! I am so ready for warmer weather!!

    Reply
  24. Southern Fried Gal says

    March 4, 2009 at 1:17 pm

    Hello! I found your blog over at Bless Our Nest. I love the mossy spheres and especially how they dressed up your Goodwill find! Great tablescape!

    Reply
  25. vintageindie says

    March 15, 2009 at 7:22 pm

    What a great idea! Thanks so much for sharing.

    Reply
  26. Laurel @ Ducks in a Row says

    March 17, 2009 at 2:52 pm

    I just came from The Inspired Room and love your post – plan on making one this week.

    Reply
  27. Della says

    March 17, 2009 at 7:43 pm

    Haha, my sister and I tried making these with tacky glue, not a good idea! Maybe we’ll try again:)

    Reply
  28. Artie says

    March 27, 2009 at 12:35 pm

    Love this idea. I actually looked at moss sheets today while I was at Joann’s! Great use for it, and they’re beautiful to boot!

    Reply
  29. Heather says

    February 22, 2012 at 7:32 am

    Hi Lindsey! I just found your blog – so glad I did (new to blogging)!!
    I love this idea – looks so easy to do! I am your newest follower and I pinned this DIY to Pinterest.
    Please come visit my blog and say hello. I love followers and comments 🙂 Lets keep in touch with GFC and LF!
    Have a great week!

    Heather @ settingforfour.blogspot.com

    Reply
  30. Cindy says

    March 31, 2012 at 5:05 pm

    I have been looking for these, but really, big ones. The largest ones I found were 12″ and ran about $80 ea. w/o shipping. I may give this method a try…thanks for sharing!

    Reply
    • Cindy says

      March 31, 2012 at 5:13 pm

      Also going to pin this! It’s already hot and humid in Houston too!

      Reply

Trackbacks

  1. Pinterest Inspirational Pics of the Week – says:
    February 22, 2012 at 6:28 am

    […] I am obsessed lately with moss balls, I bought one the other day and now every time I go in a store I tend seek them out….but at $10 a ball that’s pretty steep…..so here is a great way to make them by Living With Lindsey […]

    Reply

Leave a Reply Cancel reply

Your email address will not be published. Required fields are marked *

This site uses Akismet to reduce spam. Learn how your comment data is processed.

  • Email
  • Facebook
  • Instagram
  • Pinterest
  • Twitter

About Makely

Lindsay Ballard is a former college mascot turned political geek turned roller derby playing, DIY fanatic.

Lindsay chronicles her projects, design ideas, and lifestyle tips here at Makely, where she shares tutorials and inspiration. Her DIY designs are bold and graphic, while her spirit is fun and full of color.

Lindsay lives outside of Austin, Texas with her husband (Tom), children (Zack and Emma), and dogs (Duke and Jill). She plays roller derby for the Rockin' City Rollergirls out of Round Rock, Texas.


Archives

Categories

PRIVACY POLICY
Copyright © 2009-2019 Makely School for Girls | All Rights Reserved | Posts may contain advertising content or affiliate links