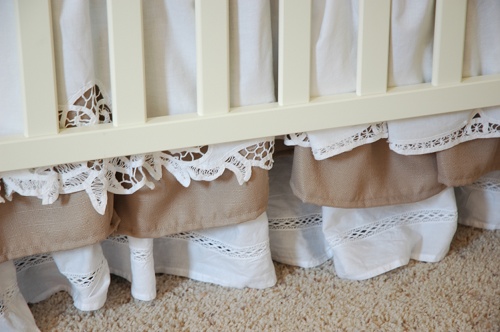
One of the first inspirations I had for Emma’s nursery came in the form of vintage bedskirts I found at Austin’s City Wide Garage Sale. I’ve talked about this show before, and you may remember that it’s more a vintage and collectible show than it is a “garage sale.” In the piles and piles of old linens that one vendor always carries, I found white bedskirts edged in lace and crocheting for $4 each, so I bought four of them to turn into Emma’s new cribskirt.
I also used some pre-made curtains that I cut up for the brown layer in between the white (the curtains were cheaper to buy than it would have been for me to buy the actual fabric yardage).
I needed to piece together the bedskirts and curtain panels to fit the crib. I simply made three panels in each fabric (one for the front and two for the sides – I didn’t worry about the back of the crib, since it would never be seen) that were about 2.5 times the length of each side. I made the height of each panel exactly the same – 19 inches. It was enough for a few inches to tuck under the mattress and the rest to hang down and just touch the floor.
After I had my panels pieced together and hemmed, I ran them through the ruffler on my sewing machine. If you don’t have a ruffler and have some extra money lying around, you should TOTALLY get one. I used to pull all of my ruffles by hand, but that was just too much work for the length of each of these panels. I would marry my ruffler if could. Anyway, after the fabric panels were ruffled, there were just about the length I needed for each side of the crib.
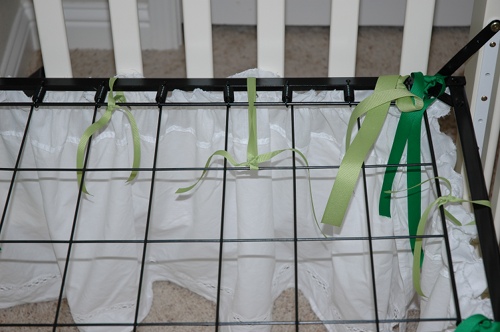
I found this genius idea to make your skirt panels with ties on the top so that you can just tie them onto the mattress frame for easy adjustment. I love this idea, because there’s nothing I hate more than a cribskirt that drags on the floor once you have to lower the mattress when the baby gets bigger. Zack’s cribskirt was too long once we had to lower his mattress, and it drove me crazy!
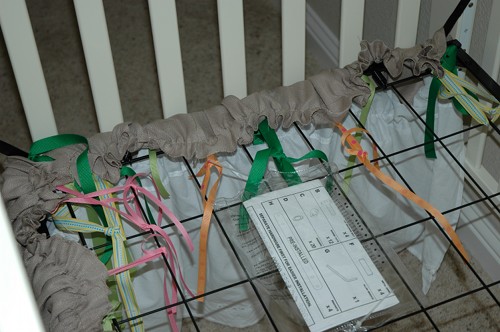
But, here’s where I got completely lazy. Instead of sewing all of those little ties onto the top of my panels, I used safety pins and ribbon that I already had on hand. I just pinned a length of ribbon onto the panels and tied it to the mattress frame. I started with my bottom layer, and tied it so that the bottom of the skirt just touched the floor.
Then, I took the 2nd layer (my brown layer) and did the same thing, tying it a little higher so that the lace from the bottom layer just peeked through.
It looks like SUCH a mess, I know, but you can’t see that when the mattress is in the crib.
Then, I did the same thing with the top layer, again tying it a little higher so that the brown layer just peeked out from the bottom.
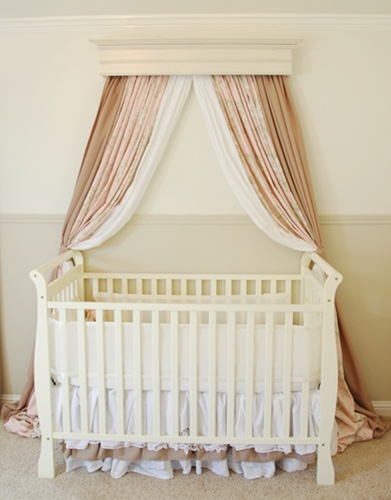
Now, I have a tiered, ruffled cribskirt that can be easily adjusted and took very little time to put together. Go me!
********************
I’m very excited to announce the winner of the Xpresiv Designs vinyl giveaway! Our winning commenter was #52, Megan from Motherhood Unedited, who said:
Today’s Moments are Tomorrow’s Memories and always remember to kiss me goodnight for my sons room.
Awww, so sweet! Congrats, Megan!
In case you aren’t Megan, Aimee is offering a fabulous 20% off code for Living With Lindsay readers! Just enter LINDSAY at checkout for your discount. Thanks, Aimee!

That is GORGEOUS! I love how you layered the brown and white. And the short-cut is fabulous. =) I’ll be linking.
I have always ruffled by hand – basting stitch twice then pulling the threads. I only recently learned of a ruffler. I have it on my list of must have attachments before I start sewing for my new granddaughter. Thanks for showing how you created the crib skirt. I made one out of eyelet with the old pulling the ruffles trick. Whew.
You MUST get one!! I used to do the two rows of basting stitches, too, and this is really so much easier – and faster – and you don’t have to worry about breaking those darn threads!
I love the colors! And the way you attached it, it’s genius! You can so use it again for another project without destroying the fabric. LOVE IT!
Thanks for tip! When I redo my bedroom I’ll be using this information.
I love your idea and it turned out fabulously. I recently went to an auction of vintage fabric store and left with a truckload of laces and trimes, so if anyone needs some little special trims , send me a note. Rosanna Hope
Great! I was just about to start on a crib skirt for my little one on the way. This will be great for adjusting the length of the skirt as we move the mattress up and down in the future!
That is ADORABLE! Totally filing it away for future use!
Also, I’ve only been to the Austin City Wide Garage Sale once, but I looooooved it!
Is there no end to your craftiness and ingenuity?!! I love this!t
I still can’t get over how beautiful this nursery is. Each detail is so perfect. It is a great idea to substitute curtain panels for bolt fabric…a perfect way to lower the cost!
Thanks so much, Alison! 🙂
Action requires knodgewle, and now I can act!
Bom dia!É incrÃvel como os adversários penetram na defesa corinthiana.É incrÃvel como o ataque do corinthians não consegue penetrar na defesa adversária!E o Iarlei, como perde gol!Abraços.
quelle scarpe e quel vestito sono bellissime<3 le scarpe col plateu o come si chiama le adoro npon vedo l'ora di avere almeno 16-17 anni per metterle<3
Hi I am so thrilled I found your blog, I really found you by error, while I was looking on Digg for something else, Anyways I am here now and would just like to say thank you for a marvelous post and a all round exciting blog (I also love the theme/design), I don’t have time to look over it all at the minute but I have saved it and also added in your RSS feeds, so when I have time I will be back to read a lot more, Please do keep up the great work.
Great idea with the ribbons! The crib skirt my MIL just ‘altered’ for the new baby room doesn’t go past the frame of the crib since the mattress is so high that you can’t even see the detail on it. 🙁 Maybe I will have to do a little ribbon action with it! LOVE how your crib turned out!
Hi!
I love the ruffled bed skirt. I sew and am thinking about doing my baby girl’s bed skirt. After reading your comments on the ruffler foot, I did some research and had a couple of questions. You all mentioned that they were expensive, but several that I found online were all between $8-$30.00, or is this something different. Can someone explain in more detail what it is that I am looking for, or better yet, is there a brand/website you can suggest that I get one from? Do you have to get a particular for your machine? I look forward to hearing back from someone! Thank you so much!
Thanks so much, Alison! 🙂
Just wondering what setting you used on your ruffler? I am so excited to try this project!
Infine, ma non meno importante, WMI ha deciso di chiedere a tutti (ergo, pure a voi) di raccontare la loro storia con Wikipedia. Il risultato può essere quello che volete: un post, un messaggio, un articolo e anche un saggio, basta che tratti di Wikipedia e di voi. Maggiori info su come colrbaorale, qui.