About six months ago, I needed to create a few big wired bows for my sister’s wedding. I was terrified, and my stomach was tied in knots about it…so to speak. I may be crafty, but I had never been a good bow maker.
Luckily, my friend Zoe is a great bow maker. I enlisted her help in my bow-making scheme, and she showed me an incredibly easy way to put together a big, loopy bow. Our little projects turned out great.
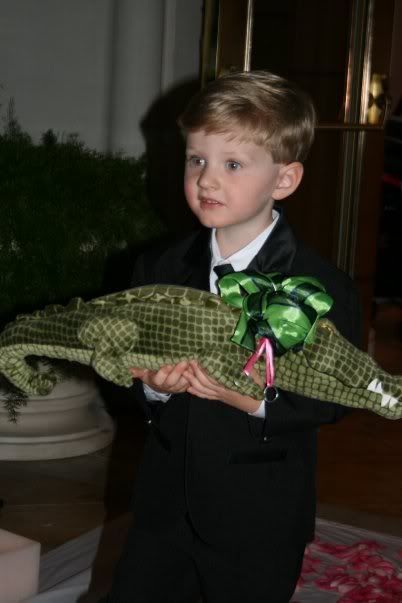
Why, yes. He may be the cutest ring bearer (with a Gator for two obsessed UF grads) that you have ever seen.
Anyway, bows like that are pretty expensive to buy in the stores, and they never have a nice, custom look about them. But you know what? They are extremely easy to make! All you need is some wired ribbon, a 6-inch length of craft wire, and a pair of scissors.

I sat down in my really messy craft room to put together a video tutorial for those of you who would like to learn how I tie bows, like the one that’s on my living room wreath. This technique is really one of those things that is just much easier to learn through seeing a short video versus looking at pictures and text.
Was that easy or what? Gosh, I love nothing more than making something so simple and getting such great results.
I’m considering making bows for the gifts under our Christmas tree this year, but then I remember that they will just get torn off and tossed aside the mad rush to open gifts. What would you attach these bows to?
I was just about to plunk $12 on a Bowdabra at Wal-Mart. Thanks for putting this tutorial up right when I needed it!
I need this tutorial! Thank you!
Those are such beautiful bows! I would absolutely use them on gift boxes. Then, after the gifts are unwrapped, place the bows on the tree until it comes down after the holidays.
I'm a new reader to your blog – so glad I found you! I'm terrible with bows, but this looks so easy. Can't wait to try it!
Oh thank you! My bows always look like they were made by seven year olds! (No offense to seven year olds. I'm just a lot older and expect more out of myself.)
Thank you, thank you, thank you! A few weeks ago I posted about a wreath that I made this year, but commented that I need help with the bow. I can't wait to get home and make the bow rock! 🙂
I can't wait to watch this video later! We have done fancy shmancy bows on our Chirstmas packages for the last 6-7 years… My sister is the youngest though, and she's 21, so it wasn't like we "wasted" the yards of ribbon when we were kids. Gosh they do look pretty though!
I tie regular bows with wired ribbon on my packages, and they still seem to be classy (I think…). Check it out here:
http://design-aholic.blogspot.com/2009/12/monogram-tags.html
🙂
-Amy
Thank you for posting this!! This is the first year that I've tried to dress up my presents with ribbon and bows and they looked nothing like that. I'm about to go redo all the ones I've done so far.
Thanks so much!
I'm going to send the link to this tutorial to my mother in law – she always has me make her bows. She'll love this!
One question: What is on your necklace? I couldn't tell because it was too far away and catching the highlights. Thanks
Just one question, girl: WHY DIDN'T YOU POST THIS BEFORE I SPENT AN HOUR TRYING TO MAKE A BOW TO TOP MY CHRISTMAS TREE ON SATURDAY! 🙂
I'm so excited, your tutorial was awesome, I'm sure that I can do it now!
Great tute! My Mother-in-law makes these bows as well, but instead of the wire she actually uses a shorter piece of ribbon (the same one she uses to make the bow) to tie around the center. She ties that smaller center ribbon in a knot (like a shoelace knot, similar to what you did but makes a bow) and then it fills out the bow even more. Does that make sense? Not that I'm saying your way is bad, just thought I'd throw something different out there.
Oh and she most definitely uses them on Christmas presents. It's her trademark and everybody oohs and awwwes over it.
Man, I could have used this video this weekend. I found a different one on you tube, but I like you better than that strange man I watched!
I just found your blog via OPT! I have been making bows sort of like this for years. I decorate our Christmas tree with them and save them in a BIG box from year to year. Our friends have come to expect a big beautiful each year on their packages!
Your tutorial is wonderful. I'm off to explore your blog now. Stop by mine anytime–I've been working on Valentine's Day collars this week–with Bows of course!
Hooray for Gator weddings (I'm a UF alum, too!)
THANK YOU
LOVELY BOW¡¡
XXOO
MARIA
Lindsay! What a timely post! I just put up a post that had me lamenting that I couldn't create a bow — it's on my to-do list. You posting a video tutorial is even better as it is much easier to follow the steps.
*sigh* I guess I'll have to go to Michaels, again.
Perfect little tutorial! I was out shopping for one of these the other day and they were crazy expensive!
I discovered your blog recently, and love it. Thanks for the tutorial on making bows. You made it look easy and I can't wait now to try it!
Nice tute! Oh, and Go Gators! 🙂
Just used this to make a fall bow. Thanks – you rock!