Makely

Let's Make Life Awesome

  • Home
  • Decorating/DIY
    • Create Your Decor
    • Decorate Your Home
    • Paint Your Walls
    • Transform Your Furniture
  • Healthy Living
    • Essential Oils
    • Family Wellness
    • Household Care
  • Project Gallery
  • Contact
You are visiting: Home » Project Gallery » Page 92

DIY Boutique Tassels

by Lindsay Ballard on March 22, 2009 2,023 Comments

I’m one of those “teach myself” people – I taught myself to sew, I taught myself how to make a faux tailored bedskirt, and I even taught myself how to be a college mascot (I was the mascot at the University of Texas while I was in school, because I thought it was something I could do…I auditioned and it turns out that I was right!).

After seeing all of the beautiful tassels hanging out around the Internet, I decided that I had to teach myself how to make them, too. I have tons of trims just taking up space in my sewing room, and I thought a tassel would be a beautiful way to use some of my stash. Last week, you told me that you wanted to learn to make them, too, so I put together a little tutorial while I was assembling one of my new friends.

**Before I get to the tutorial, I want to ask that this tutorial not be used to make tassels to sell. There are some incredibly talented women out there that are already making these lovelies for public consumption, and I do not want to be a party to the over-saturation of the tassel market. I just wouldn’t feel right about that and would lose a ton of sleep…and you don’t want to see Lindsay on little sleep. Certainly, no one has asked me to make to make such a request, but it’s just what I feel is the right thing to do. I definitely hope you understand where I’m coming from.**

Okay, ready to get started making a little beauty for yourself? Let’s do it!

It’s time to assemble the cast of characters. Most of what you need may already be found around your home.
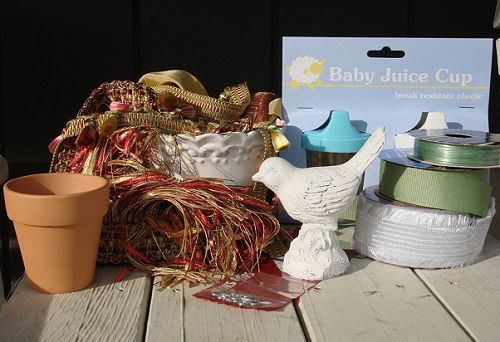
You will need:

A selection of trims and ribbons in various lengths in complementary colors
Ornament or small decorative item to use as topper
Small eyelet screw (and maybe a drill) and a width of ribbon that fits in the eyelet
Glue gun
Small cup or pot to use as a base

In trying to teach myself how to make a decorative tassel, I experimented with several types of bases. The two that worked best for me can both be found at the Dollar Tree.

I recommend using the baby juice cups. With the top removed, they are lightweight and the perfect size for the tassel. You can find the cups in the baby section, and they cost $1 for 2 cups.

I have also used the mini flower pots that can be found in the floral section. They are quite a bit heavier than the juice cups, but they are $1 for 3 pots, so you can get more bang for your buck.

You may have something around the house that could work instead of the juice cup or flower pot, but it should be roughly the same height and shape as these items.

To get started, you need to sort your trims by lengths. You can use any type of trim you have on hand from previous projects, such as tassel trims, eyelash trims, fringe, etc. If you need to go out and purchase trims, try to pick the best quality you can find (without breaking the bank!). I actually received an email this morning that Hobby Lobby’s trims will be 30% off this week, so if you have a HobLob around, this is a good time to check out the home decor trims.

You’ll want to use your longest trims on the lip of the cup. You have a few different options for applying your trims. The first option, and the one that you will most commonly use, is gluing your trim directly to the cup. For this example, I wrapped the trim around the cup twice so it would be fuller.

Or, as I ultimately decided to do for my tassel, I glued the trim upside down. My fringe, although beautiful, isn’t very fluffy, so I wanted to do something to puff it up a bit. As you can see, I glued the trim on in the opposite direction as my previous example, with my trim hanging down the cup instead of away from it. If you are using tassel trim or a fuller fringe, you won’t need to do it upside down like this.
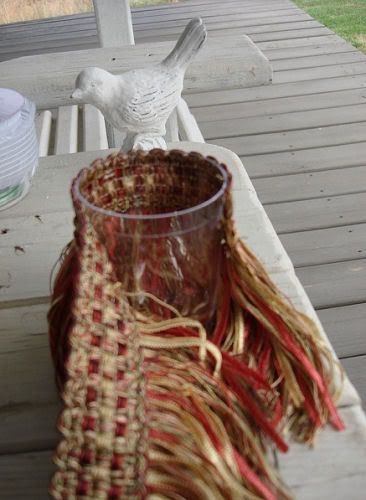
I wrapped my trim around the lip of the cup twice here, too. Then, I lost my light outside, so I had to move the tassel-making operation inside. 🙂
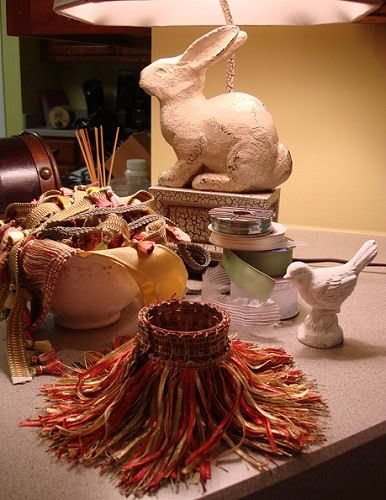
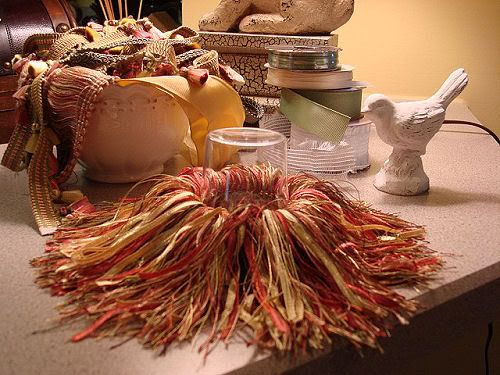
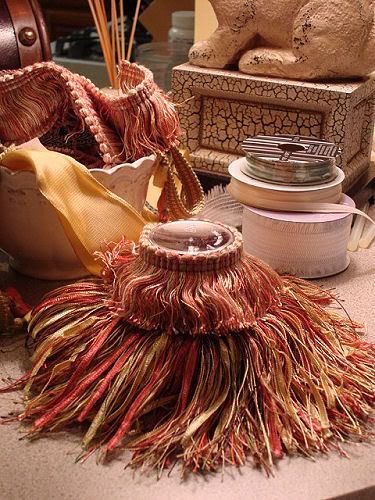
Because I glued my trim on upside down, I flipped my cup over so that the base (the flat part of the cup) is at the top. See how the fringe puffed up a bit when I flipped it over? Thank you, gravity!

This next part is when you get to be really creative. Take your different trims and hold them around the cup to see what looks good to you. If you like the way it looks, just glue it on! Here, I used a fluffy fringe.

Keep adding fringe until you get to the top of your cup. You can layer them on top of each other if you want to “build up” your trims, or you can space them out like I did. All you really need to remember is to make sure none of the cup shows through the trim.

Next, take your decorative ornament and see if you can screw your little eyelet screw into the top of it. If your piece is made from wood, you will probably be able to. If it’s made from plastic or plaster, you will probably need to drill a tiny hole in the top, which is what I had to do. My eyelet screw is 1/2″ long from end to end and a package of 10 or so of them costs under $1 at a hardware store.

Add a generous amount of glue to the bottom of your ornament, and glue it directly to the flat top of the cup. Push the two pieces together while the glue dries so that the glue bond will be nice and tight.
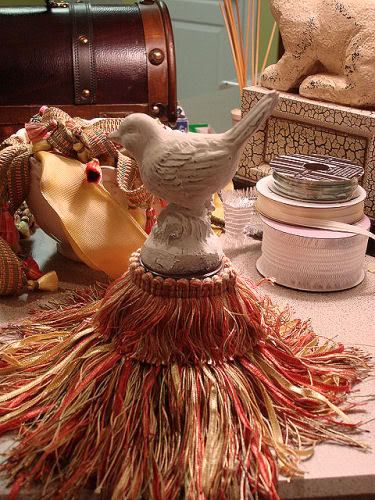
My little bird, in case you were wondering, came from a great store called Old Time Pottery and cost $1.99. We don’t have an Old Time Pottery in my city, and I’m SO JEALOUS of those of you who do! I bought a few of them to add to different vignettes around my home. I just couldn’t pass them up!

Once the ornament is in place, it’s time to add the last of your trims. I added more fringe around the base of my bird. Other types of trim that look really great here are eyelash trims or loopy trims. They really make it look like your ornament is sitting on a nest of trim.
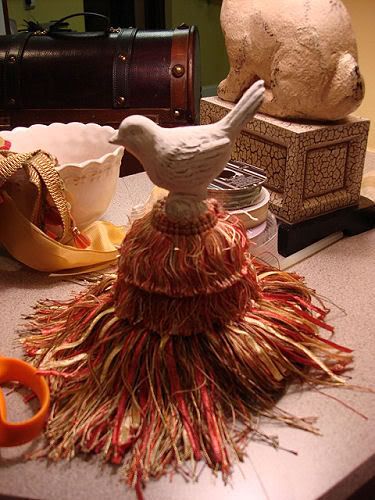
Keeping adding trims until you feel like you are finished. I added some gimp around the top of the fringe.
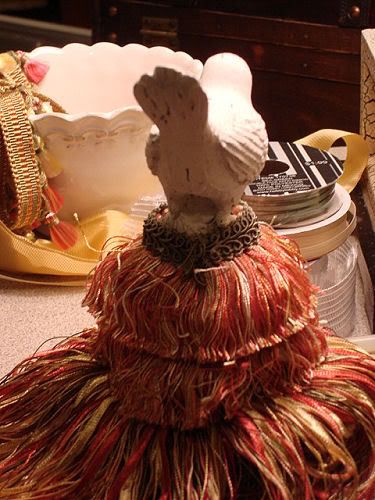
Then, I added some little tassel trim on top of the gimp.
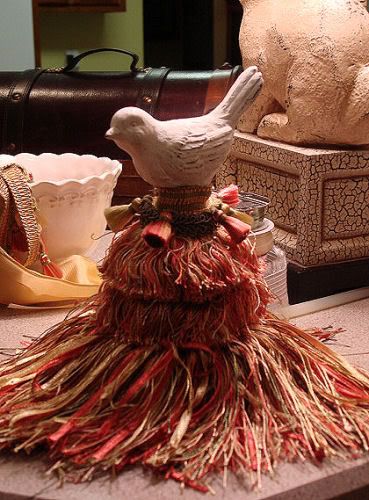
For a finishing touch, I added a little
bow to the back of my tassel.
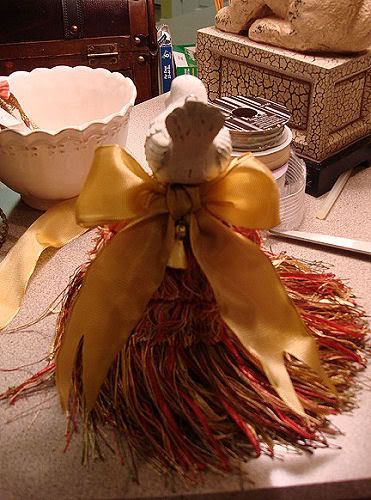
Once you are satisfied with your tassel, it’s time to add the eyelet and ribbon hanger. Screw the little eyelet into your drilled hole, slide a length of ribbon through, and tie a little knot at the top of the ribbon to make a loop.
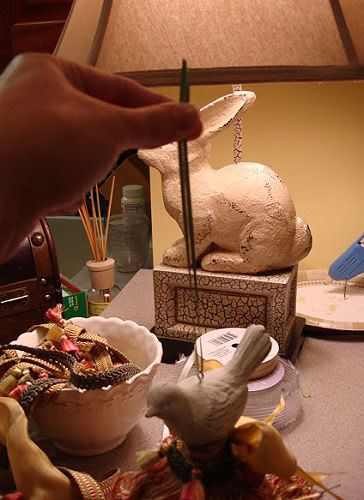
Now, it’s time to hang your tassel somewhere beautiful and admire your work!
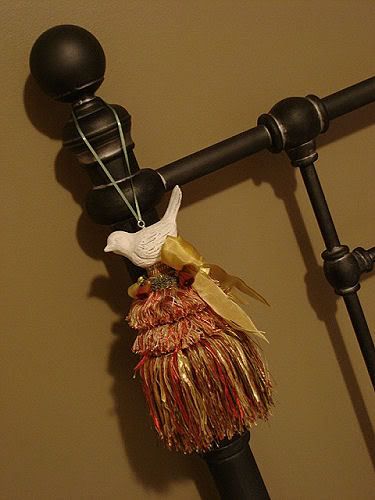
On my last post on tassels, several people commented that they didn’t quite know where to hang these type of decorations. The answer is to hang them anywhere you want! They look great on dresser knobs, headboard posts, lamps, or simply sitting in a dish. The sky’s the limit, so get creative.

The first tassel I created was one with a bunny that looks like a chocolate rabbit. I purchased him at Big Lots in the Easter section for $1.50, and he looks so cute sitting on this tassel!
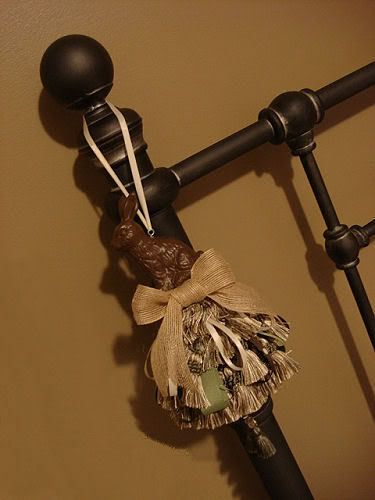
My mother loved this one so much that she told me to just go ahead and leave him at her house. 😉 He now hangs on a built-in china cabinet in her kitchen.

For the rabbit tassel, I used a mini flower pot as the base and used a lot of tassel trim and loops of ribbon. I even bought a pre-made small tassel for a few dollars at Walmart and strung it on a ribbon, which I glued to the inside bottom of the pot, creating the little dangling tassels you see. There are so many different ways you can make these tassels, so use your creativity and see what you can come up with.

I’ve enjoy making these tassels so much that I thought I’d make one more…for the Grand Prize winner of the Five Dollar Challenge!

The prize is shaping up pretty well so far, with monogrammed hand towels, a swatch organizer, and now a custom made tassel already announced. Get to work, because there’s more prizes to come!

Please let me know if you need any more tassel pointers or if there is a step that isn’t clear. Happy creating!

P.S. I’m adding this post to the Works for Me Wednesday linky carnival over at We Are That Family!

Glue and Pin Your Way to a New Window Treatment

by Lindsay Ballard on March 17, 2009 1,986 Comments

The year I went off to college, my parents left our home state of Texas and retired to the Florida Keys. They were too young to be officially retired, but thought of their new relaxing life as retirement nonetheless. Then life changed, as life tends to do, and they decided to move to Tennessee to be closer to my mother’s aging parents.

Going ‘home’ for me as an adult isn’t really going ‘home.’ My parents live in a gorgeous house, but it is in a teeny little town with little more than a McDonald’s and a Walmart. Their little Tennessee town seems like it’s on a different planet than my hometown of Austin, Texas. Things here are just so…strange.

I never feel comfortable out and about in their town, but I feel more comfortable than ever inside their home. Although the furnishings (other than the antique grandfather clock and armoire I lust after) are totally different than the ones I grew up with, they are warm and welcoming, just like Mom and Dad.

Every time I walk into their home, I am drawn to the custom window treatments that cover the breakfast room windows. They are simple, yet classy and unique.

Photobucket

Sorry for the lousy photos throughout this post. I used a point and shoot camera for these instead of my normal DSLR.

Photobucket

Photobucket

I check the window treatments out during each visit, trying to figure out how best to replicate them in my own home. During this trip, I finally figured out that all I needed was a glue gun and a safety pin. Seriously, it’s that easy folks. Let me show you how!

SUPPLIES:
Home Dec width (54″) fabric – you’ll need 2 1/2 times your window width
Scissors
Iron
Glue gun or fabric glue
Safety Pin

Cut a 7″ width strip off the length of the short edge of your fabric and set that aside. You’ll be using that piece in a bit.

With your large piece of fabric, fold in half so that the raw edges with the printed fabric information (not the edges cut at the fabric store) are together at the top. This is likely how your fabric came off the bolt, so just make sure that the upper edges are even. Press the fold so that it creates a nice straight line.

Next, open your fabric and press in every side by 1/2″. You’ll do this on the top and the sides.

Photobucket

Fold your fabric back in half lengthwise at the first crease mark you made. All of your raw edges should be folded inside the piece of fabric.

Using your glue gun or fabric glue, seam the short sides of the fabric together. This will essentially create a long rectangle with an open top.

Photobucket

Here’s where you have a decision to make. You can make the fabric tabs like the ones in the curtains above or you can use drapery rings to hang the curtain from the rod. If you want to use drapery rings, you can skip down to where I put a *** in the post. If you want to use the tabs, continue with the directions as written.

Grab the 7″ wide strip you set aside earlier, and cut three 8″ long pieces out of it. You should end up with three small pieces that are 7″ wide and 8″ long.

Go back to your ironing board and turn in the long edges 1/2″ on each of the small pieces. Then fold the long edges together so that the width of each piece is 2 1/2.” The sides of each piece will slightly overlap on the back. You just need to play around with it a bit to get it to work.

Photobucket

Then, fold each small piece in half so the raw edges meet and press a crease. You’ll end up with three small pieces measuring about 2 1/2″ wide and 4″ long (when folded in half).

Go back to your large piece of fabric and find the center of the open side. With about 2 1/2″ of a short piece above the open side, glue the short piece in place.

Photobucket

Glue the other two short pieces in the same way, but space them so that these two tabs will hang on the outer edge of the curtain. Use your measuring tape or ruler. I just eye-balled the spacing for this tutorial, and you’ll notice later that I didn’t space them far enough apart.

(***Welcome back, drapery ring users!) Close the top seam with your glue gun or fabric glue.

Photobucket

Your curtain is now ready to hang! You can hang it as is and I think it looks perfectly delightful. Fuss with the folds a bit, fluff them out, and you are good to go.

Photobucket

Or, you can take it one step further, which you is what I would do. 😉 Visually divide your curtain into three horizontal sections. Pinch the top of the bottom third and bring it up to the top of the middle third.

Photobucket

Use your safety pin on the backside of the fabric to pin the little pinch into place. You could be totally fancy schmancy and use a needle and thread to tack it in place, but why would you go through that effort when you could just use a safety pin? Yep, that’s how I roll.

Photobucket

My mother always told me that 95% of window
treatments is the fluffing, and she is absolutely right about that. Pull and tuck and fold and fluff until you get them exactly how you want them.

I think mine turned out really great – especially for $3/yard fabric, a glue gun, and a safety pin. Dare I say they look better than the ones that were custom made?

Photobucket

Hanging next to my mother’s window treatment.

Photobucket

With using nothing but a glue gun and a safety pen, I think the Nester would be proud.

Does this window treatment work for you? It sure works for me! Visit Works for Me Wednesday over at We Are That Family to see more WFMW fun.

« Previous Page
Next Page »
  • Email
  • Facebook
  • Instagram
  • Pinterest
  • Twitter

About Makely

Lindsay Ballard is a former college mascot turned political geek turned roller derby playing, DIY fanatic.

Lindsay chronicles her projects, design ideas, and lifestyle tips here at Makely, where she shares tutorials and inspiration. Her DIY designs are bold and graphic, while her spirit is fun and full of color.


Archives

Categories

PRIVACY POLICY
Copyright © 2009-2019 Makely School for Girls | All Rights Reserved | Posts may contain advertising content or affiliate links