I wanted to create a year-round decorating solution for my dining room table. I’ve mentioned that I tend to change my centerpiece with the seasons and holidays, but I needed something else on it to give it more texture and visual interest.
I will be the first to admit that I’m not a big fan of burlap. I think it’s itchy and sheady, but I also have weird issues with some textures (For instance, velvet and upholstery foam send shivers down my spine. Yep, I’m odd.), so don’t listen to me in that regard. However, I decided that a table runner made from burlap would satisfy my need for more texture on my table, my need to have something that would work year-round, and my need for something cheap. And since I don’t really have to touch it all that often, that works for me, too.

The runner was so cheap and easy to put together, that I want to teach you how to make one, too. You’ll love having this on your table.
For this tutorial, there are three different versions I’m going to show you:
- Sew version – using a sewing machine (what I did);
- Semi-sew version – using stitch witchery or no-sew hemming;
- No-sew version – just cut and go. I will add the special no-sew instructions in italics.
Begin by measuring the length of your table. Mine is 79″ long.
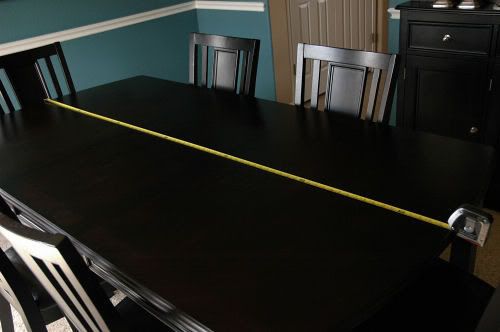
Next, you will need to figure out the dimensions of your runner. I generally like my runner to overhang the length of the table by 6-8″ on each side. I personally think that runners that only overhang a few inches or don’t overhang at all look a little anorexic, but that’s just me. Runners are also generally 14-18″ in width, but again, choose what works for your table.
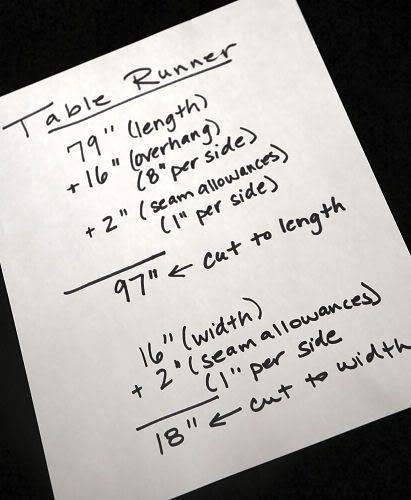
Because I’m one of those people who likes to see everything in writing, I wrote out my dimensions to use for cutting the burlap. If you are going to create the sew or semi-sew version of the runner, be sure to add in the 2″seam allowances as I did. If you are going to create the no-sew version, leave the 2″ seam allowances out of your calculations.
Are you following me?
If you don’t already have a stash of burlap on hand, head to a fabric store and pick some up. It’s generally less than $3/yard. For my runner, I needed about 2 1/4 yards. Burlap comes in an array of colors – white, black, natural, red, orange – so choose what works best for your decor.
Once you are home with your burlap, throw it in the washer and dryer if you are doing the sew or semi-sew version. If you are doing the no-sew version, do not wash it now. We’ll do that in a bit.
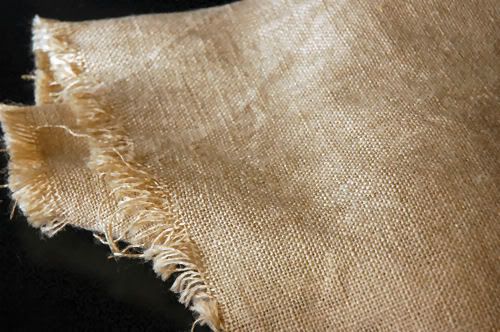
Now we’re ready to cut. Spread out your burlap on the floor and use a yard stick or tape measure to mark of your dimensions you calculated earlier. Follow the weave of the burlap to cut your lines as straight as possible. If you have already washed your burlap, go ahead and cut off the frayed selvage edges before you cut out your runner.
For the no-sew variety, now all you have to do is fray your edges! Throw your cut piece into the washer and dryer to soften the fabric and fray the edges. When it’s dry, or almost dry, iron the piece on a high setting and place on your table. Congrats! You’re finished!
For the sew and semi-sew varieties, fold under each edge 1/2″ and press. Repeat by folding under each edge 1/2″ again and press. I generally like to do the double folds on the long sides first and then the short sides so that I end up with nice square corners.
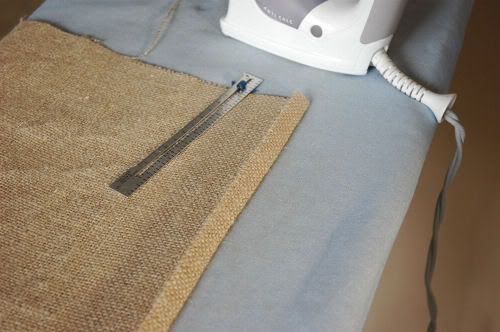
Now you can either add a strip of stitch witchery underneath the folds and iron it according to the directions on the package or you can run it through the sewing machine, as I did mine. Regardless of your method for seaming the edges, your are now ready to enjoy your simple new table runner!
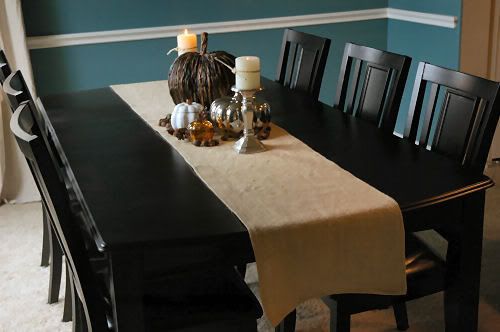
There are so many different ways to embellish the burlap if you would like to. I will probably end up stenciling B’s on the hanging parts of the table runner (of course) once I get tired of the way it looks now. Check out Tiffany’s easy burlap stenciling technique at la*T*da. Love it!
Do you see a $7 burlap table runner in your future?

Great post….love the simplicity of the burlap table runner. Had to laugh when I read you Header…One glue gun burn at a time. At present I don't have any burns but last week after crafting….I had a few.
PS: Love the color of your room….I'm looking for a new wall color. Do you remember what it is? 🙂
Fabulous tutorial! I love the texture the runner adds to the table and it really could be a year-round accent. I am off to buy burlap!
Chelsea
You make it look so easy. I like it!
i LOVE burlap, in general! great as a table runner, and durable. and for $7!
kelly
http://tearinguphouses.blogspot.com
Great idea – I'm weird with textures like you are too – My husband calls me a freak, but I call myself unique! ha!
I did one this summer, but I added ribbon and a stencil:
http://serenitynow4amanda.blogspot.com/2009/08/diy-how-to-make-embellished-burlap.html
Was surprised at how easy it was!!
Burlap is my new best friend! Great idea!
I love it. This was actually a project on my list to do. I was inspired by the pottery barn version, that is very similar only they use a type of wool instead. Great job!
I love it. I have a ton of burlap in my sewing basket just waiting to be loved this much. I'm curious did you make that mirror thing on your wall, or did you buy that somewhere…?
Love it all… such great ideas… I will be back for sure! ~ kim
i love that table. where did you get it?
Hold the phone. You can wash and dry burlap? Why didn't I know this sooner???!? I made a 90" round burlap tablecloth without washing it first, wishing I could wash it but thinking I couldn't. Maaaaaaaaan! I'm going to go stick what burlap I have left in my washing machine and see what happens.
I just washed my burlap and I have burlap fluff and fiber all over the place! It is currently outside on the clothesline. I hope I don’t regret this…
ME TOO!!!! Now I’m washing the washing machine and the dryer!!!!
Your table runner looks fabulous, by the way. 🙂
Lovely. I have a black table, as well. I've been wanting to make a runner for it…maybe I'll grab some burlap!
I absolutely cannot have velvet in my house. Just knowing it is there wigs me right out. And the only thing worse than upholstery foam is that green floral foam. Once I worked in a craft store and had to unpack dozen of crates of it. I told them I would have to quit if they didn't let me swap jobs with someone! Luckily, burlap is okay so I do, in fact, see one of these in my future. Thanks Lindsay!
I've never really used burlap but every time I see one of you fabulous ladies in blogland use it I am amazed at how beautiful it looks!!
Janell
I love it! I need to find some burlap now… Can we see a close up picture of the centerpiece? I like it and want to totally copy it, my poor dining room table is always bare, or has some random lonley thing sitting in the middle of it, totally too small for the big table but I don't know what to do about it.
YES! I definitely see it in my future. I think the frayed edges will look awesome this time of year on my table. Thanks for the tutorial!
I agree…velvet=yikes!
I've been meaning to make one of these and seeing yours almost made me jump in the car to go buy some burlap. *almost* It's raining and my youngest is napping. So maybe later, since I've got dinner cooking in the crock pot my evening is freeeee! YAY! – oh not to mention a hobby lobby 40% off coupon!
Love it. The perfect texture for Autumn.
I have the SAME issues with velvet and the upholstery stuff! All these years I've thought I was the only one, nice to know now that I'm not alone 🙂
I definitely think the burlap runner has a future on my kitchen table…I love the texture and I think it would be perfect with a stenciled monogram on both ends…thanks!!
Jane
The look you have here with the burlap runner is awesome…I have several yards of the natural…just got back from the fabric store with some red…neeed some orange for a college tailgate on Saturday…but I have not had any luck just yet. Looove your blog!
Blessings,
Linda
I actually have several yards of burlap in our office ready for projects. This may be just the inspiration I needed.
I had already planned on doing burlap runners on long, banquet styles tables for my wedding. This tutorial is AWESOME and I'm SOOO using it! Thanks so much!!
Very cool. I ran to my fabric store, but the only bulap available is really gross and smelly, and the weave is completely different. SO I bought some painters drop cloths at the paint store instead!!The thing you have to do in a small town!
Thanks for the idea- and I'm copying your centerpiece, also!
i love your table. may i ask what brand/where you purchased it from? thank you
Hi Lindsay,
What a wonderful blog you have here! I just discovered you and I can see already that I will be back often for inspiration.
Your table runner is really pretty in
burlap with the black table. ~Gorgeous job!
I hope you come by and visit me as well. You're always welcome anytime.
Many Blessings and Happy Fall!
~Melissa 🙂
I don't have any fabric phobias, thank goodness. I haven't tried any burlap projects, though (gasp!). Thanks for the inspiration!
Love the burlap runner ! Have you seen the subtle color variations burlap now comes in? I saw some in a soft cream at the local Joanns and loved it! Must copy this project.
So brilliant, and so Ballard ! But without the cost. Thanks for the inspiration.
I just found your site for the first time and LOVE it! I'll be back and browsing your archives! Thanks for sharing!
This is great! And I love the measurements! Thanks so much for this, I'll be linking.
Great project! Love your elegant dining room tablescape too.
Ok Lindsay, I made one! My first, of many projects I'll be making that you inspired me on. HINT: With my extra fabric from this project, I'm going to cover some picture frame mats. 🙂
Check it out here:
http://design-aholic.blogspot.com/2009/11/sewing-with-tube-table-runner.html
I know a few others have asked…but I'm still dying to know. I love your table! What brand is it and where did you get it?
I love this idea! Mine turned out pretty good…Please Check it out…
http://spottedsmiles.blogspot.com/2010/02/easy-adorable-and-affordable-table.html
Hey Lindsay, just found your blog and love it! I was looking for burlap table runner ideas and voila- you popped up in the results! Can’t wait to make one of these for my newly refinished table. Thanks!!!
Its crazy! I just started following your blog this week (I am new to all of this blogging stuff) and last night I was on the dashboard looking around…I clicked to read your post and at the same time remembered that I wanted to see if I could find a tutorial on making a burlap table runner (I had been looking in my Southern Living At Home catalog). I opened up a new tab on windows and typed in how to make a burlap table runner…your post was the first to come up! Anyway…loved the idea and I am making my shopping list now! Love you blog and all of your great ideas! I have also already done the moss orbs…that’s how I found your blog!
Love it and love burlap. Can’t wait to try out your no sew method.
Hi! I’m planning to start making burlap runners this weekend for my wedding. Can I ask how crucial it is to wash the fabric beforehand? Does that help with the shedding or something? Just wondering because I have like 60 yards of fabric (haha I think I may have over estimated just a tad) and I’m not sure I want to take the time to measure, cut and wash before sewing. Would love to know what you suggest!
I think you can get by without washing it – unless it smells bad. Sometimes, burlap is really stinky!
Congrats!!!
You’re right, the burlap doesn’t smell so great. But unfortunately my test wash of one yard of fabric resulted in a crumpled and frayed mess. So I think my new plan is to make the runners with the fabric unwashed and then maybe throw them in the dryer for a bit with some scented fabric softener. Fingers crossed that does the trick! Thanks so much for your response 🙂
Hi! I just found your blog and am seeing we have a few ideas in common. Glad to find you.
~Judy~
i just bought 4 yards of burlap at Hancock Fabric. The lady gave me a weird look when she asked what i was making with it and i replied throw pillows. Then i got home and realized that the burlap i got smells terribly. I see that you washed yours first. Can i wash it??? i see some say that their fabric was ruined and some say it makes a mess. what is your take on this??
Thanks,
Meagan
I’ve washed burlap on more than one occasion and have never had any problems at all. I don’t even bother washing mine on delicate, although you might want to if you are nervous about it.
Hi there!
Do you have any recommendations for sources for burlap, either recycled or new? I am hoping to make these runners with a lace overlay for a friend’s wedding and might need about 20!
Cheers,
Jessica
Hi Jessica – I usually just buy mine at JoAnn or Hobby Lobby. I’m sure you could find it for cheaper somewhere online, though, but I don’t have a good source.
Hi! Thanks for this wonderful tutorial! I am thinking about making these for my restaurant and am curious how bumpy the seams are? Do glasses get tipy? Random question! Thanks again for sharing!
I’d think you wouldn’t want to put a glass on top of the seam, because the edges are a little bulky.
What is your wall color? I love it! Thought I had seen it in another post, but now I can’t find it.
Thanks!
I would like to make some home dec items with burlap. My question is …. are there different qualities of burlap? The reason I ask is that some of the pictures I see…looks like there is a tighter weave on them. If so what do you recommend?
Hi Jan!
I’ve noticed that myself. I’m not sure if there are different qualities or if different fabric mills weave them tighter than others. I generally buy mine at JoAnn or Hobby Lobby, and I’ve been happy with the weave.