Makely

Let's Make Life Awesome

  • Home
  • Decorating/DIY
    • Create Your Decor
    • Decorate Your Home
    • Paint Your Walls
    • Transform Your Furniture
  • Healthy Living
    • Essential Oils
    • Family Wellness
    • Household Care
  • Project Gallery
  • Contact
You are visiting: Home » Silhouette » Page 6

Hi. I’m a New Rug.

by Lindsay Ballard on February 2, 2012 1,913 Comments

Over the last few weeks, I’ve been working on updating the powder bath in the entryway of our home.  It’s always been unremarkably boring, but since it’s the bathroom that a) you see when you walk into the house and b) our visitors always use, it was overdue for a little revamp.

I have a few more things to finish before I can reveal the entire room to you, but I must say that it is pure bold, vintage quirk.   Oooooh, that sounds like a perfect eclectic style mix, doesn’t it?  However, I do want to show you a fun little piece that can be completed in under 15 minutes.
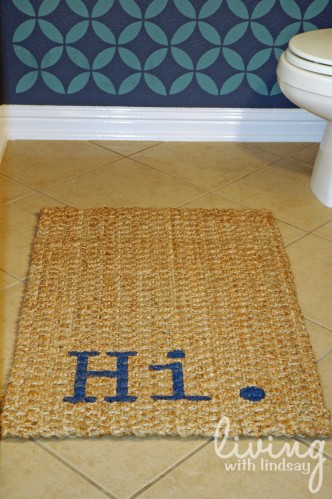
Well, hello to you, too!

The floor needed a small, textured rug, but necessity didn’t mean that it had to be plain and boring.  The simplest process ever yields a “talking” rug.  Besides, who wouldn’t want a little greeting when they walk into a room?

How to Paint a Talking Rug

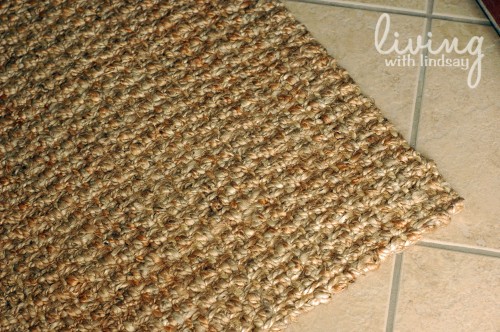
1.  Find a natural fibered rug, such as jute or sisal.  The rug I used is a 2 x 3 jute rug that I picked up at Cost Plus/World Market for $16.99.  As a side note, they have really great natural rugs for reasonable prices, so make sure you check them out when you are in the rug market.
2.  Cut your word out of vinyl and position it on your rug.  I used my Silhouette SD to cut out the word, but you absolutely do not need to have a craft cutter to do this.  You could trace your word onto a piece of sticky vinyl shelf paper (i.e. Contact paper) and cut out the stencil by hand.  The font I used can be downloaded here for free.
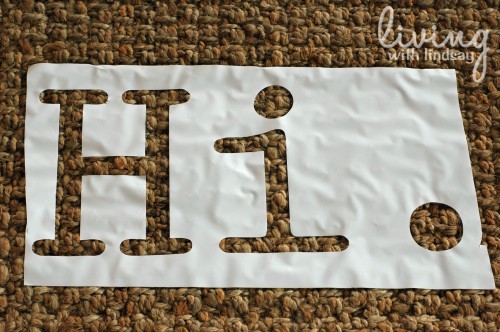
3.  Dab your paint onto the rug with a cheap chip brush, using a up and down motion.  The vinyl won’t stick incredibly well to the rug, so I wouldn’t brush the paint on to ensure that your brush won’t slip under the vinyl.  Any craft paint would likely do, but I am using Martha Stewart craft paint because it is really thick and creamy.  The color I chose is Wild Blueberry, which looks like a dark navy under the light in my room (remember that your lighting will effect your color choice!).
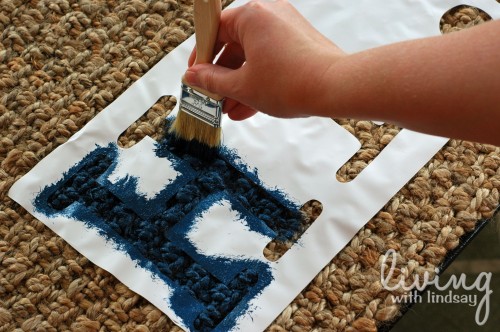
4.  Keep dabbing until your stencil is completely filled in and only solid color shows through.  For reference, it took me under 5 minutes to fill in my word.
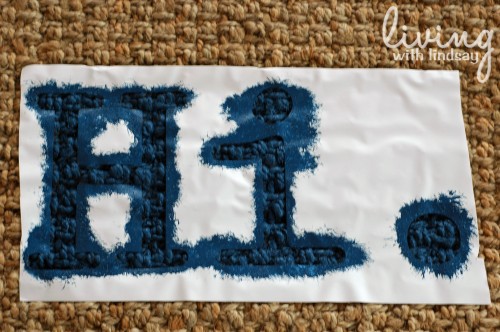
5.  Carefully remove the vinyl and put your rug in a place where it can dry.  If you are in a hurry, you can use a hairdryer and it will dry more quickly.

I love my little “statement” piece and the fun that it brings my tiny bathroom.  If the paint comes off after a lot of wear, I could easily touch up the paint.  Or, for only $16.99, maybe I’ll buy a new rug and give it a new voice.
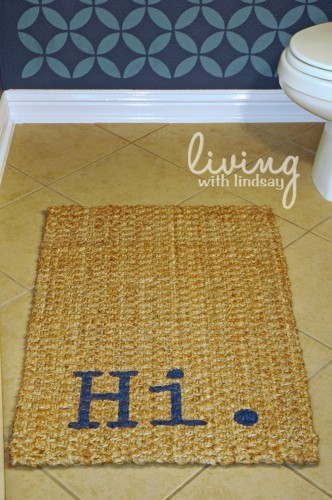
What say you?  Could you use a little unexpected greeting somewhere in your home?
 

Create Your Own Temporary Tattoos and a Silhouette Print and Cut Tutorial

by Lindsay Ballard on June 21, 2011 1,540 Comments

When I found out at that the folks at Silhouette America were going to send me some of their printable tattoo paper to have some fun with in my Silhouette SD craft cutter, I knew I wanted to do a really cool project.  Sure, it can be used to make removable tattoos for the kiddos (adorable examples here), but I wanted an outside of the box idea.

It ended up being an outside of the door idea.

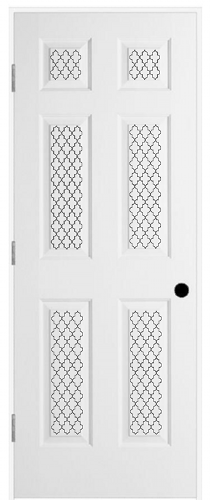
Add temporary tattoos to interior doors for an updated look.

Using a temporary tattoo that we had in the house, I discovered that you can apply removable tattoos to interior doors and remove them easily with rubbing alcohol and a cotton ball (test it on your door to make sure it works on your paint, of course).  Cool, huh?  This opens up a whole new world of possibilities, especially since you can use the Silhouette Tattoo Paper to create your own temporary tattoo designs.  You are no longer confined by one color vinyl designs on your doors.  With the tattoo paper, you can print your deigns in any color imaginable.  You don’t even need to have a Silhouette SD craft cutter to use the paper.  Simply print it in your own home printer and cut out your design by hand with scissors.

I found the geometric design above in the Silhouette downloadable library, where all designs are just 99-cents each.  I measured my kitchen pantry doors, and created a temporary tattoo that fit into the inset panels perfectly.  My printer at home was not printing well (and then not printing at all once I tried to fix it), so I took my tattoo paper to Office Depot, where the copy gal said it would be no problem to print on them.

And then, in a chain of events that could only happen to me, the huge copy machines at Office Depot ate three of my four pages of printable tattoo paper.  I wanted to complete this project so badly, that I frantically searched for a friend who had a color ink jet or laser printer to use.  When I finally found one, I realized that I had lost the fourth piece of tattoo paper somewhere in my madness.  That fourth sheet must be living with the box of raisins, running sock, and credit card that have all disappeared into thin air.  This poor little project was never meant to be.

So, instead of showing you a finished project, I’m going to share my tutorial for using the Print and Cut feature on the Silhouette SD.  Did you know you could take practically any image from the internet and use the Print and Cut feature to make all sorts of projects, including custom temporary tattoos.  As my 5-year old son would say, “True story!”

And, if you are itching to get your hands on some of the awesome Printable Tattoo Paper, a Silhouette SD package, or any of the Silhouette supplies, scroll to the bottom of this post for a great discount code especially for my readers!

Silhouette SD Print and Cut Tutorial

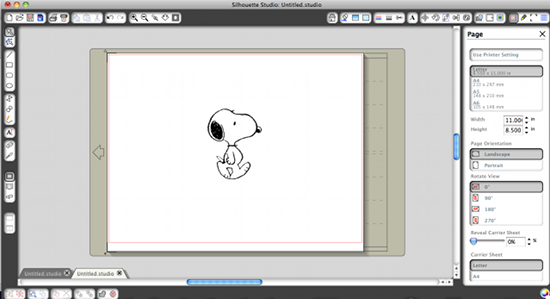
1.  Locate an image on the internet that you would like to use and save it on your computer -or- simply find a pre-loaded design in your Silhouette Studio software or online library.  For this example, I’m using this iconic image of Snoopy that my friend sent me to make cupcake toppers for her son’s third birthday.

2. Using the Silhouette Studio software that comes with your Silhouette SD, open your image as a new Studio document.

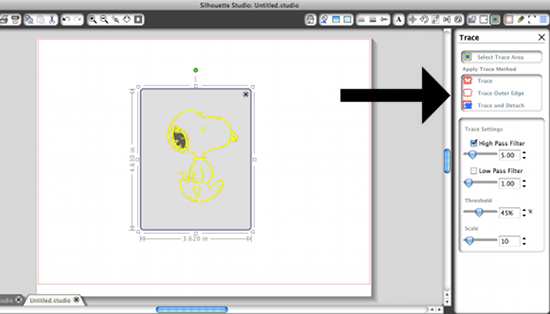
3. Re-size the image to the size you would like it to be with the Scale feature in the Silhouette Studio toolbar.  Then, go into the Trace menu (it’s a blue and yellow square on the top of the toolbar).  Click “Select Trace Area” and use your cursor to draw a square/rectangle around your image.

4.  You will notice that most of the lines on your image turn yellow.  Click “Trace Outer Edge” in the Trace menu.

5.  A thin red line will appear around just the outside of your image.  I usually move my image a bit to make sure the red line (the cut line) appears correctly.  Hit “Undo” in the Edit Menu once you are finished checking to move the image back so that it’s perfectly inside the red line.

6.  Select the image by clicking on it and then hit CTRL+click to select the red cut line.  Gray boxes should appear around both items.  Head to the bottom of the page and click the “Group Selected Items” box (the left most button).

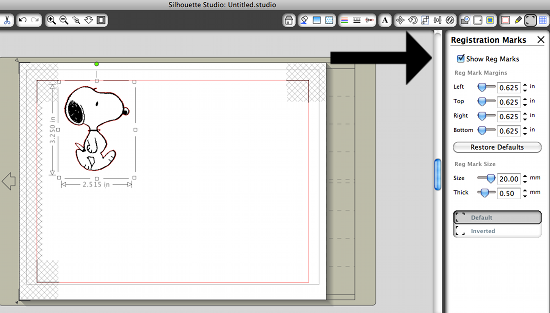
7.  Once your two items are grouped, you will need to add the Registration Marks to the page by clicking the Registration Marks toolbar button (it looks like three L’s) and then click the “Show Registration Marks” box.  Your Silhouette SD will “read” these marks to know where it’s supposed to cut.  Move the image to where you would like it to be on the page, making sure it lies within the gray Xs created by the Registration Marks setting.

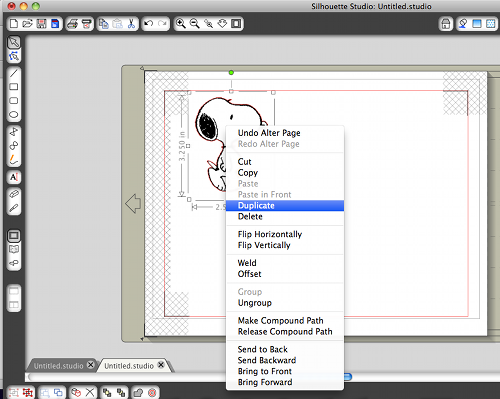
8.  If you want to create more than one of the same item, right click on the image and select Duplicate.

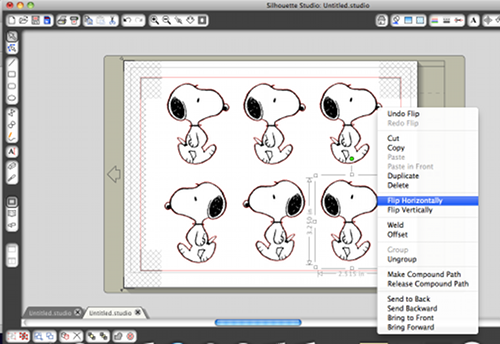
9.  On this page, I wanted three Snoopys facing the left and three facing the right.  I duplicated my original image five times, and moved each image to a location on the page within the Registration Marks.   I then right-clicked on the three images I wanted to reverse and chose “Flip Vertically” in the pop-up menu.  If you are printing on the temporary tattoo paper, you will want to flip all of your images vertically so that they will look normal once the tattoo is applied.

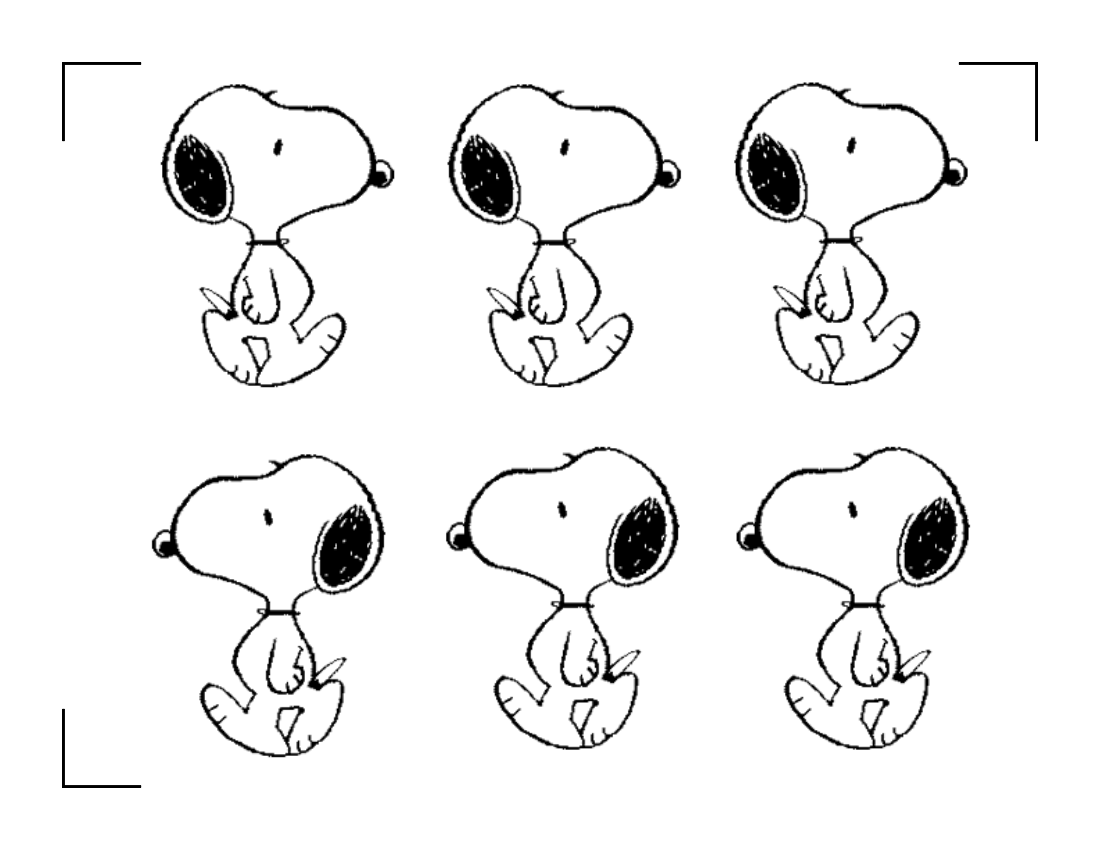
10.  Now, you are ready to print!  Select the “Send to Silhouette” icon in the Silhouette Studio toolbar, and it will ask you if you would like to send the document to the printer.  Yes, you would love to.  Once it prints, you’ll have something like this:

Snoopy Images with Registration Marks for Silhouette SD Print and Cut Feature11.  Continue following the prompts in your Silhouette Studio software to feed this printed page through the Silhouette SD machine as you would with any other project.  We ultimately hot glued the cutouts to candy sticks to create the Snoopy cupcake toppers for the birthday party.  They were a huge hit with partygoers – children and adults alike!

Isn’t that a fun and easy way to create little cutouts?  It’s so much easier than doing it all by hand.  This little Silhouette SD machine is worth MORE than it’s weight in gold (it’s really lightweight!).

Now, it’s your turn!  Silhouette America is running a special deal for readers of this blog from June 21-June 29.  Click here and use the code LINDSAY at checkout to receive:

  • a Silhouette SD craft cutter and two packages of printable temporary tattoo paper for $199 (you save $120!), and/or
  • 25% off ALL products in the Silhouette shop (excluding gift cards and download codes).

Woo hoo!  What do you want to Print and Cut?  Or, do you have questions about the Silhouette SD and the related products?  Let me know in the comments.

« Previous Page
Next Page »
  • Email
  • Facebook
  • Instagram
  • Pinterest
  • Twitter

About Makely

Lindsay Ballard is a former college mascot turned political geek turned roller derby playing, DIY fanatic.

Lindsay chronicles her projects, design ideas, and lifestyle tips here at Makely, where she shares tutorials and inspiration. Her DIY designs are bold and graphic, while her spirit is fun and full of color.


Archives

Categories

PRIVACY POLICY
Copyright © 2009-2019 Makely School for Girls | All Rights Reserved | Posts may contain advertising content or affiliate links